
Manual Provisioning for F1
Slightly trickier, greater flexibility! These steps allow you to provision your F1 Starter Kit according to your preferences.
Prerequisites
Make sure that you have set up the following software beforehand:
CP210x USB to UART Bridge Virtual COM Port driver – link (only required for Windows and Mac users)
Microsoft Visual Studio Code with CtrlR plugin – link
Last but not least, sign in to Ctrl here – create an account or log in, if you already have one.
Provisioning Steps
Part 1 – Configure your network profile
Once configured, you can apply these profiles to multiple devices in your project.
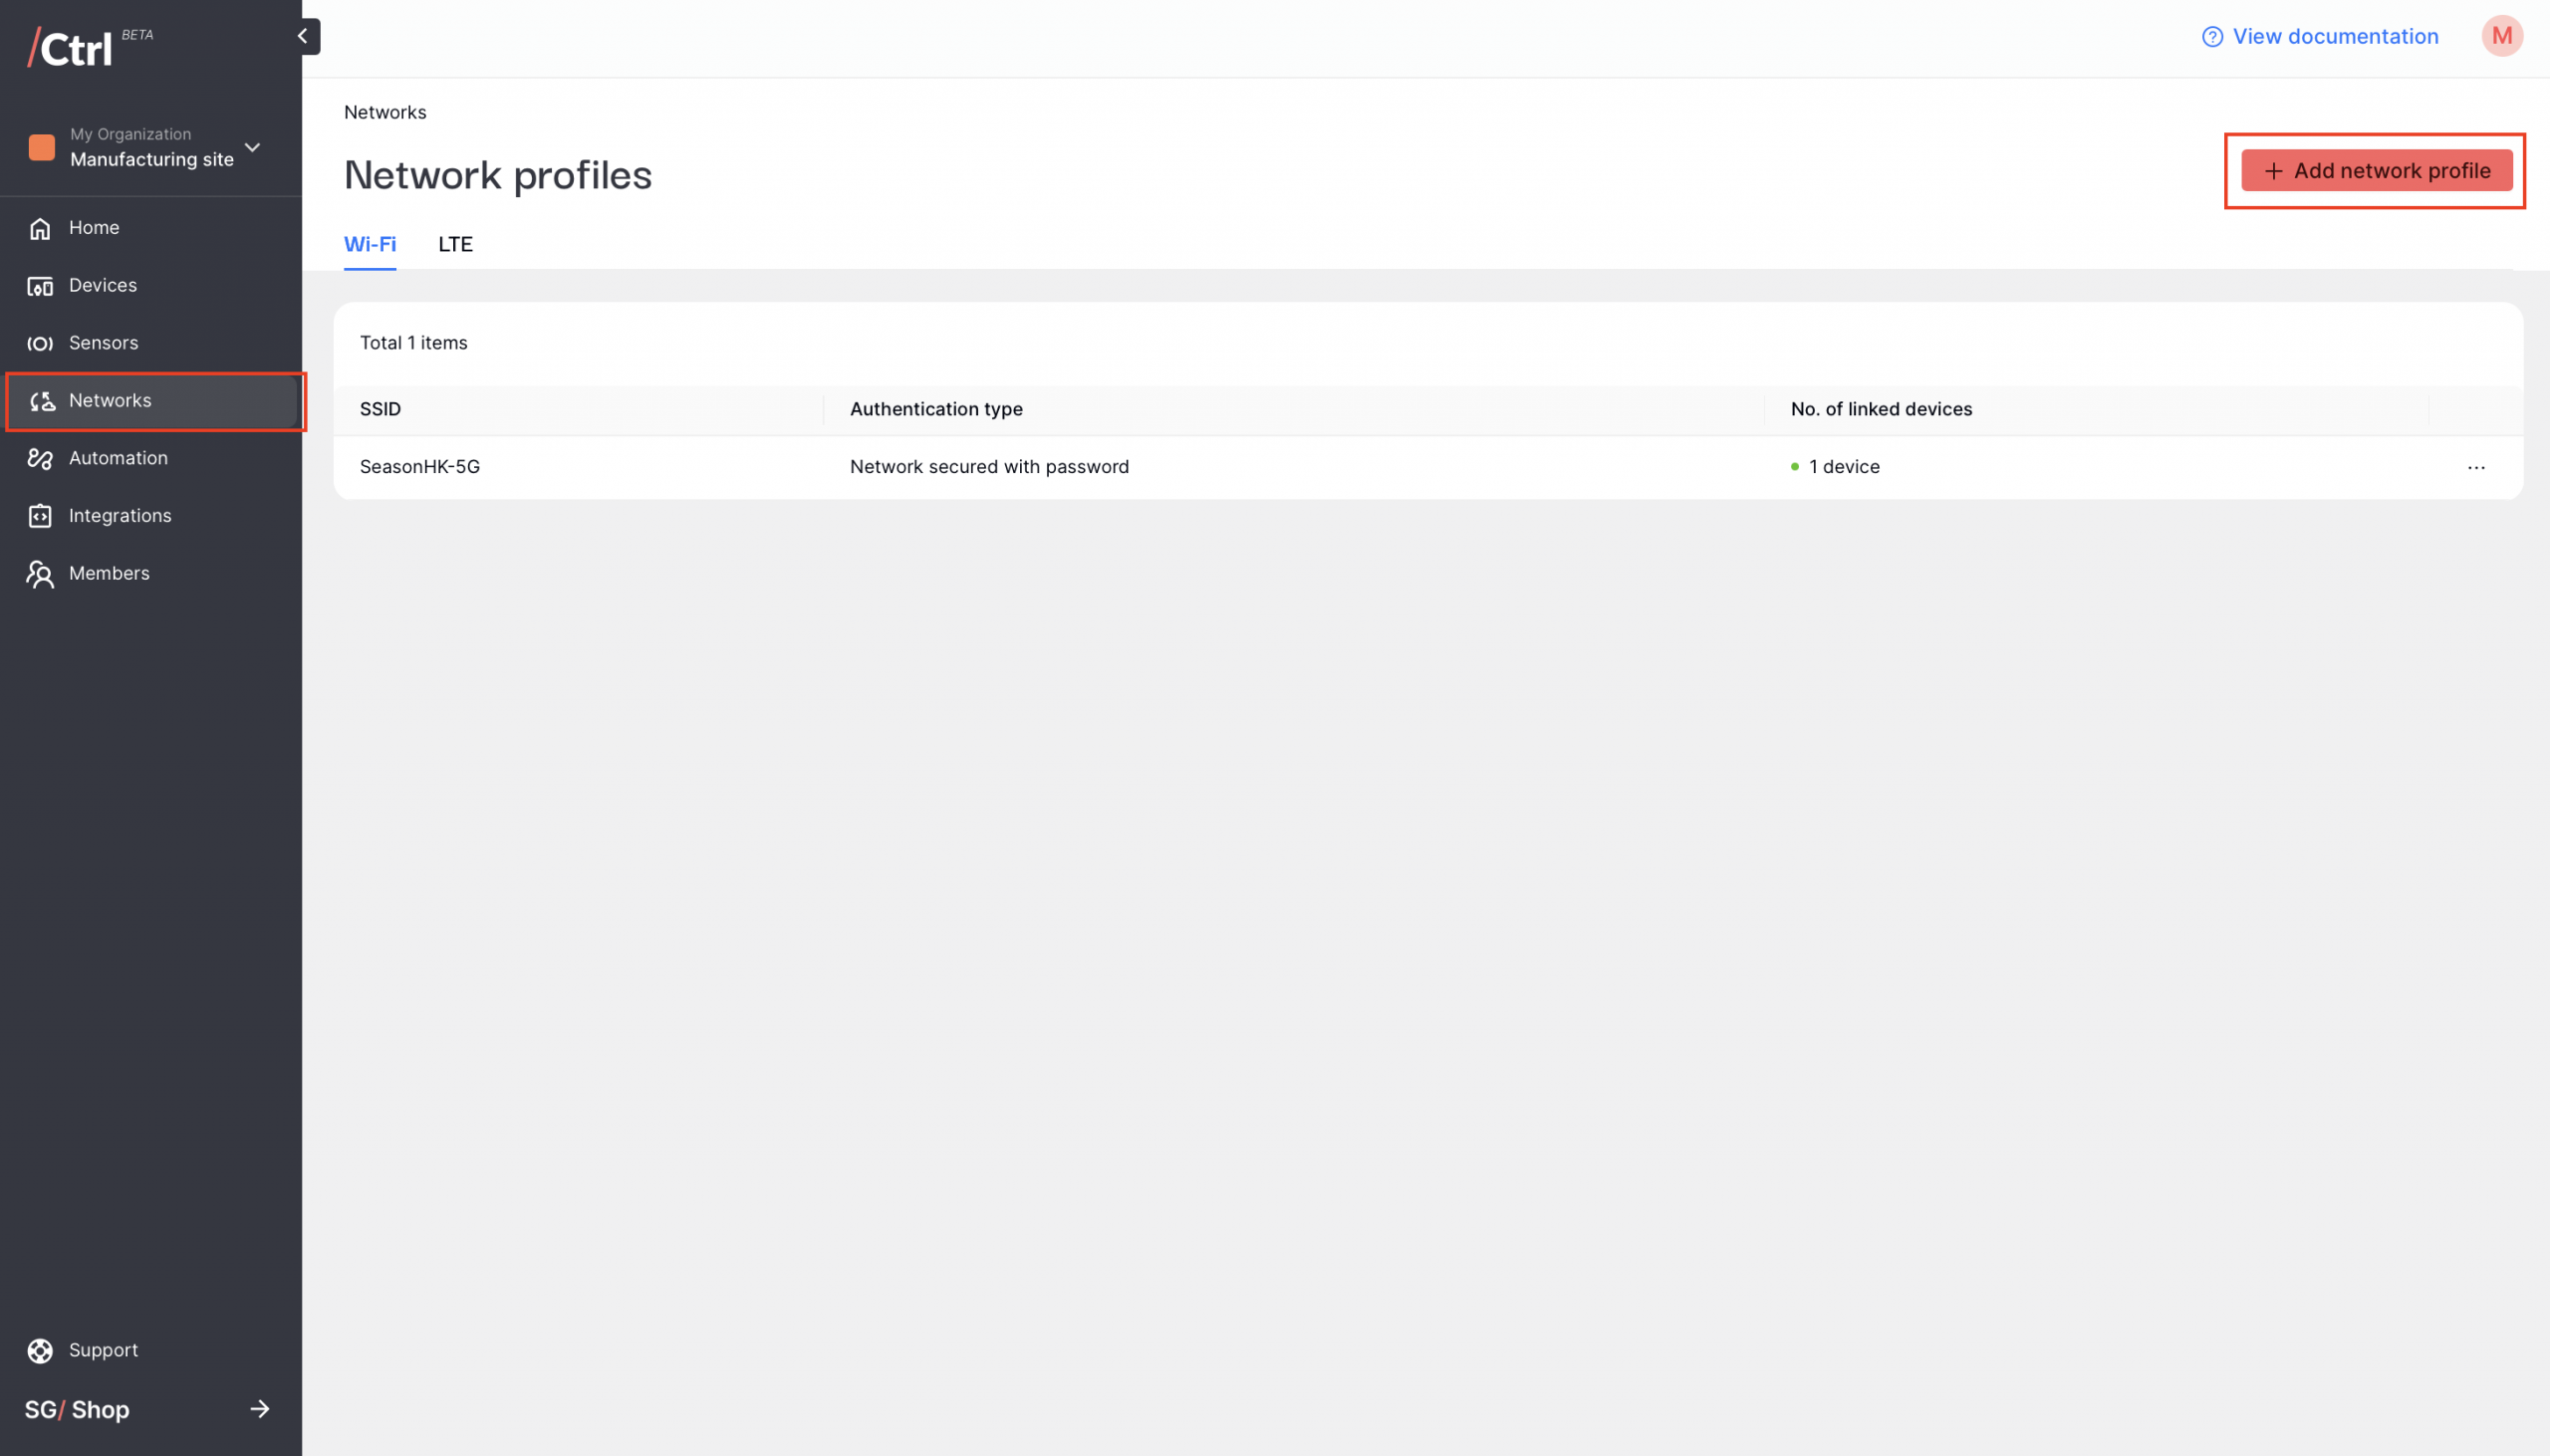
In the side menu, click “Networks”, then “Add network profile”.
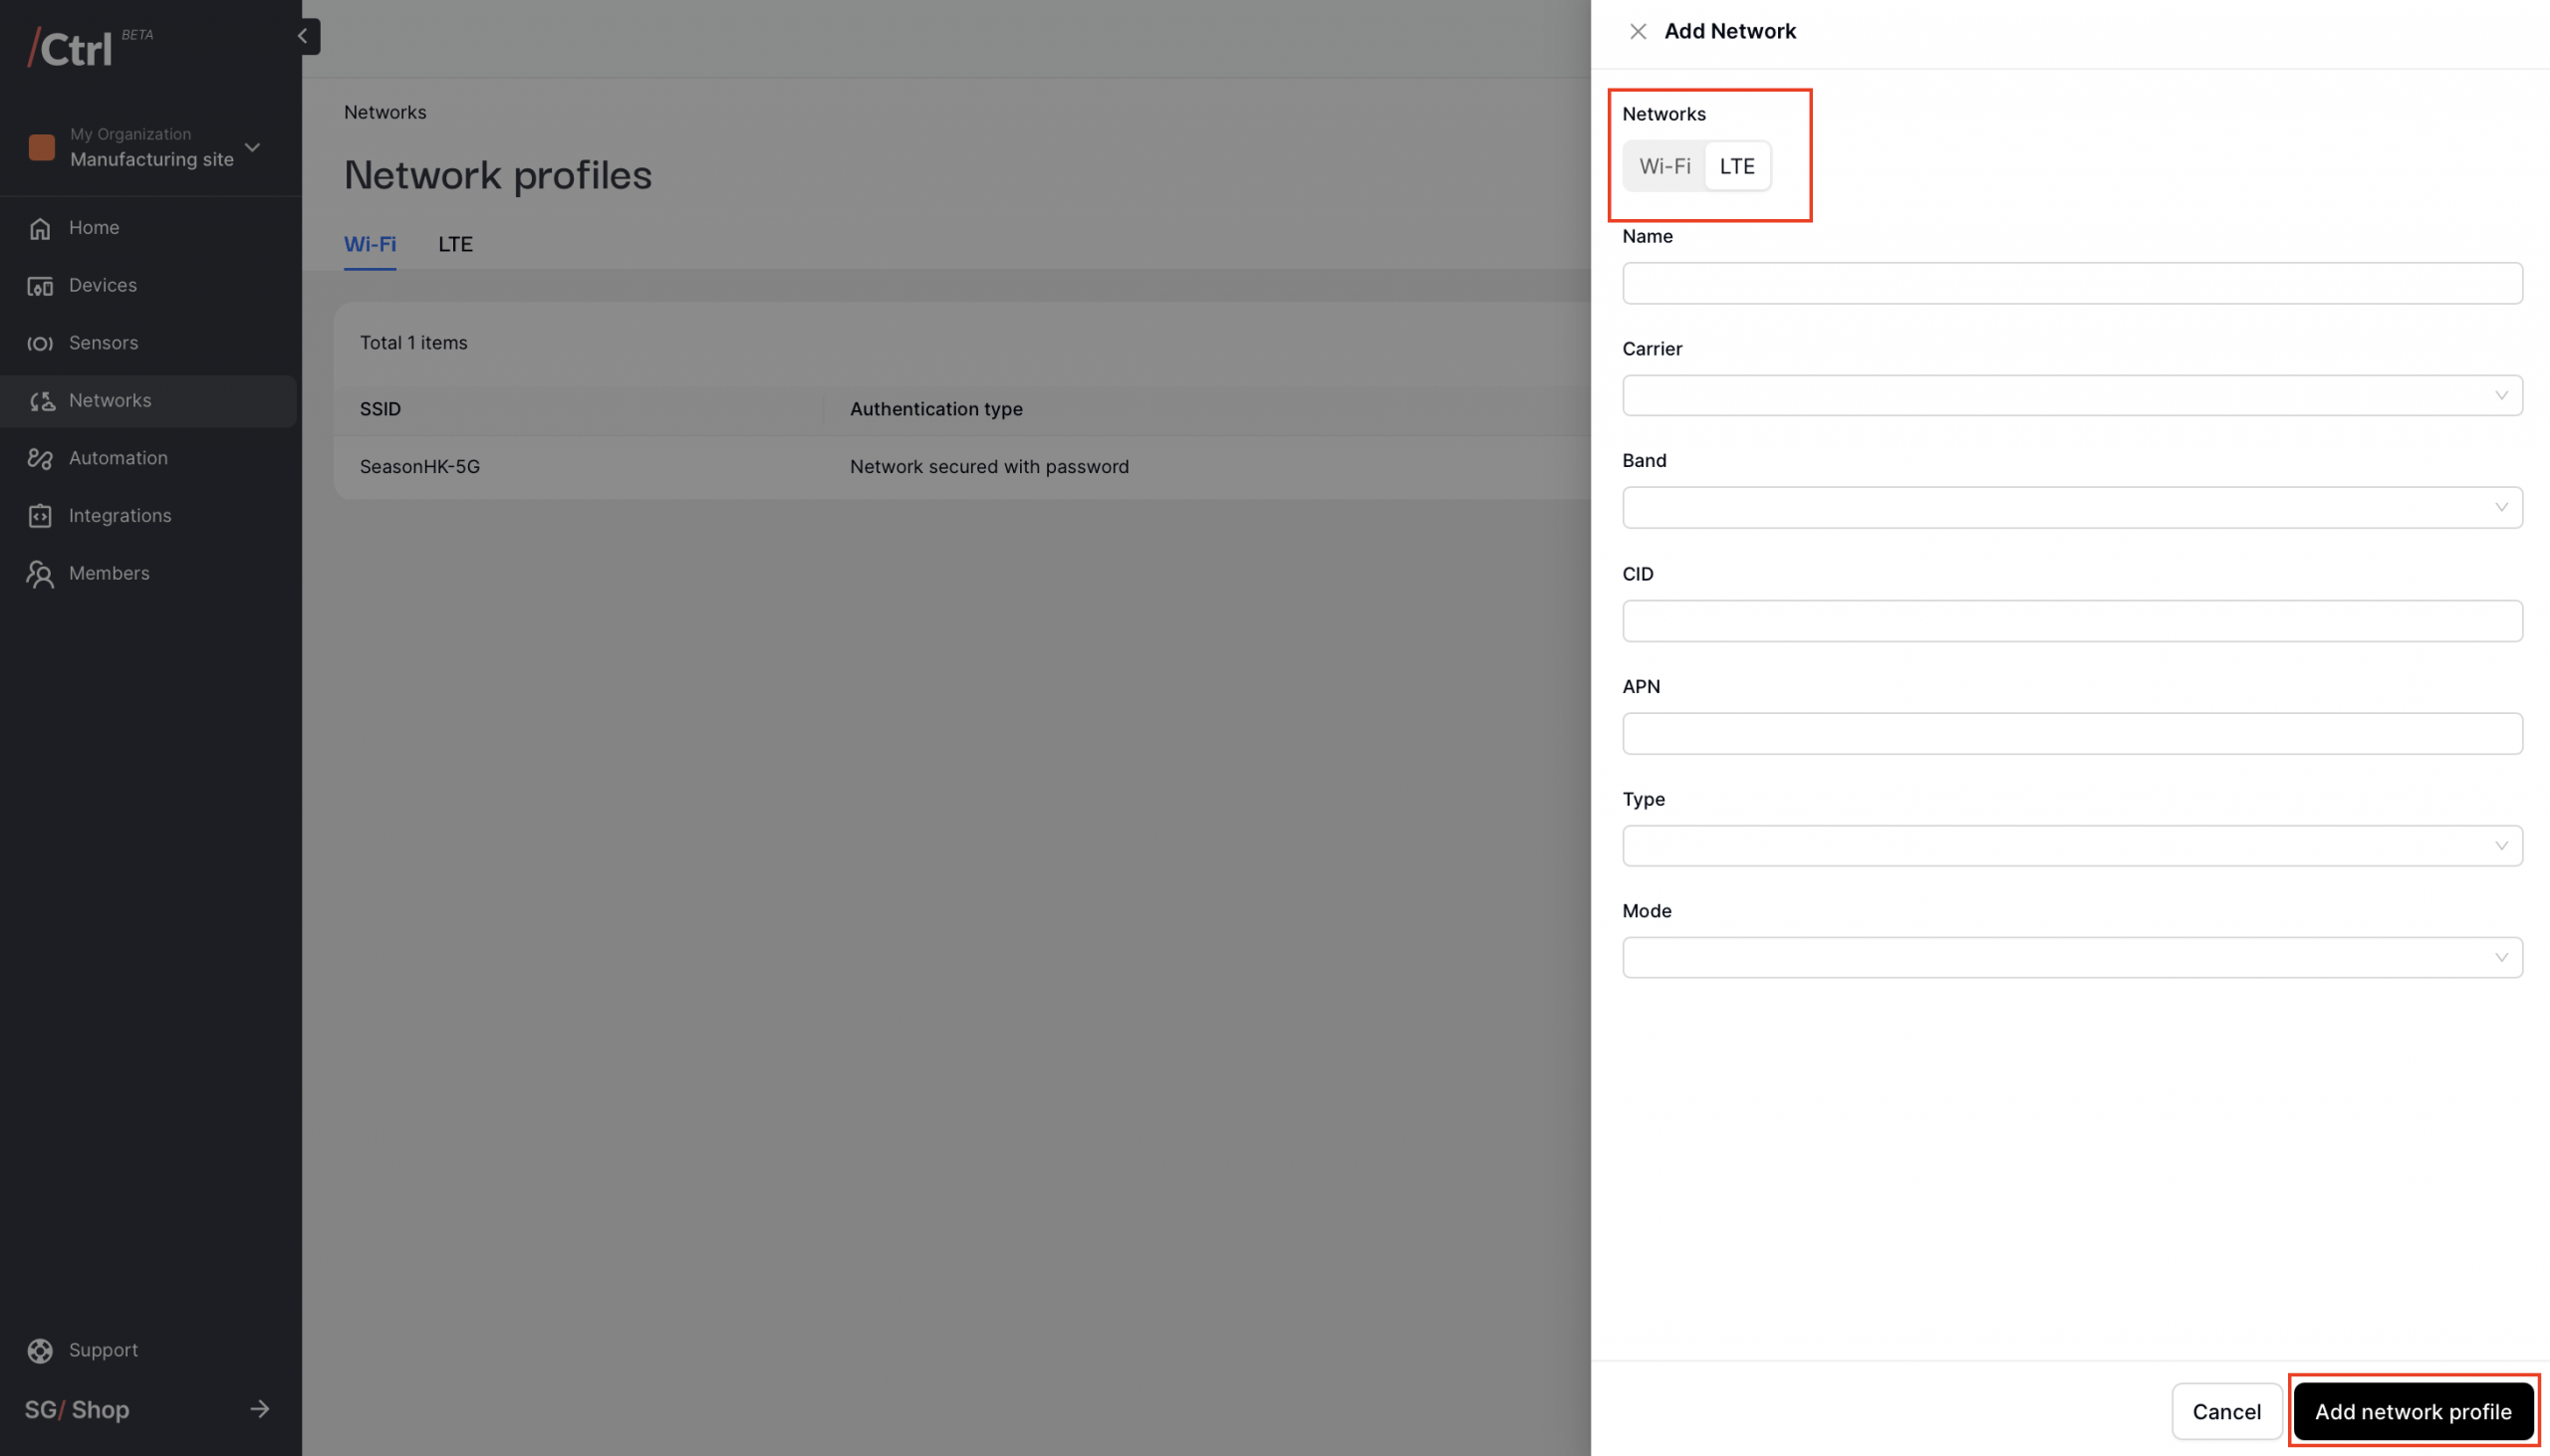
Choose “Wi-Fi” or “LTE”, and enter the required network credentials.
Click “Add network profile” – you’ll see the added network in “Networks”.
Part 2 – Add your F1 Starter Kit
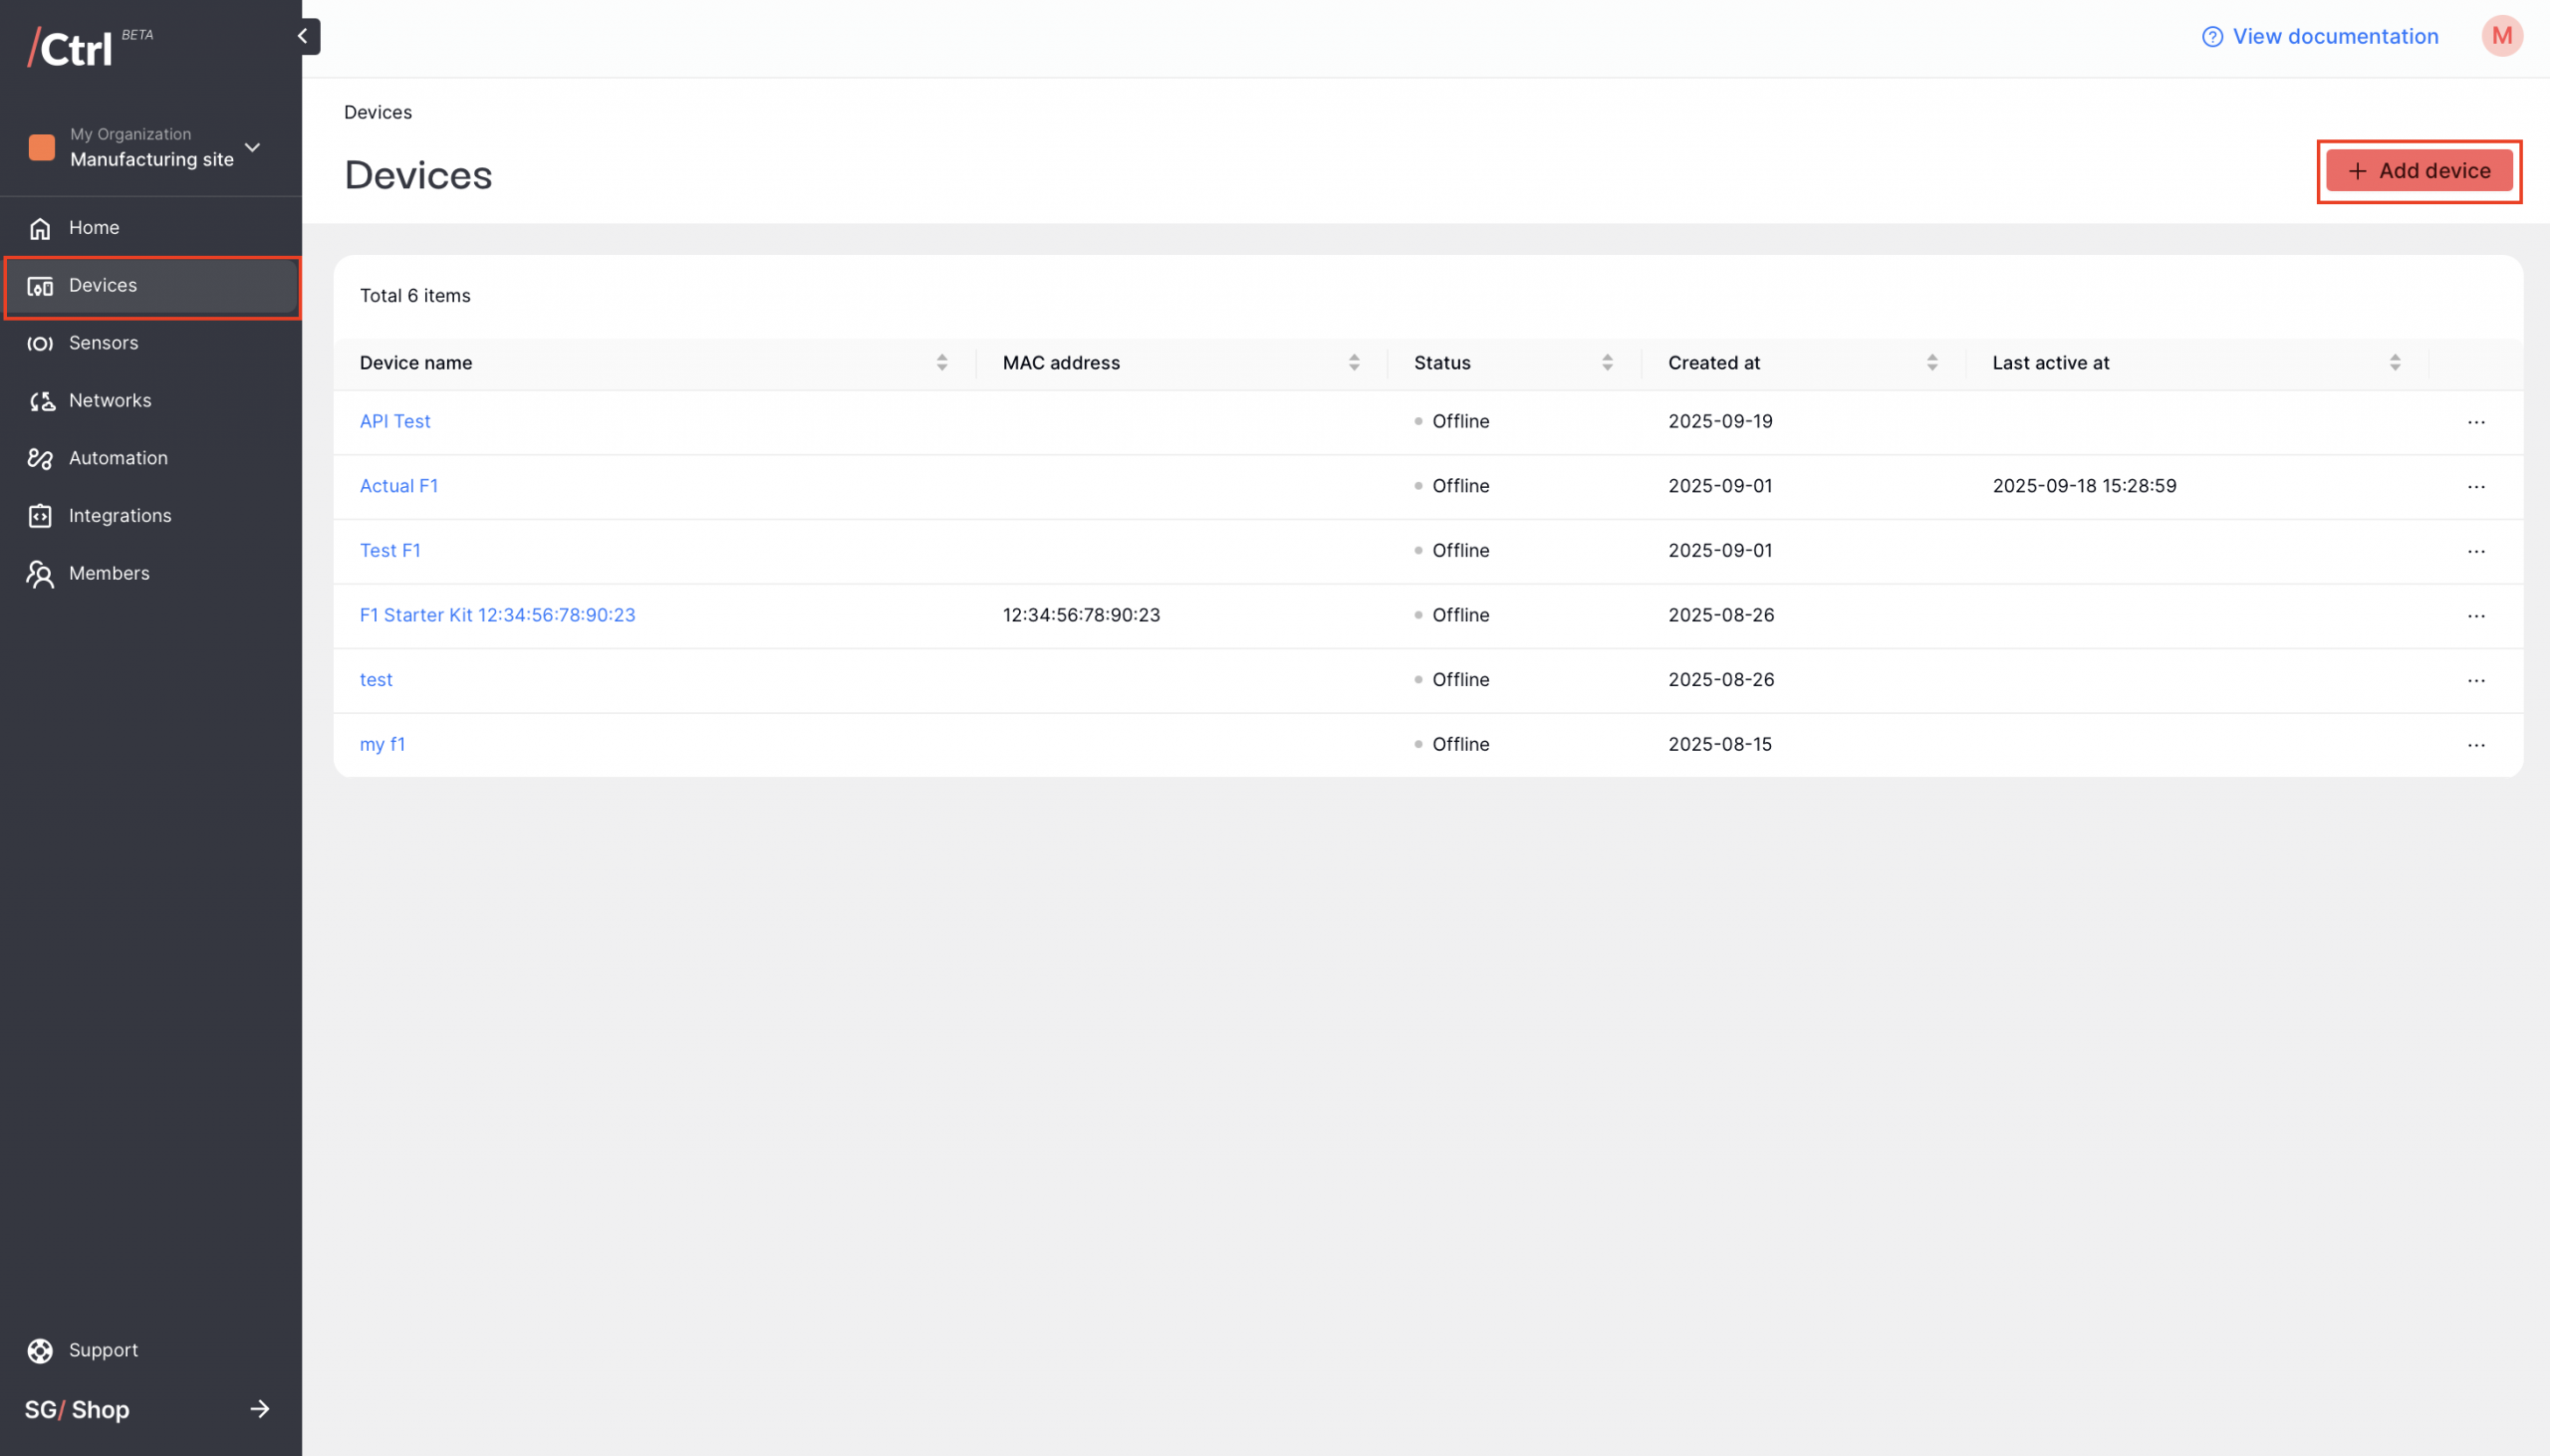
In the side menu, click “Devices”, then “Add device”.
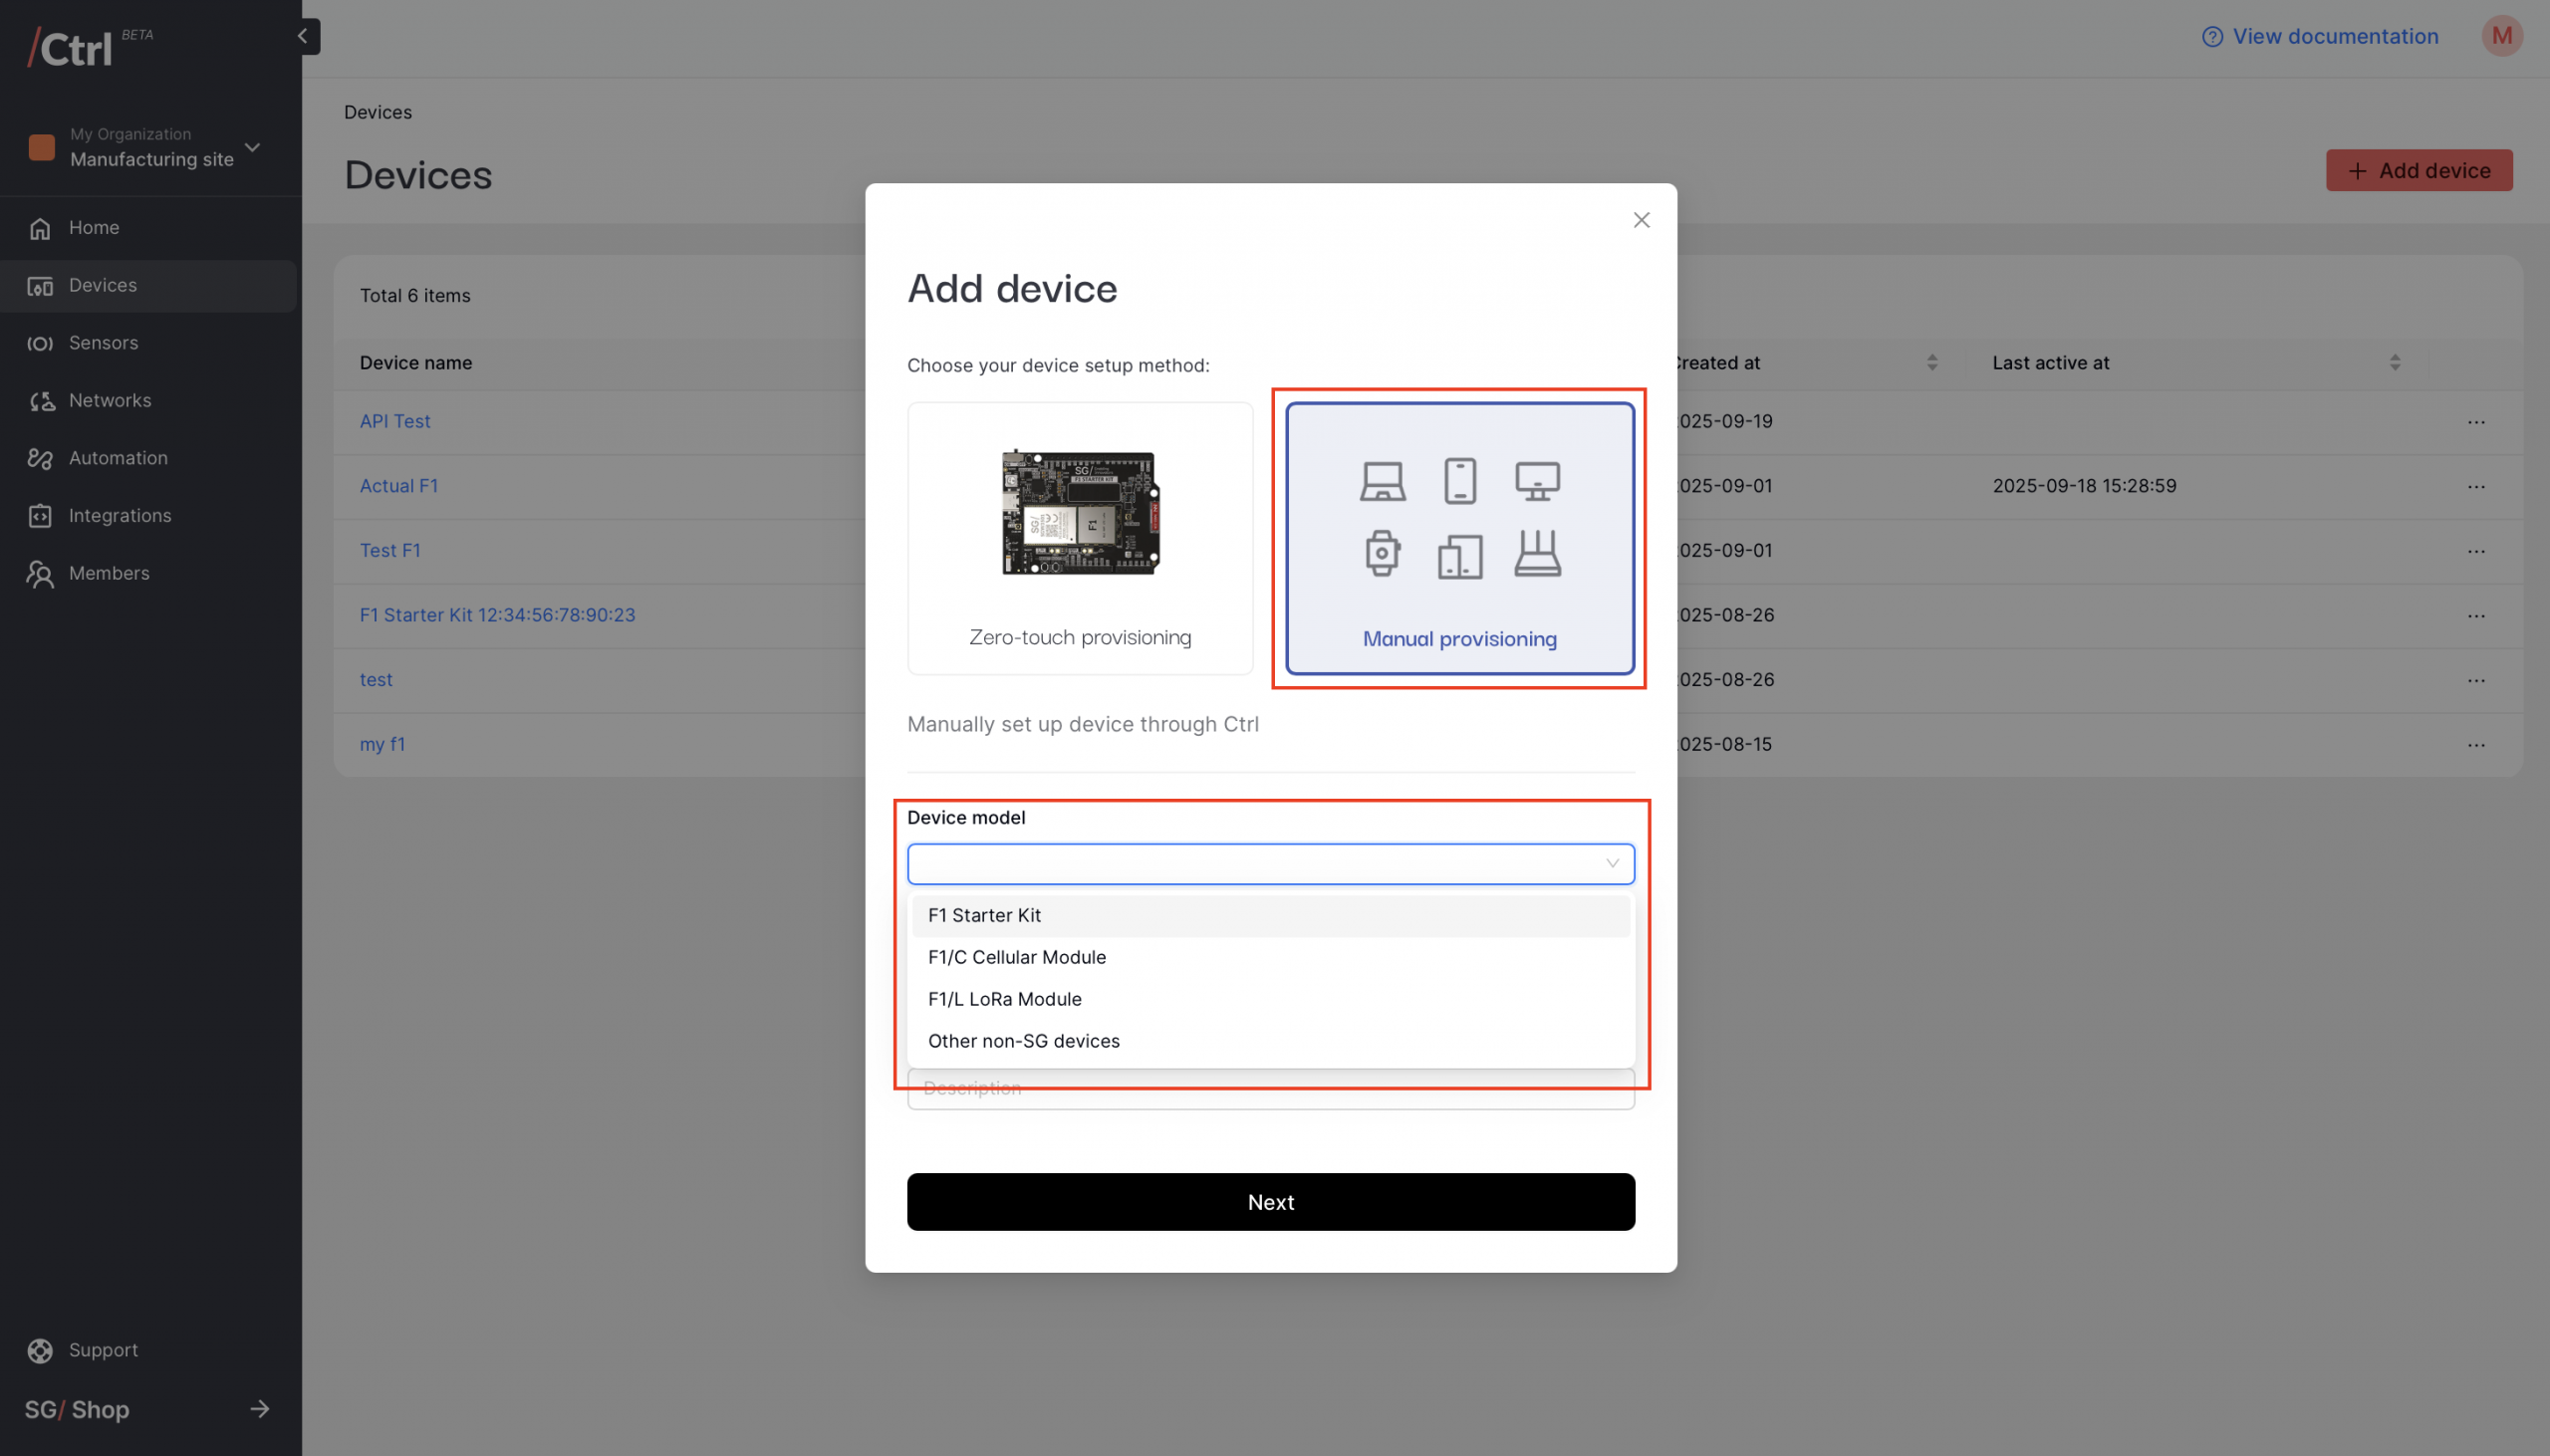
Choose “Manual provisioning”.
Choose “SG F1 Starter Kit” as your device model. Enter a name and description.
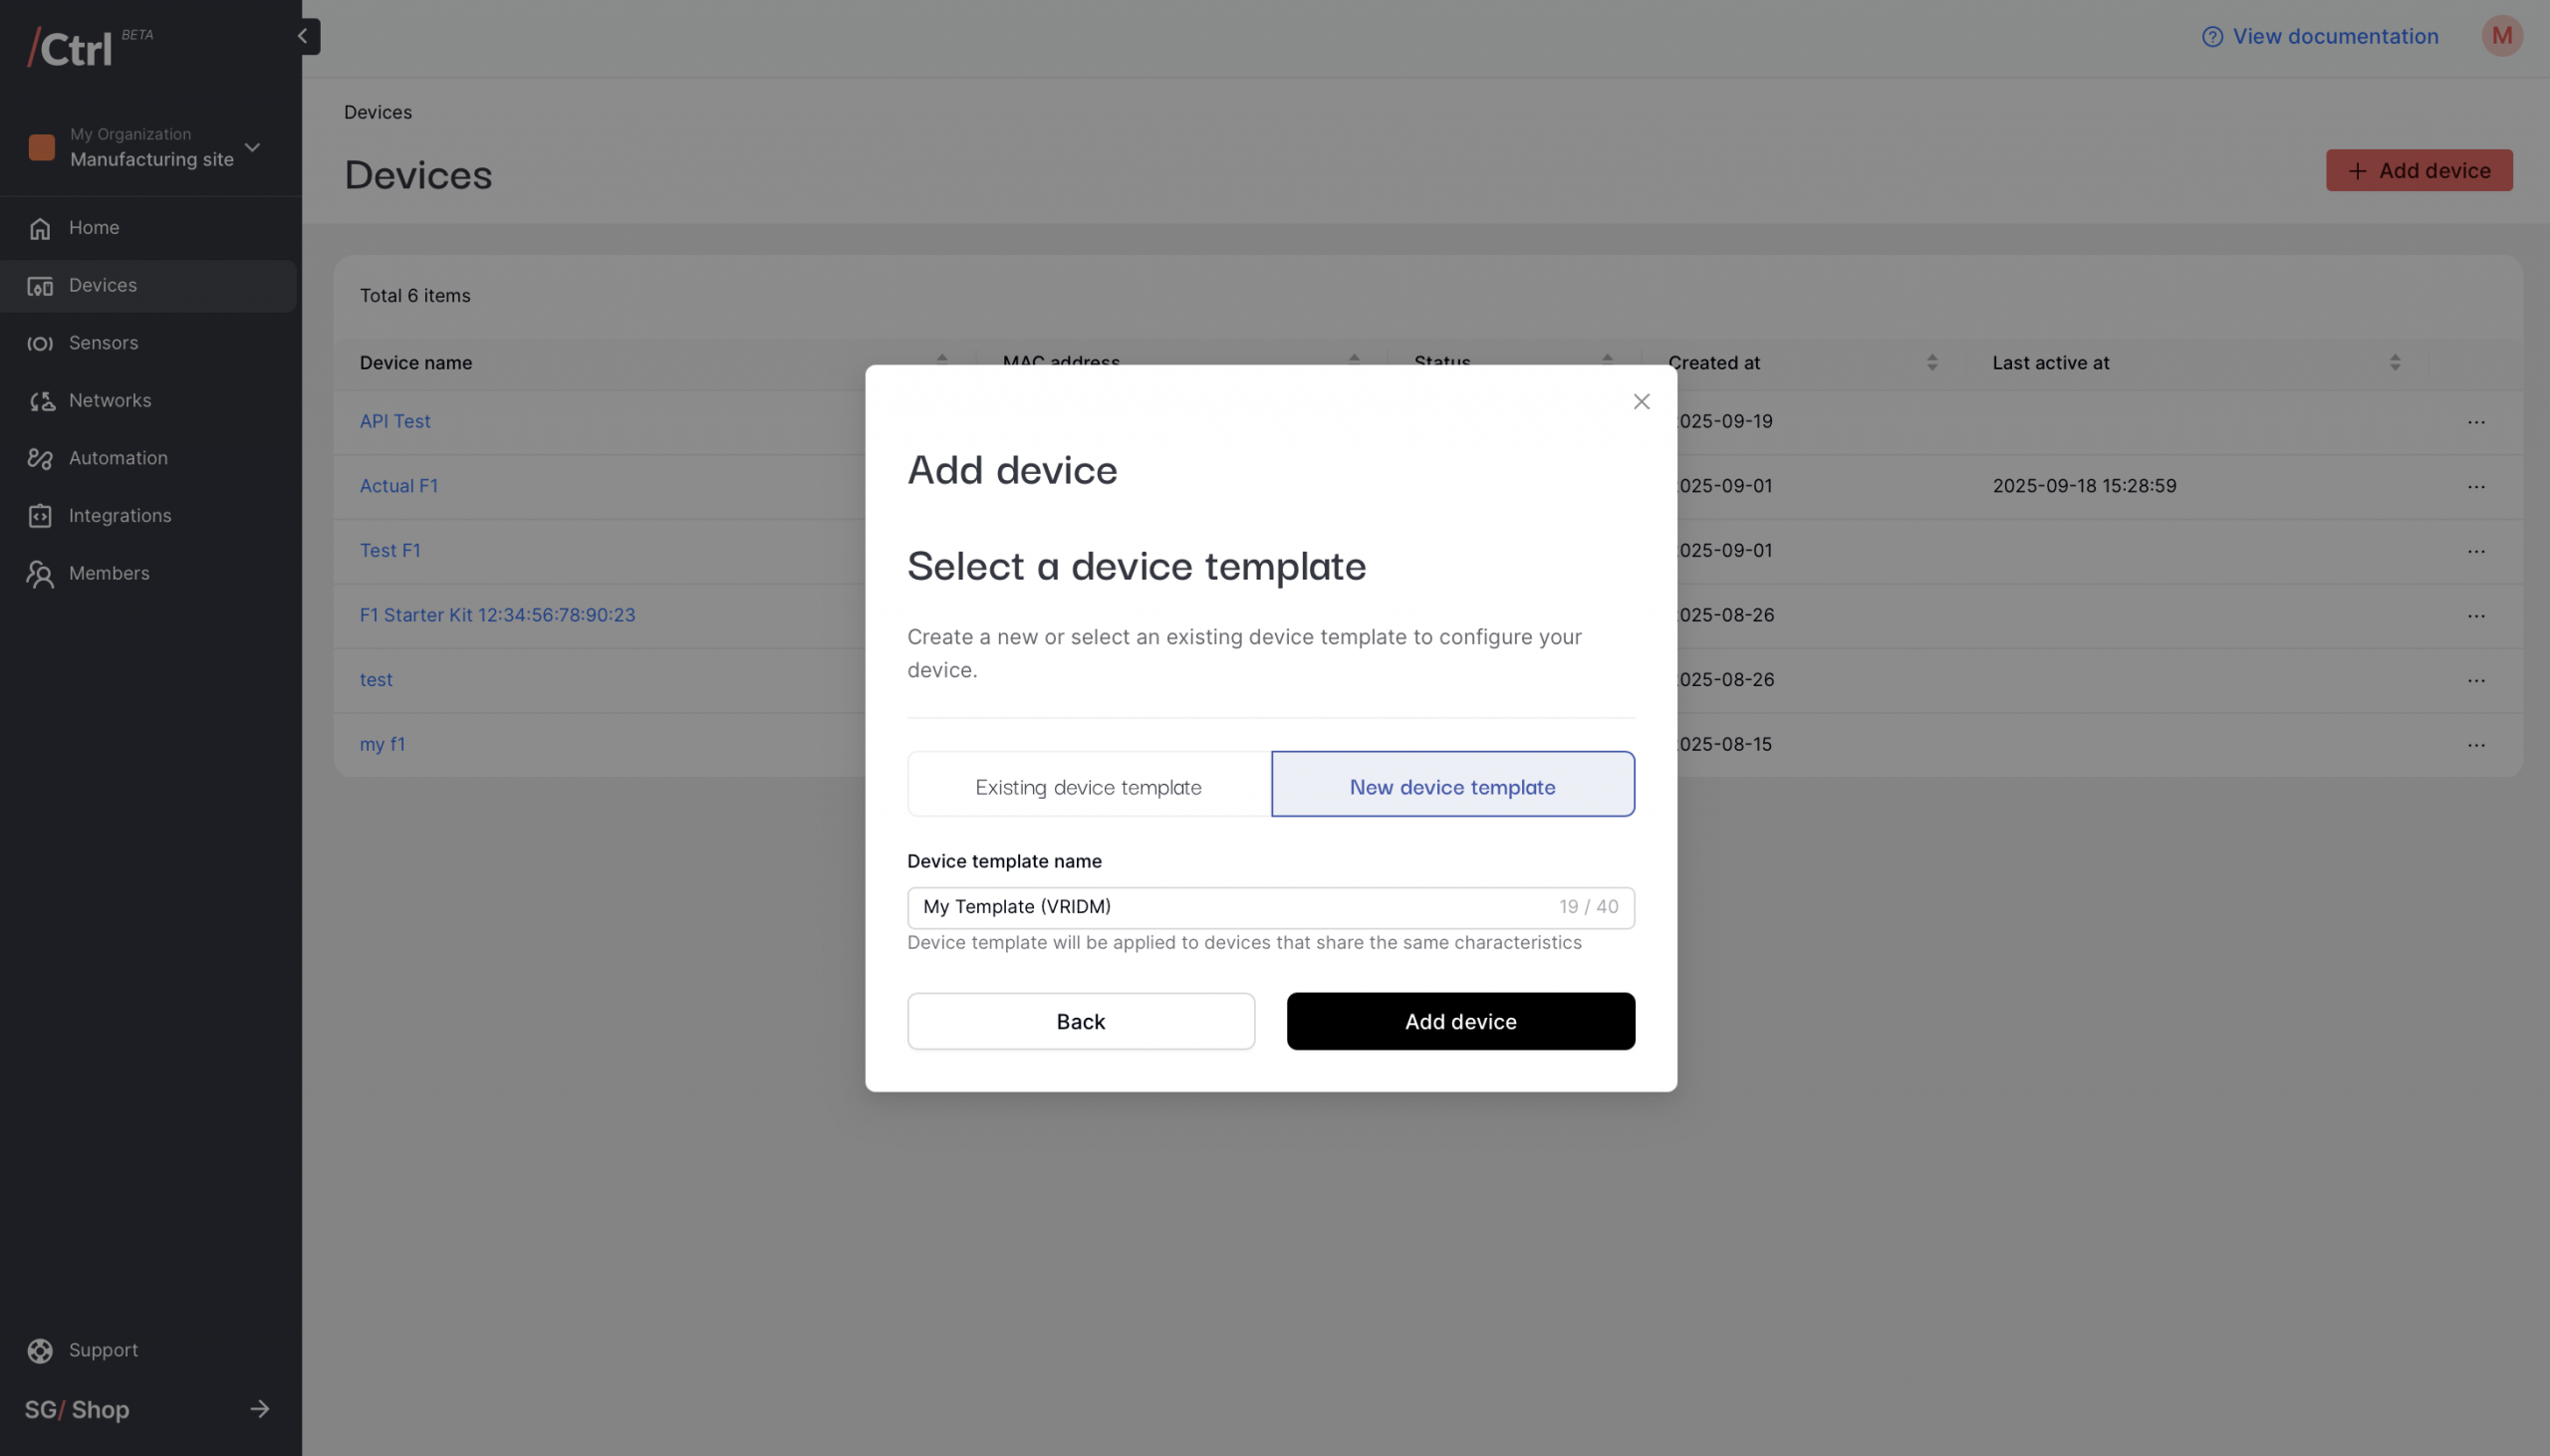
Select a Device Template – as this is your first device, you’ll land on “New device template” by default and you’ll be given a system-generated template identifier. (Device Templates will be important as you scale – more on this later!)
Click “Add device” to complete the device creation flow.
Part 3 – Configure your F1 Starter Kit Network
Click “View device details” to view your newly-created device page.
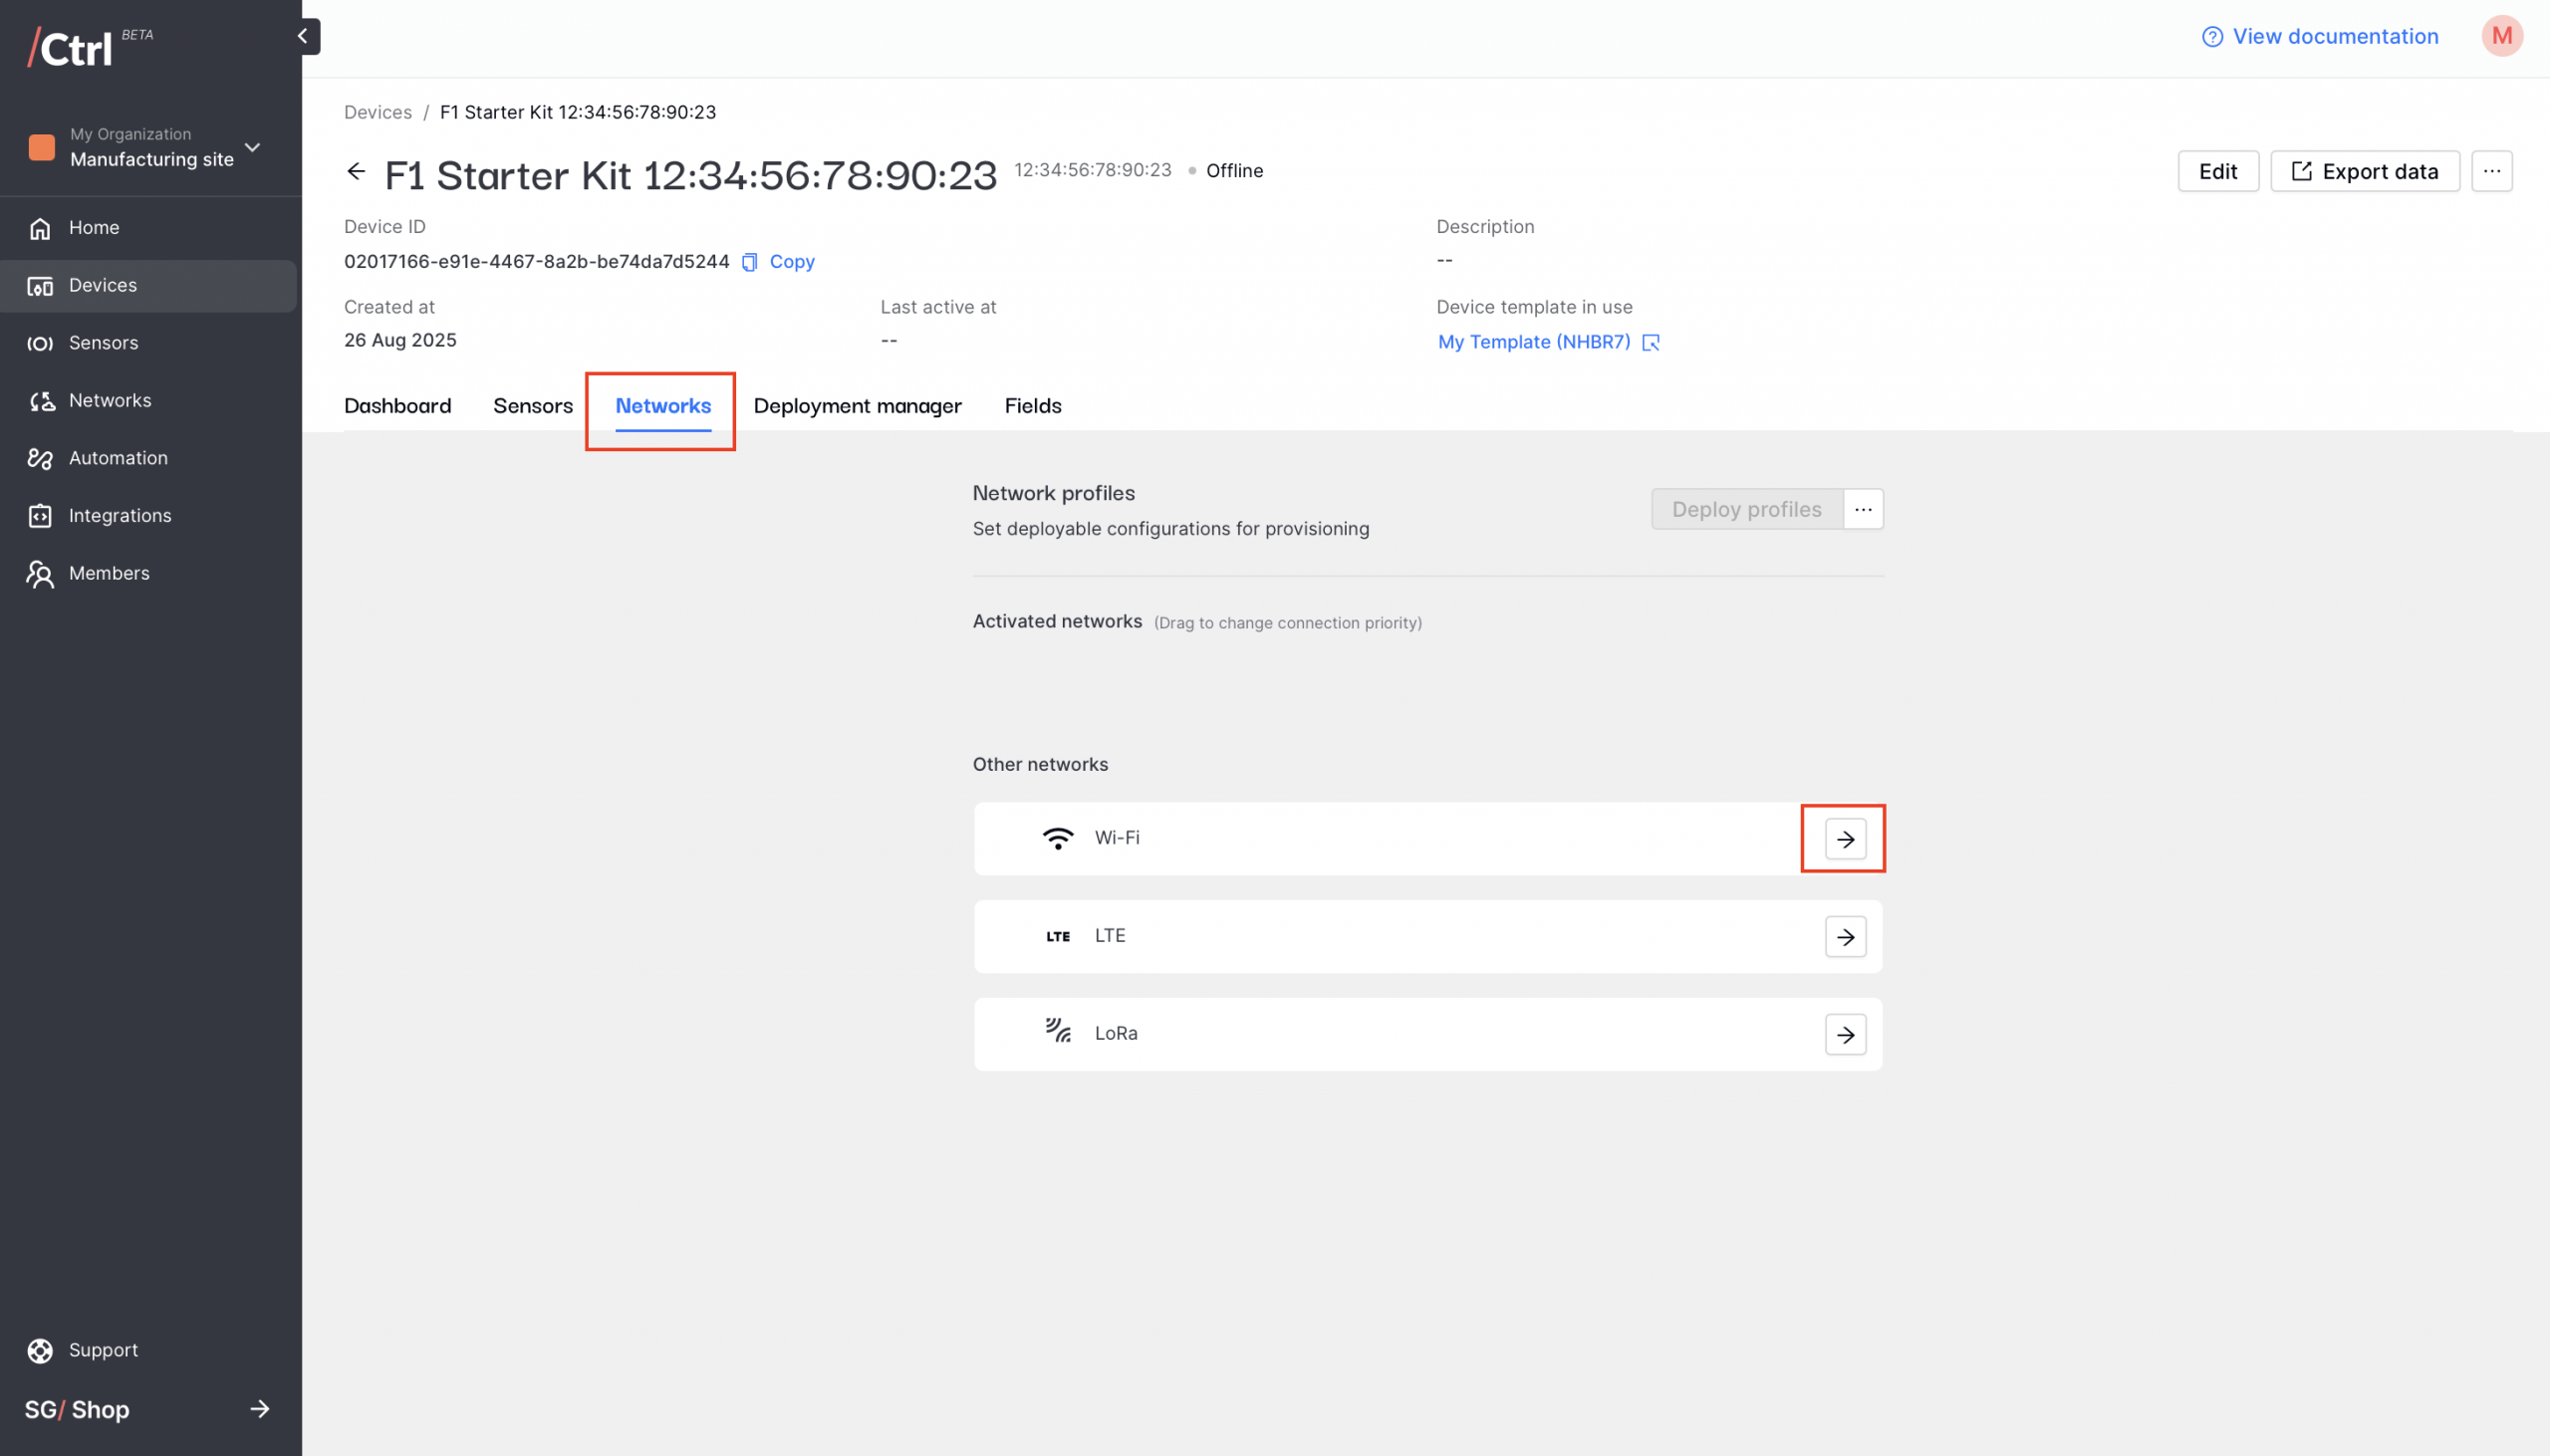
Click on the “Networks” tab and choose the network type that you want to activate.
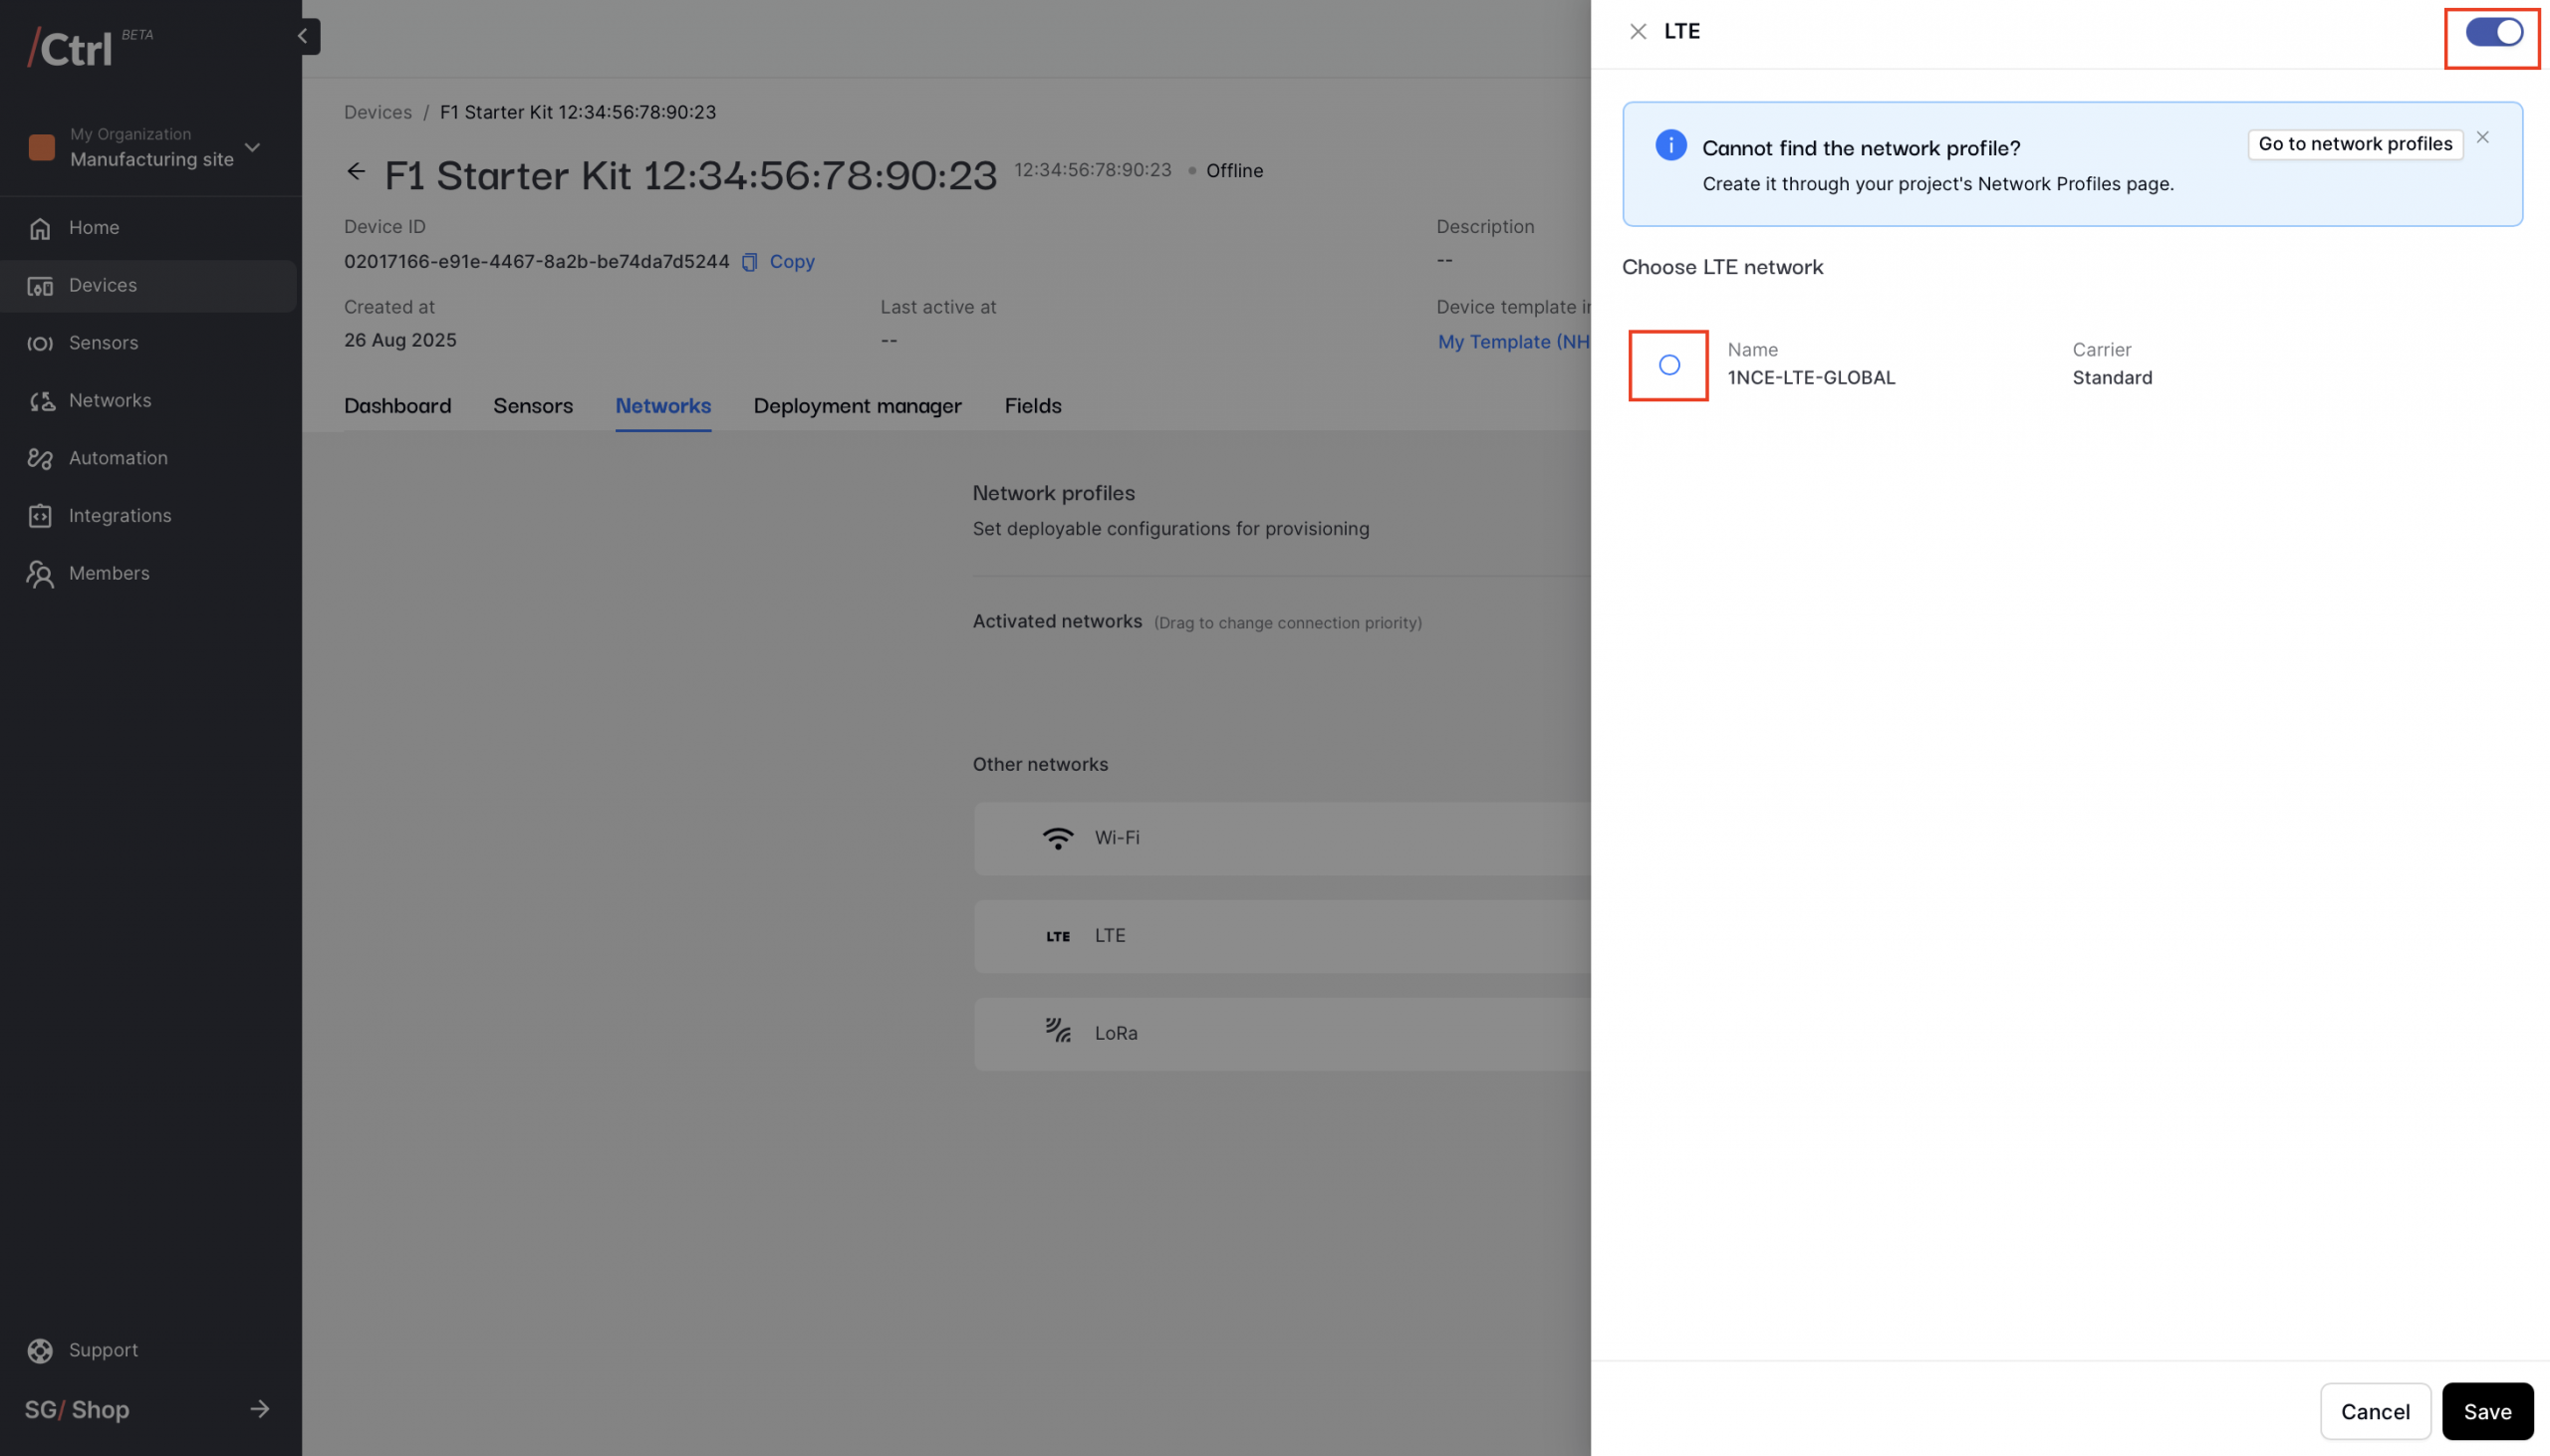
Toggle the target connection to activate it, then select the target network profile.
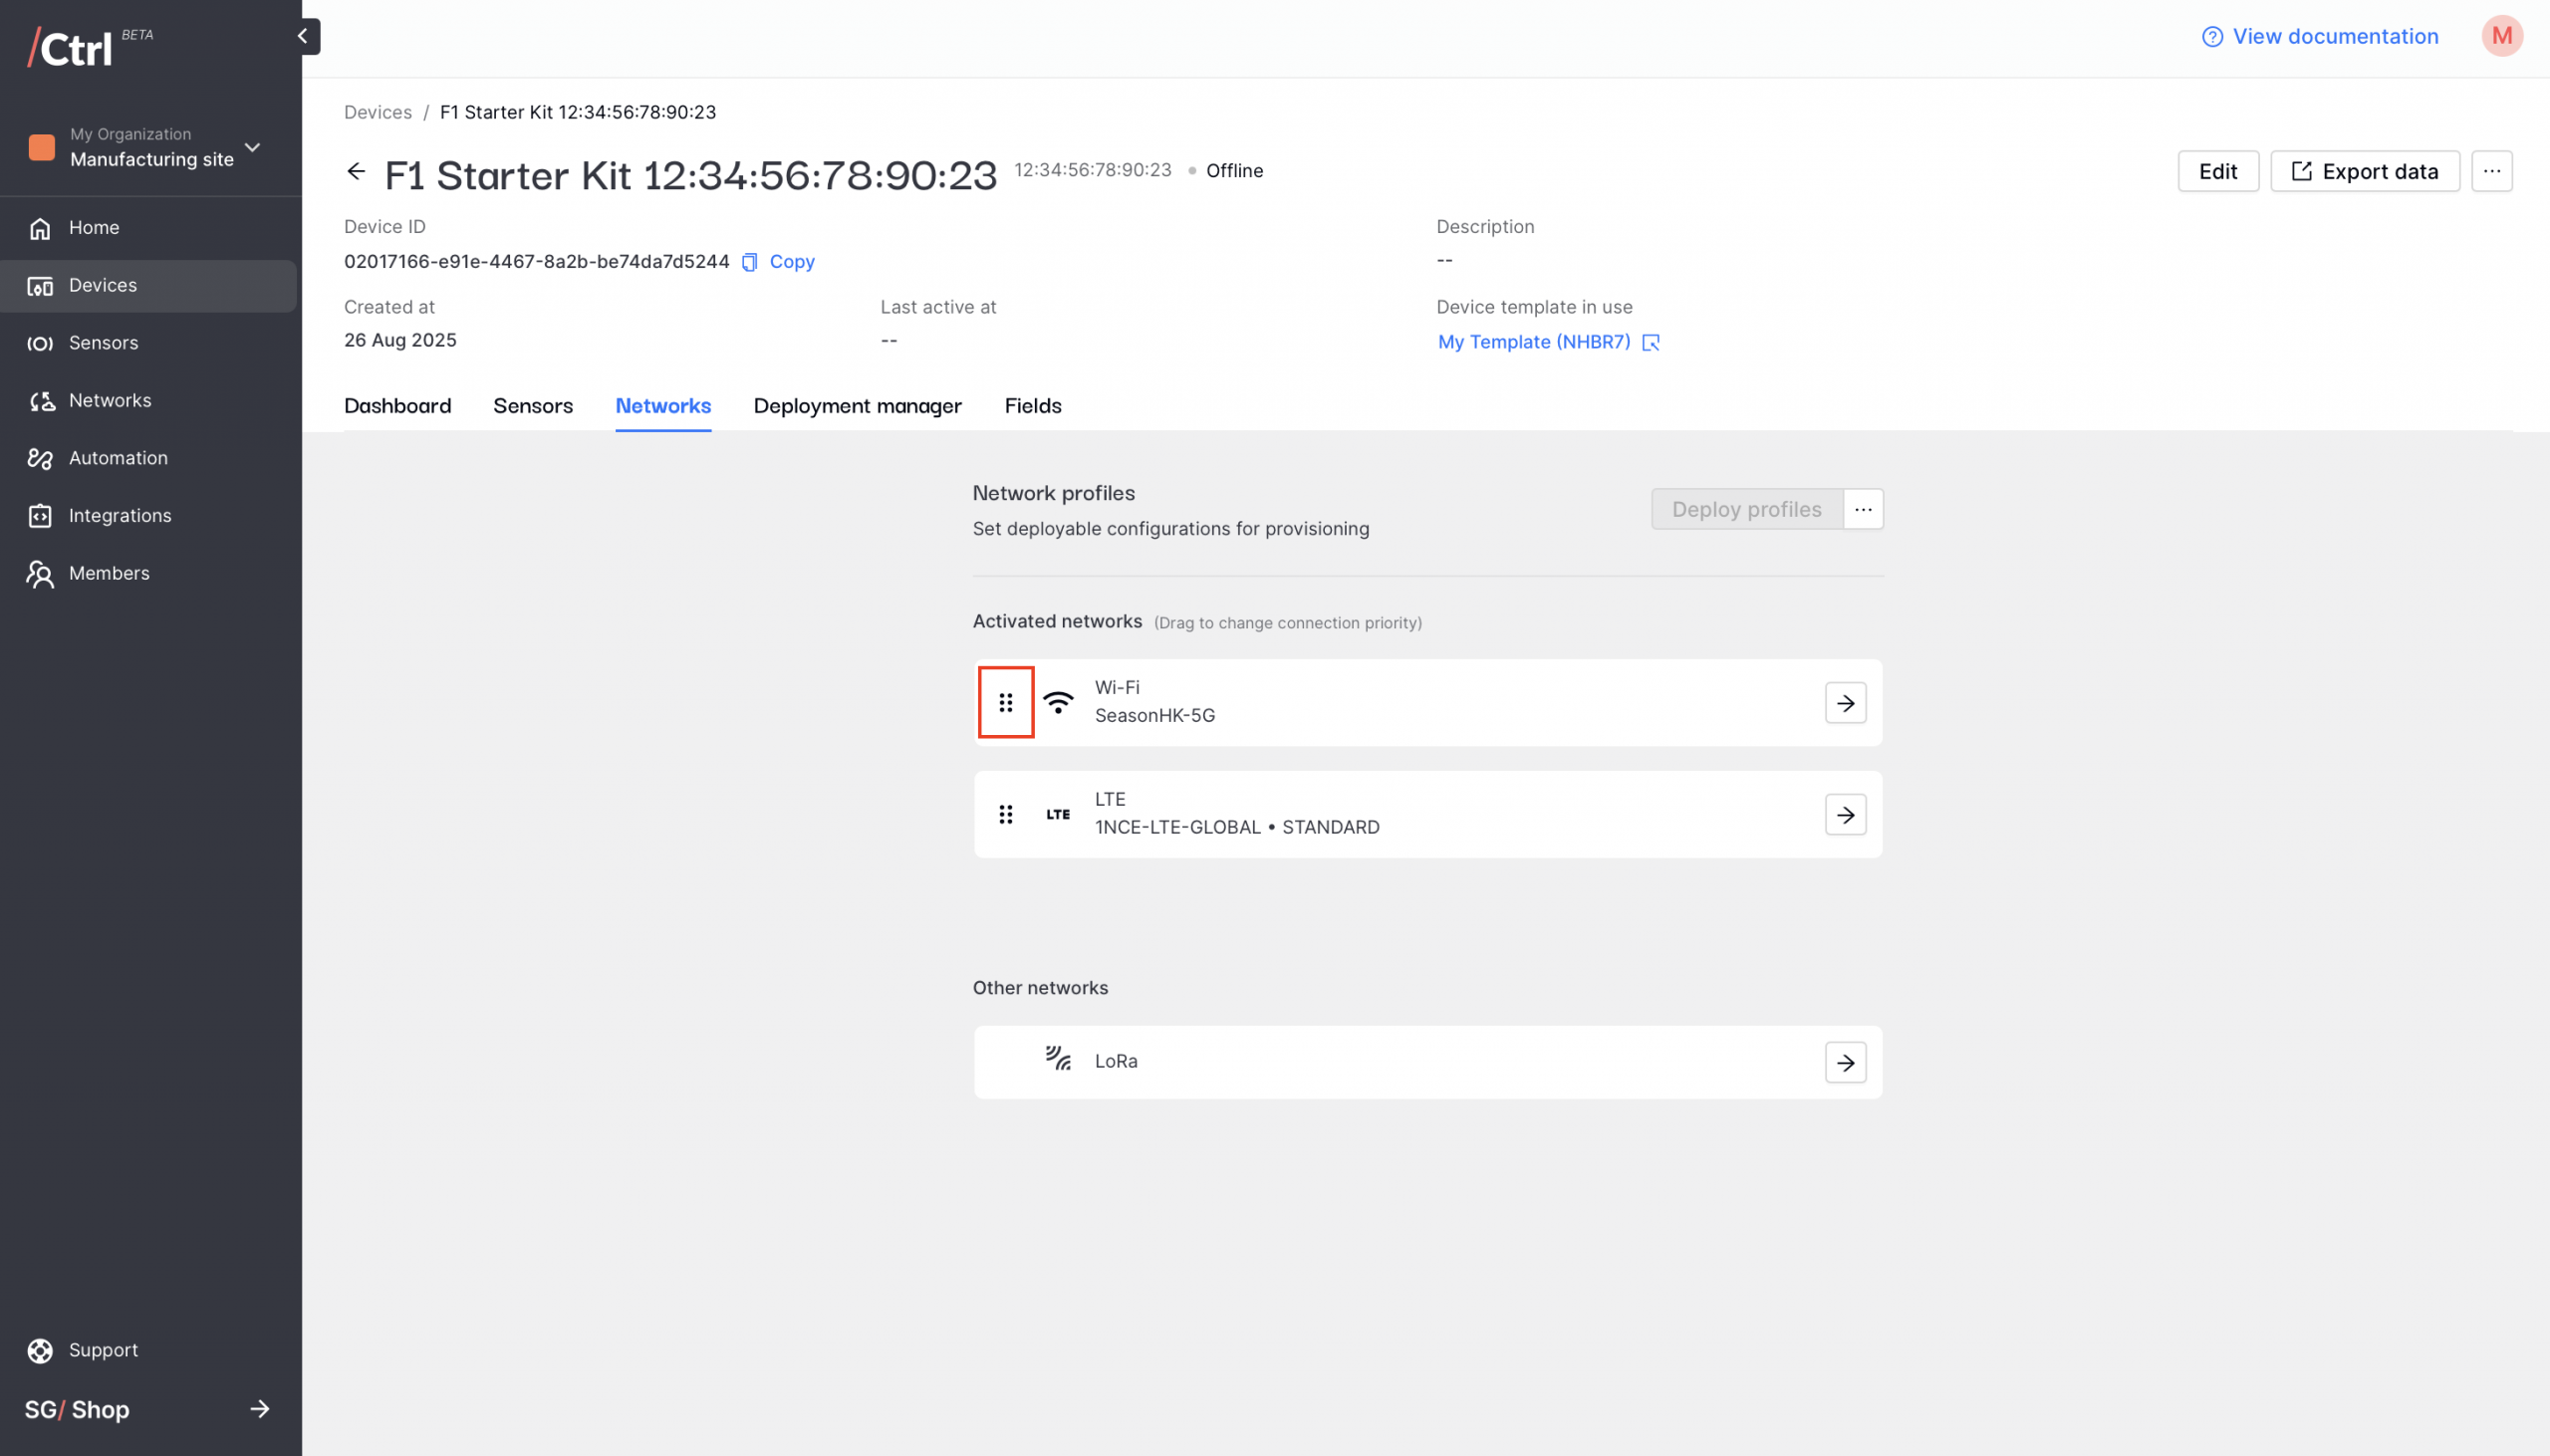
If you’re enabling more than one network type, hold and drag the network type to adjust the priority.
Part 4 – Deploy to your F1 Starter Kit
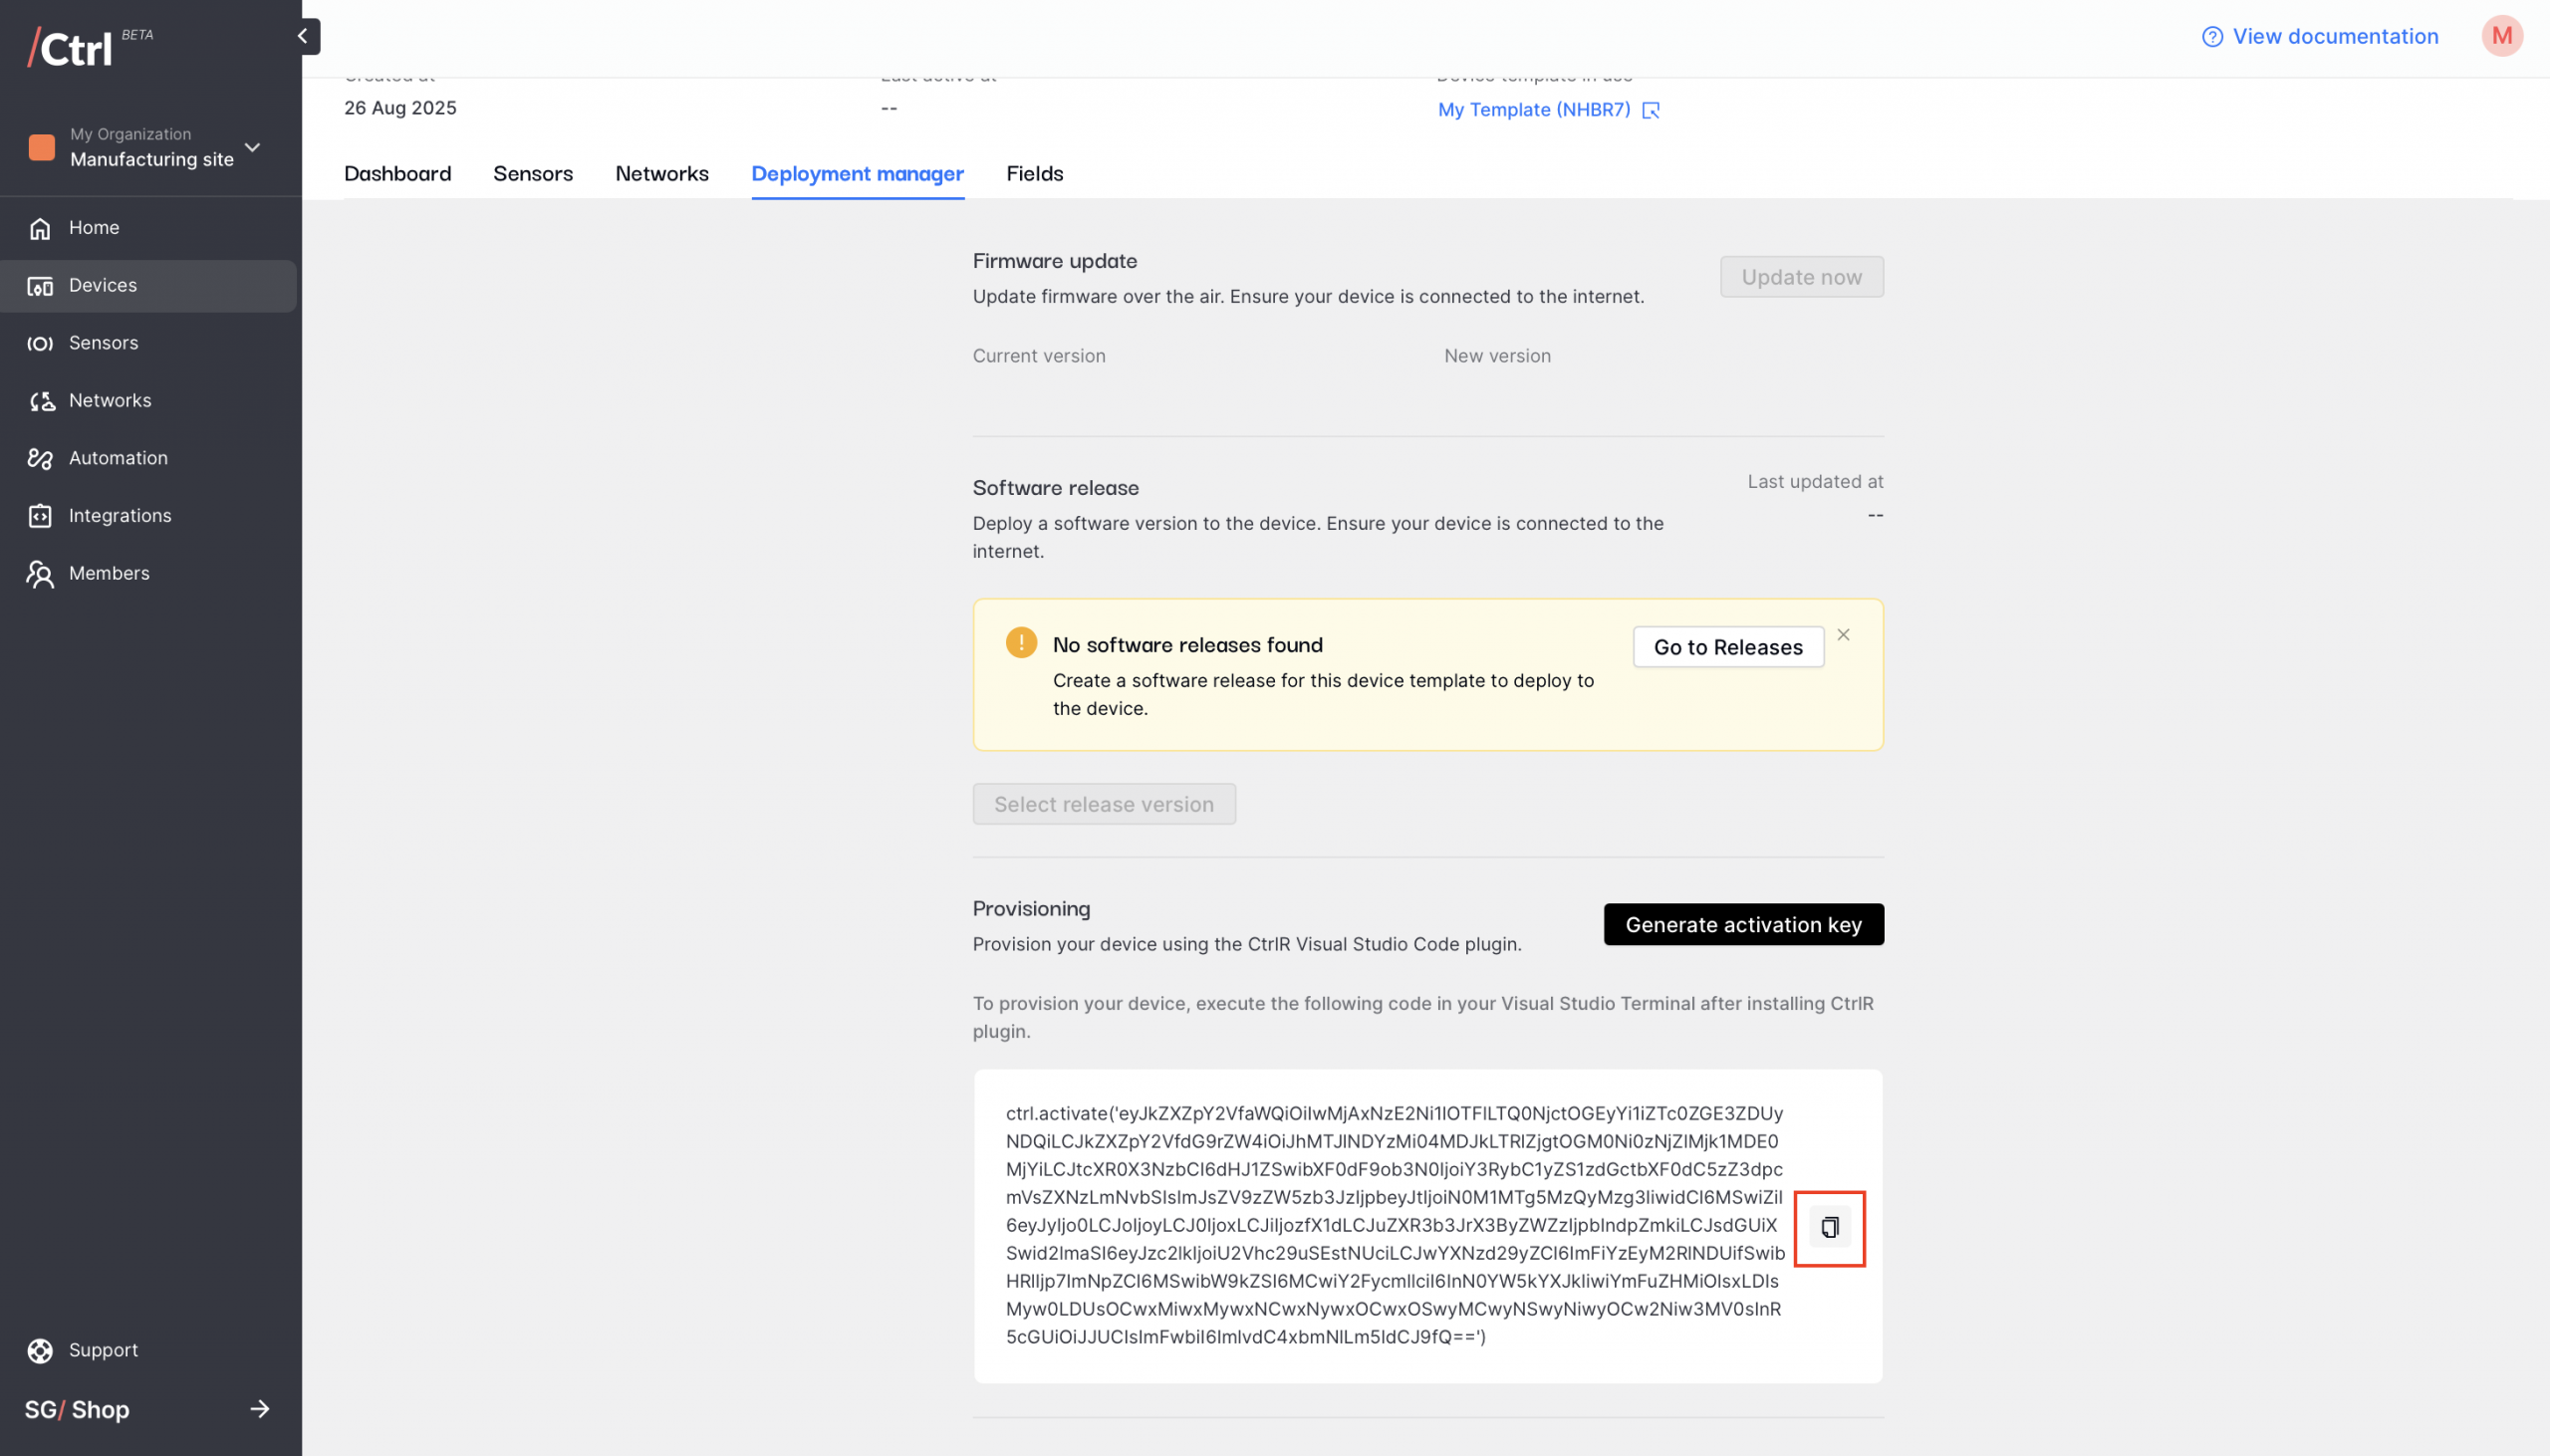
In the device’s “Deployment Management” tab, click “Generate activation key”. You’ll need this key in a bit.
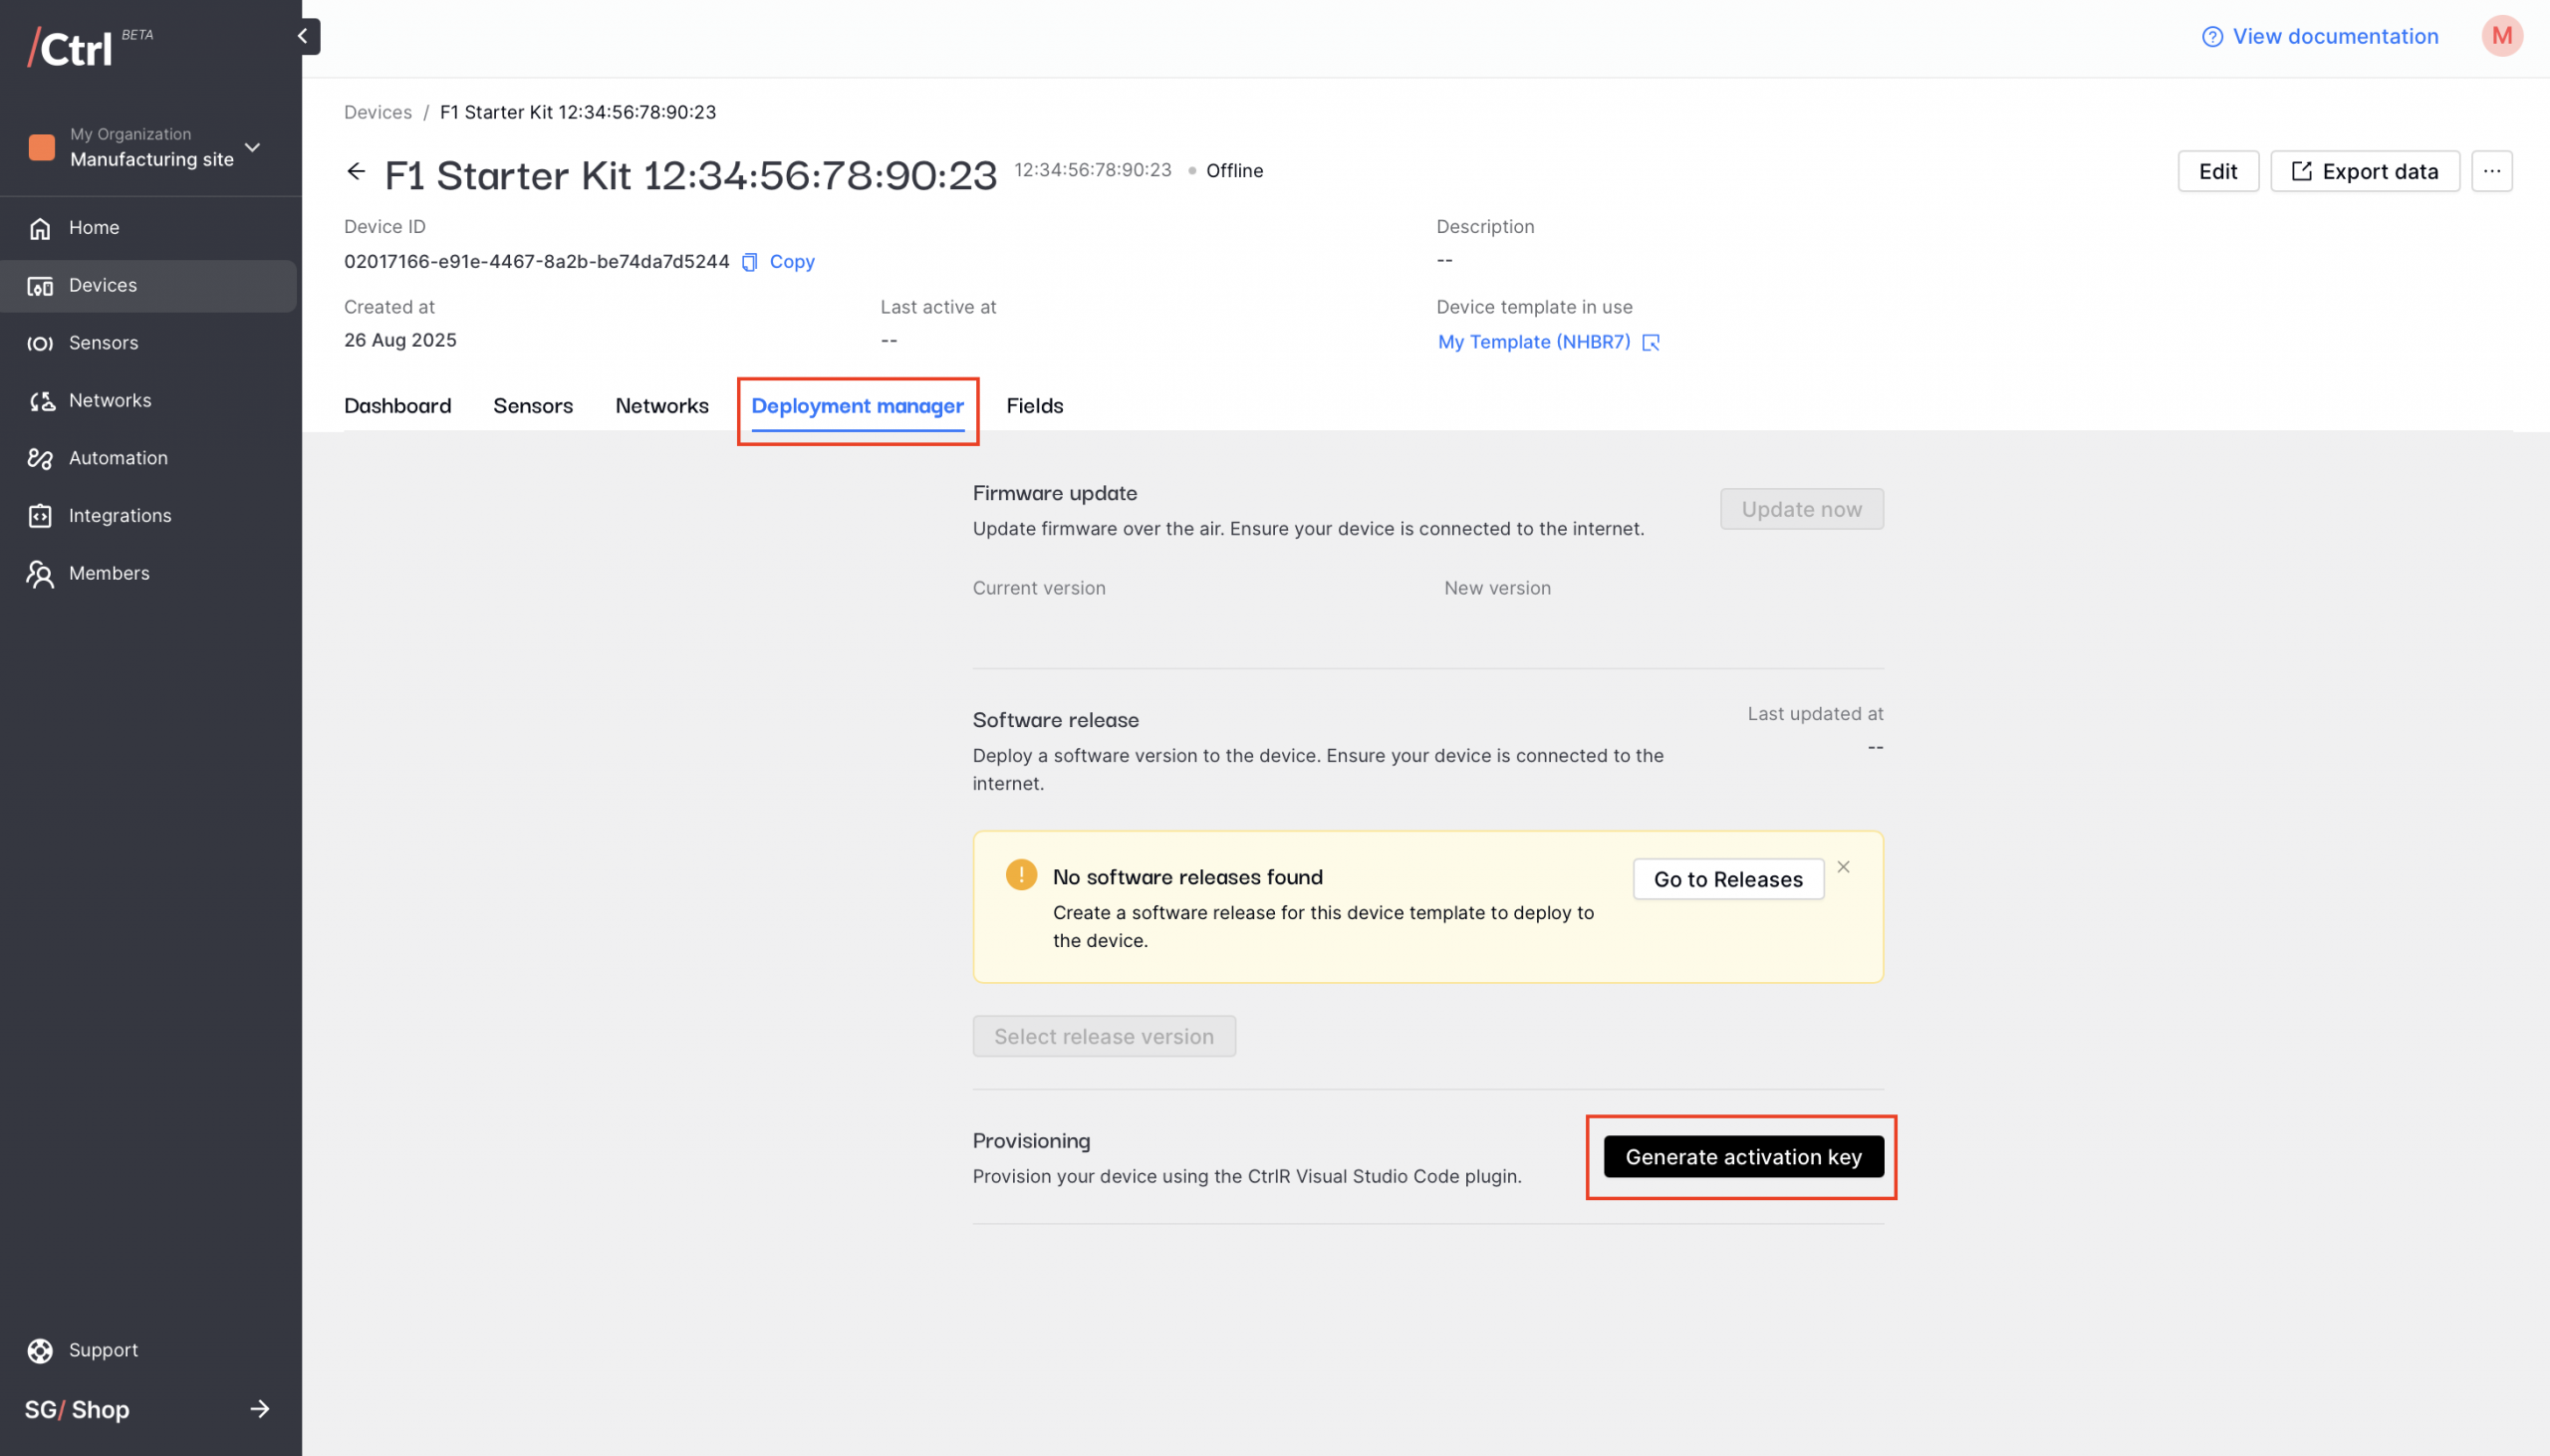
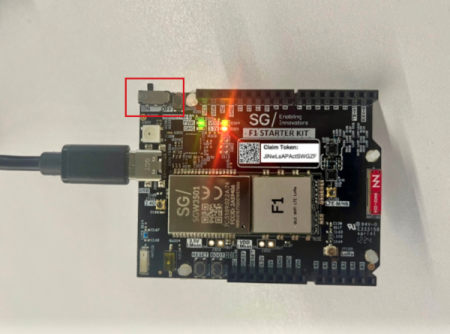
Connect the F1 evaluation board to a power source and toggle SW200 from OFF to ON (LEDs will light up).
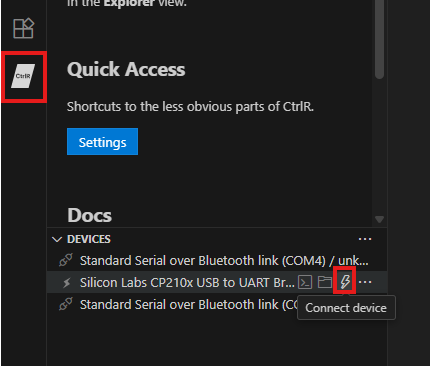
Open the CtrlR plugin in Visual Studio Code and click “Connect device” on the detected device.
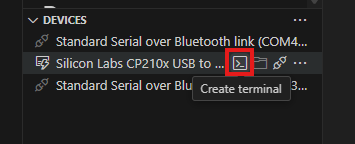
Invoke a terminal to access the REPL interface by clicking the “Create terminal” icon.
Remember the key you generated earlier? Copy it from your Ctrl “Deployment Manager”.
Paste it into the terminal, and press Enter.
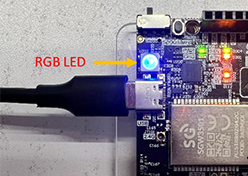
Monitor the RGB LED on the F1 evaluation board:
Blinking blue = registering
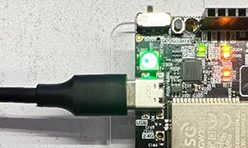
Blinking green = cellular connected
Solid green = provisioning complete
When provisioning is complete, you’re now ready to link your first CAP/T Sensor to start collecting data.