Managing Projects
Your initial project is automatically generated when you create your account. You can establish multiple projects to organize different groups of IoT assets based on your requirements. Each project stores its IoT assets along with relevant information, such as templates, devices, sensors, network profiles, automation rules, integrations, and member management.
Project Components
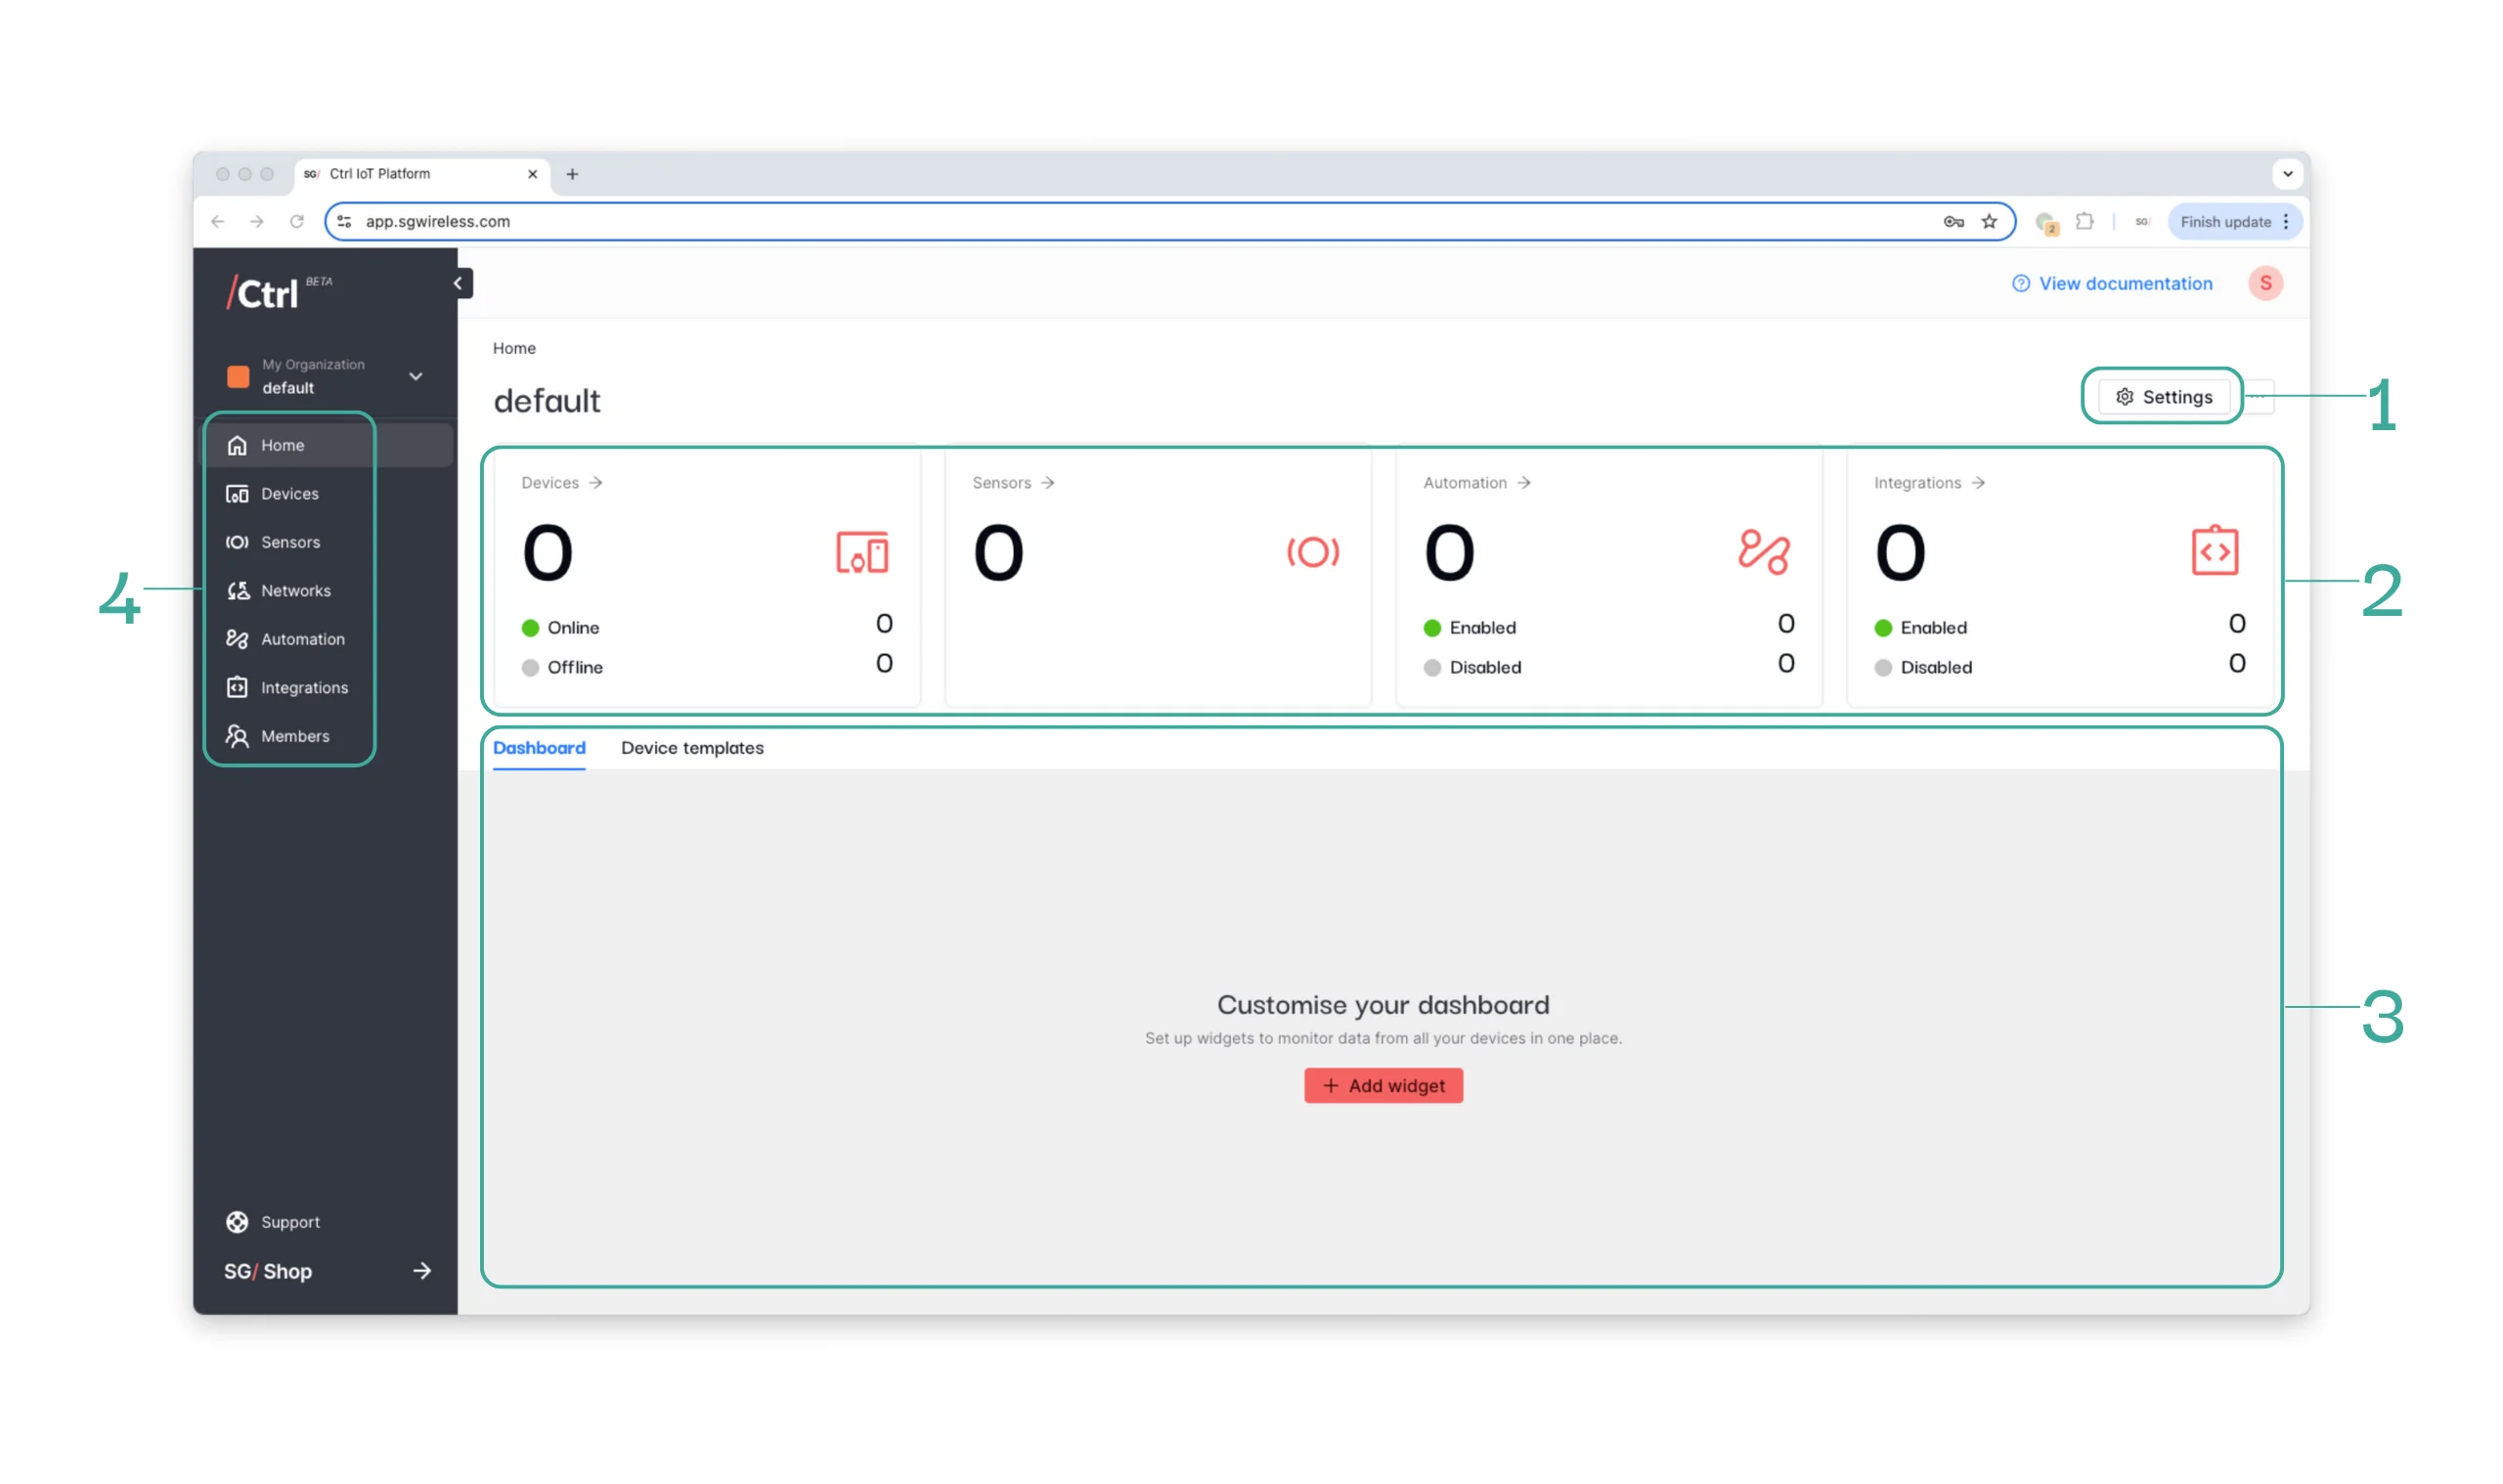
Your first project “default” is automatically created when you sign up for a Ctrl account. This is the project home page. Below are the components of a project:
Settings: Name your project, pick a colour, and change the time zone if needed.
Set-up: Overview of your project set-up, from connected assets to configured workflows.
Customization: Create dashboards and device templates for your use case.
Menu Bar: Quick links to configure each Ctrl building block.
Add Project
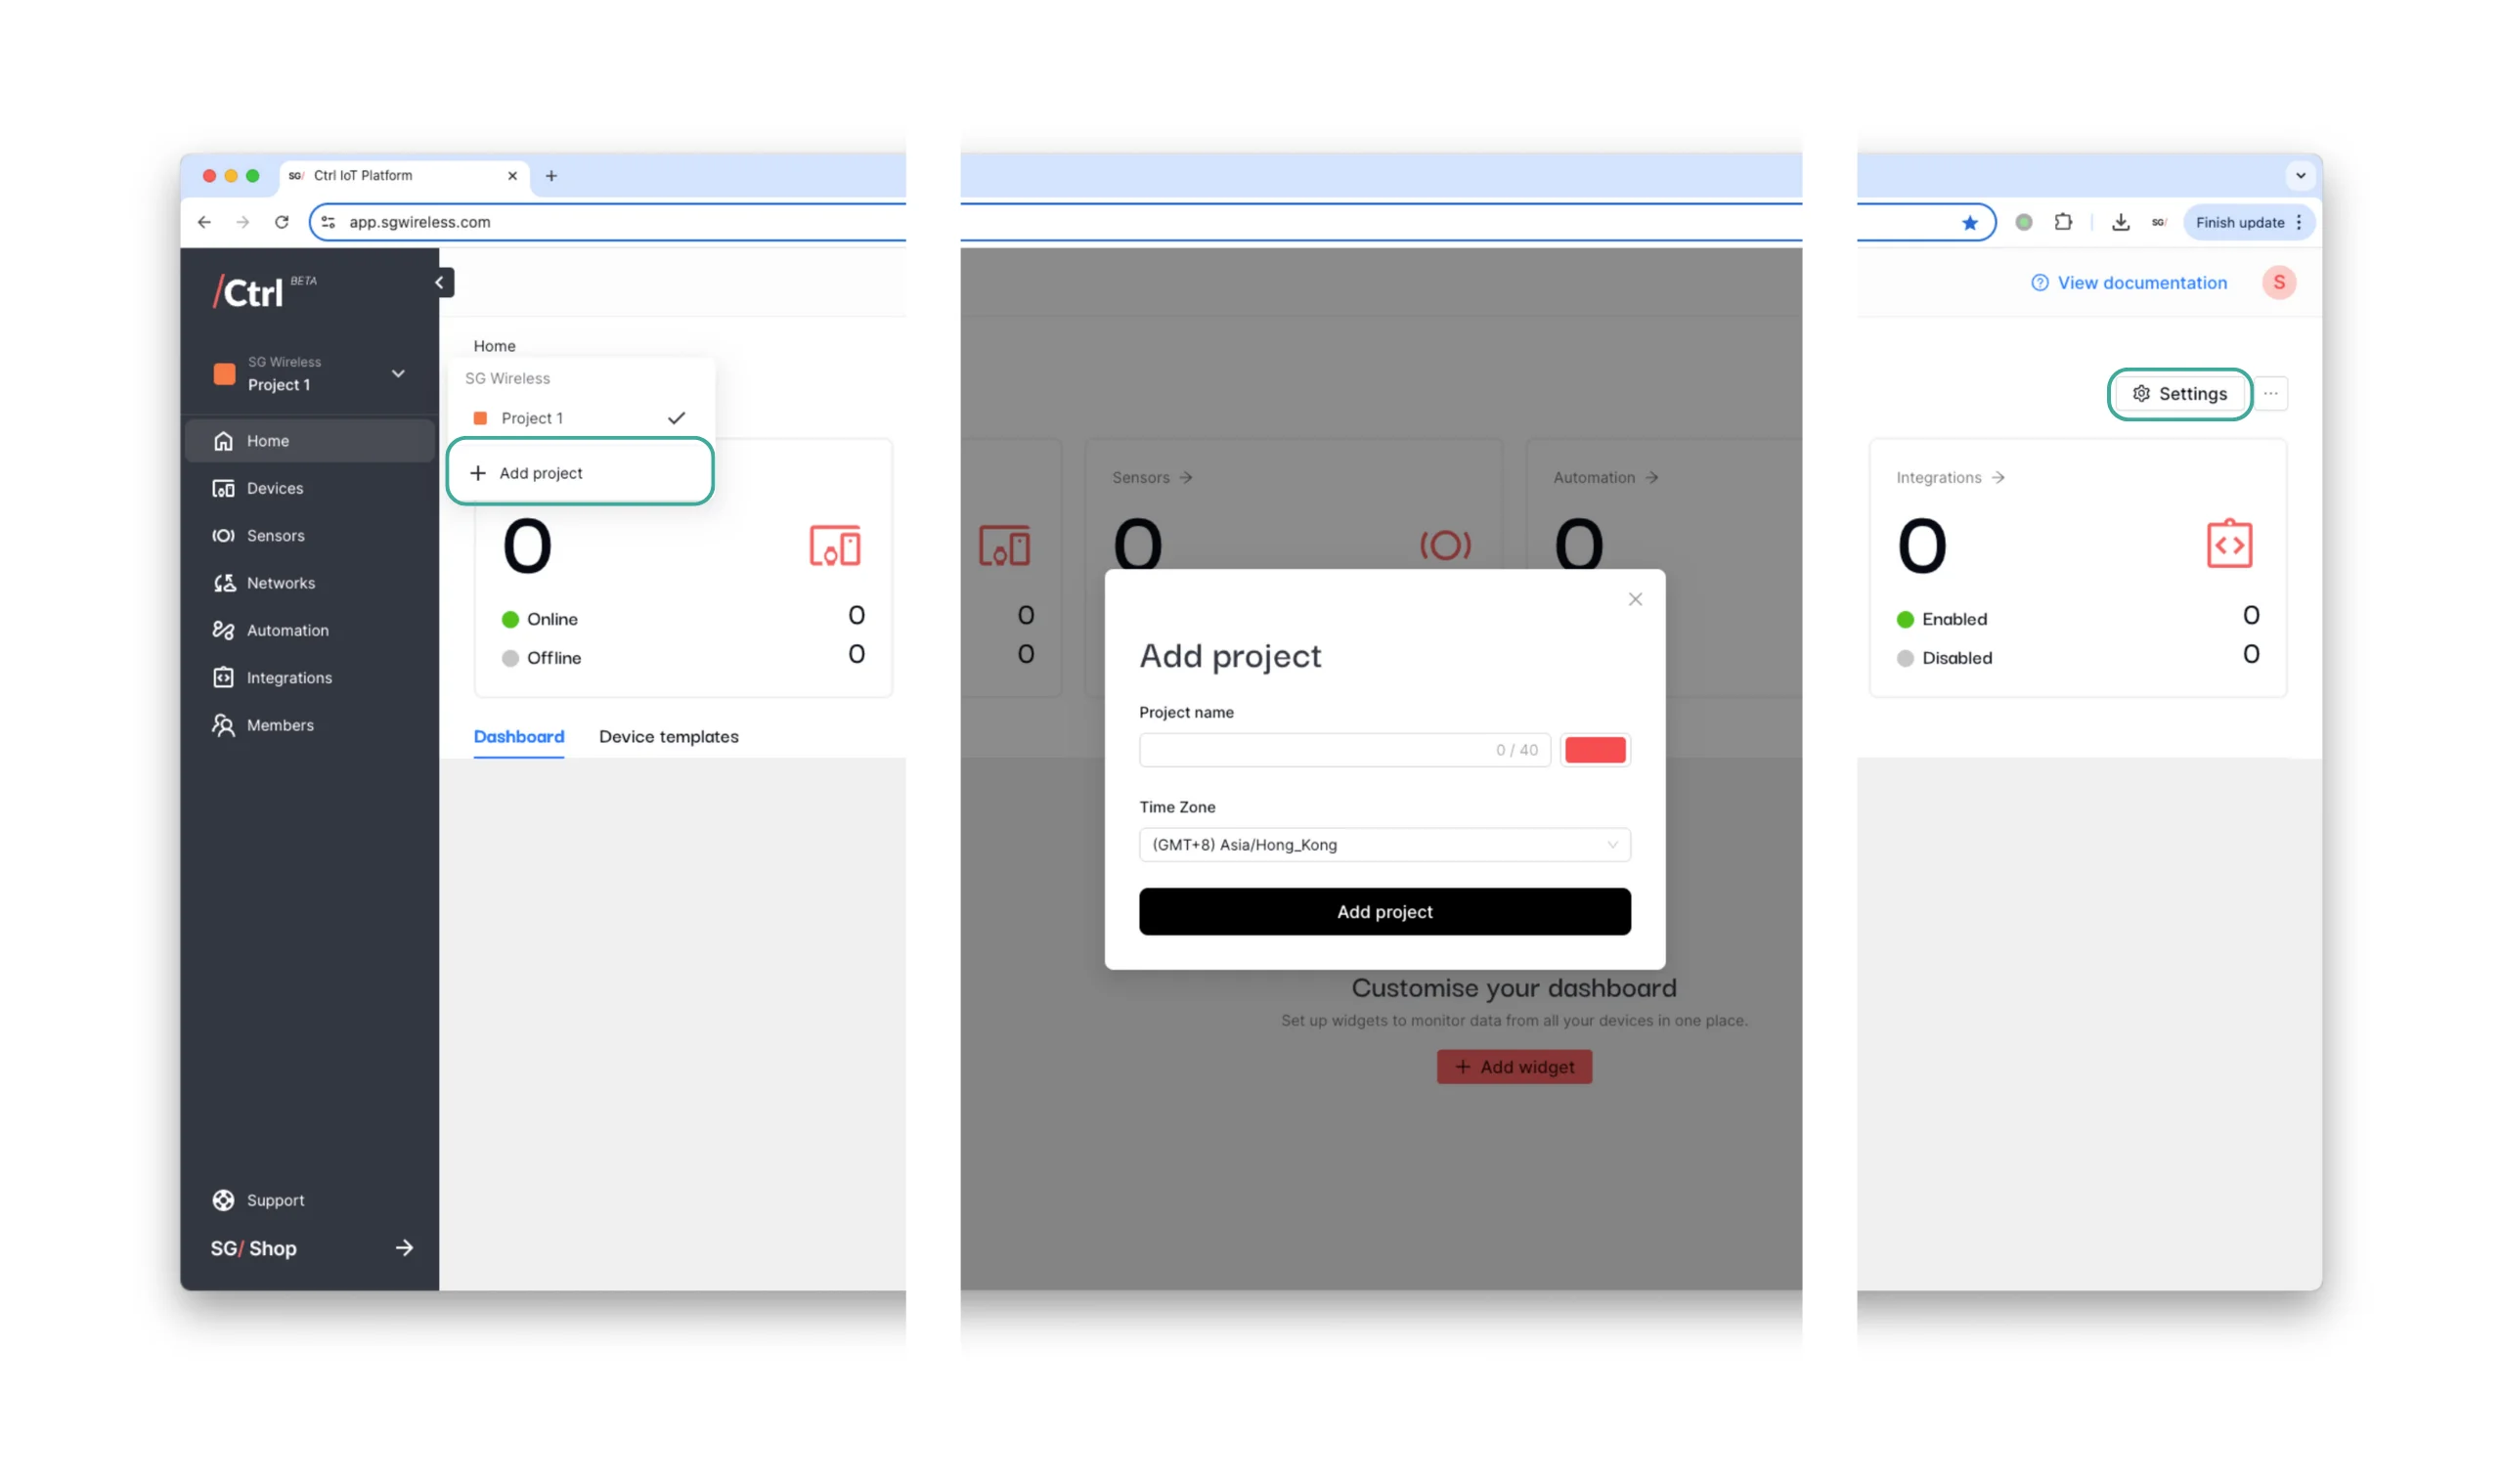
To set up new projects, click on “Add project” and follow the prompts. These can always be changed later in “Settings”.
Switch Project
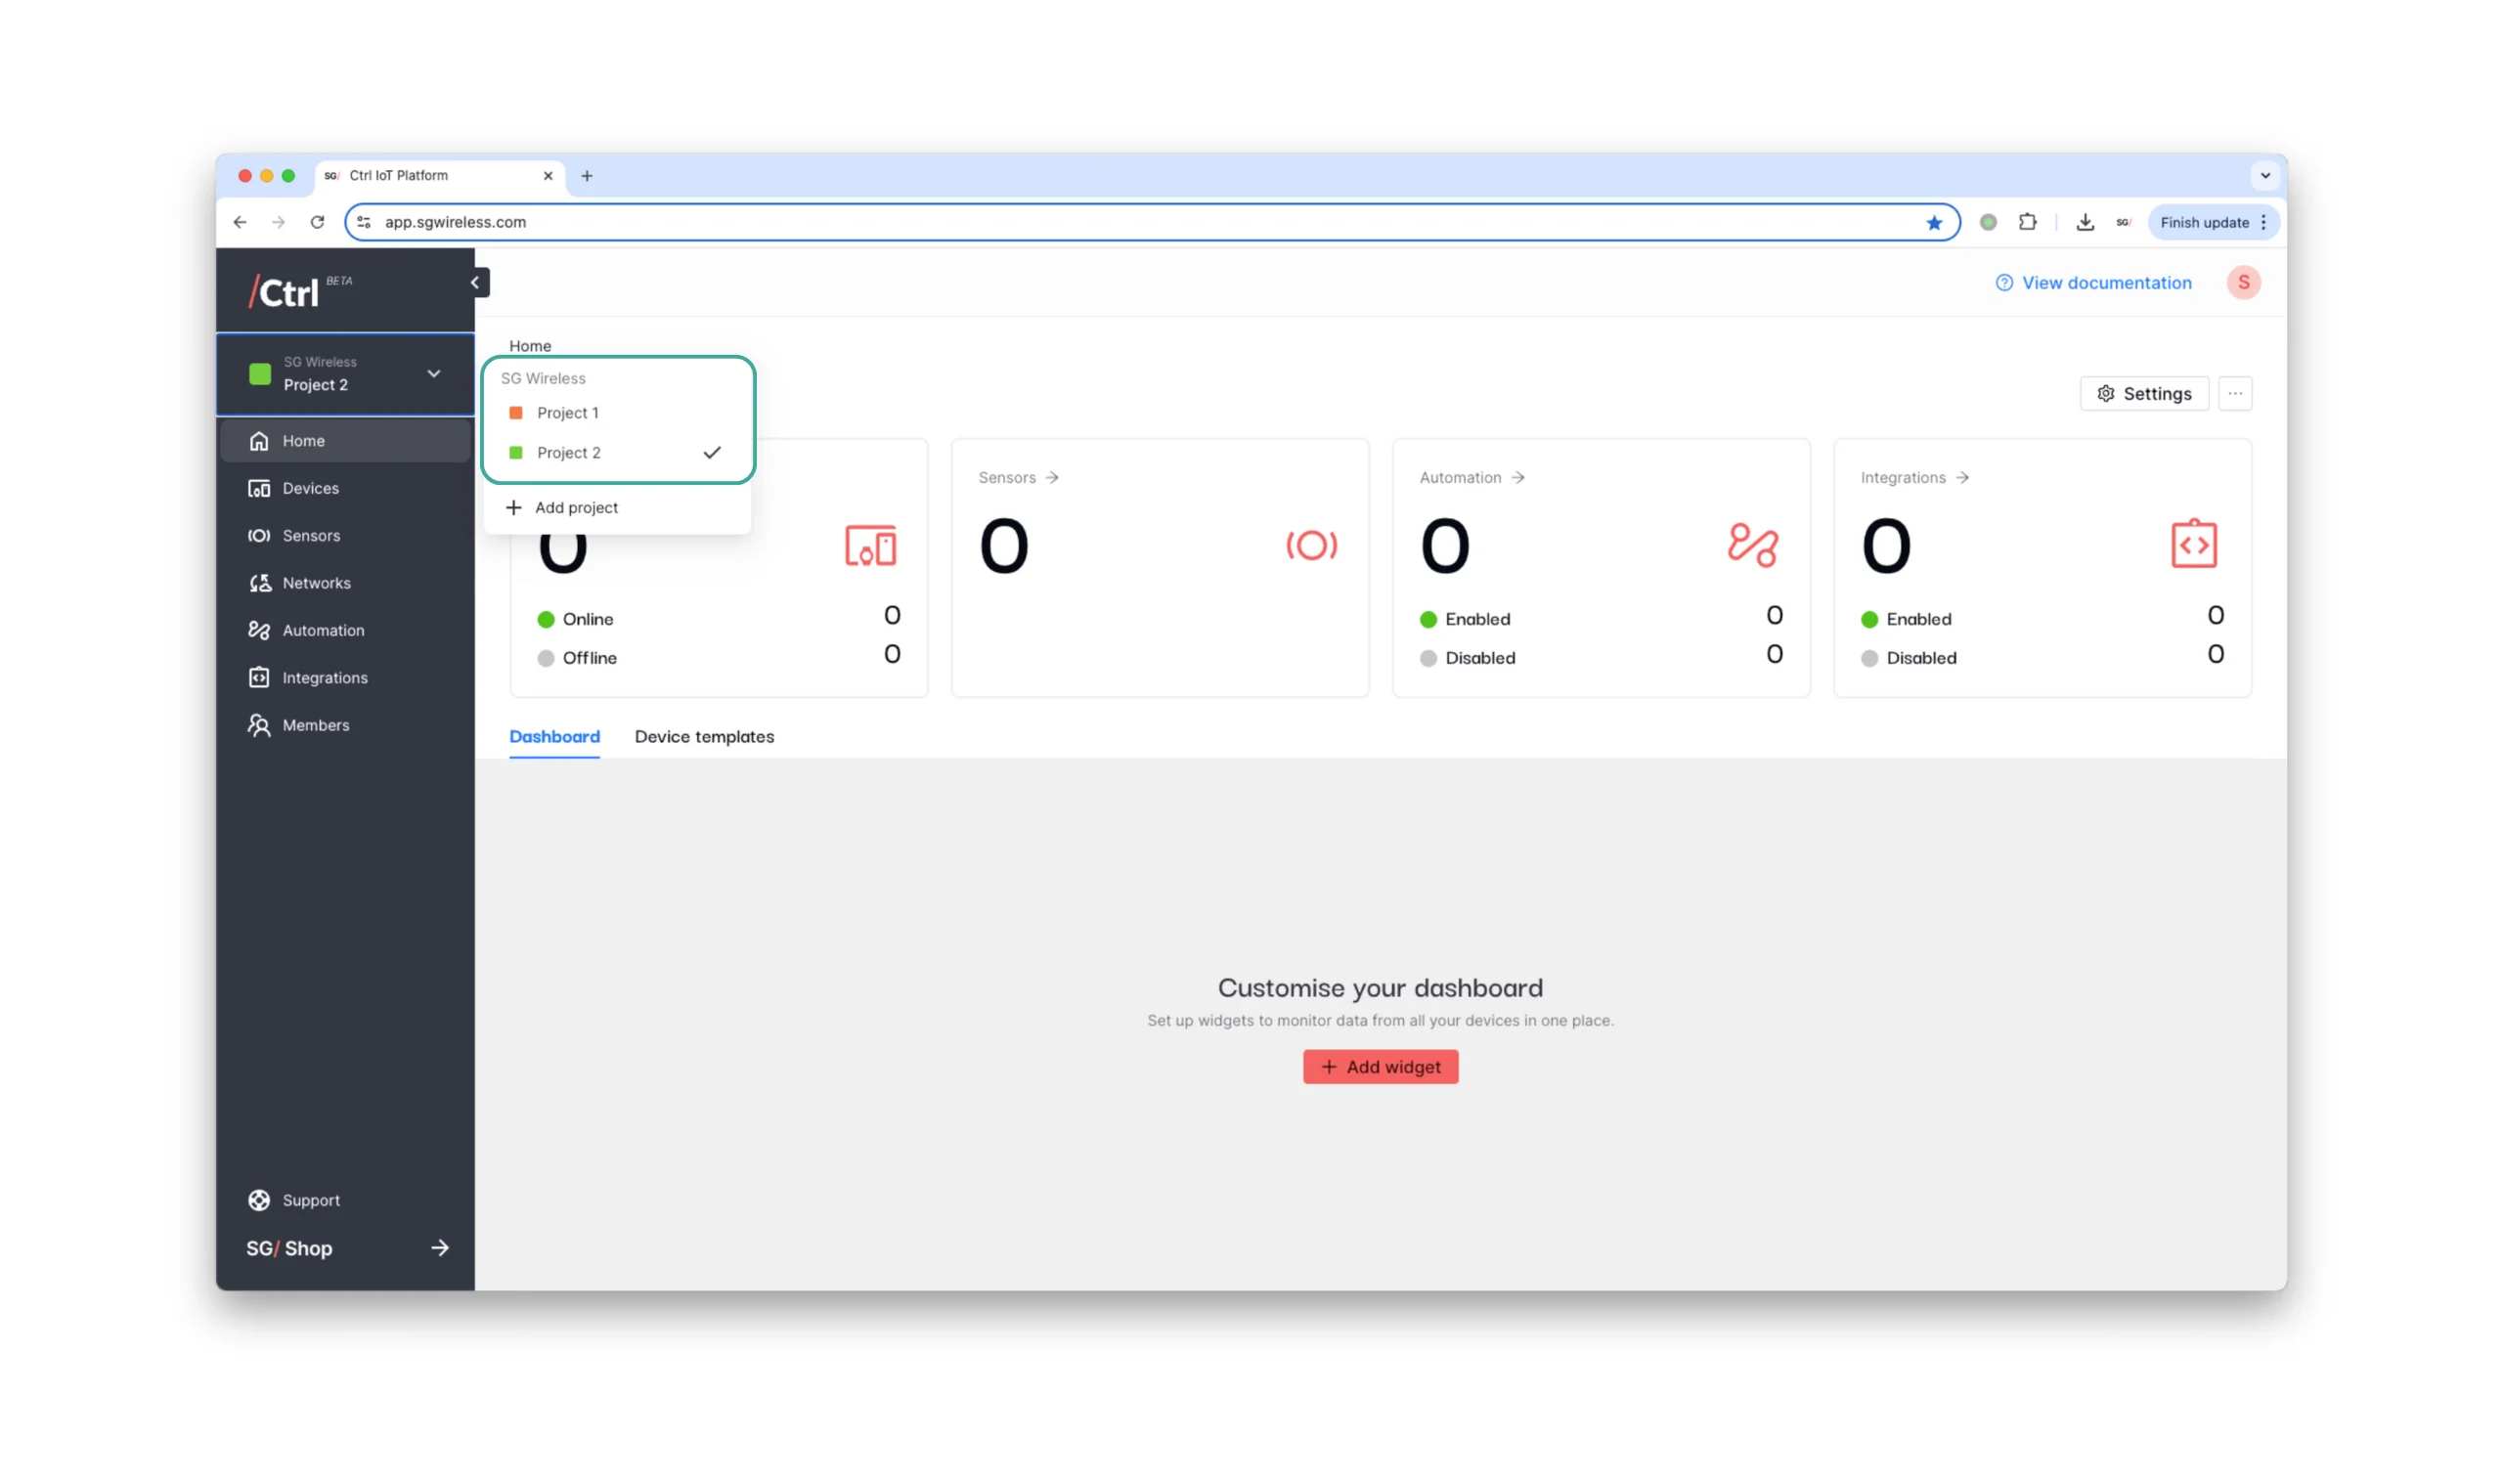
Switch between different projects simply by selecting it. The checkmark indicates the selected project.
Edit Project
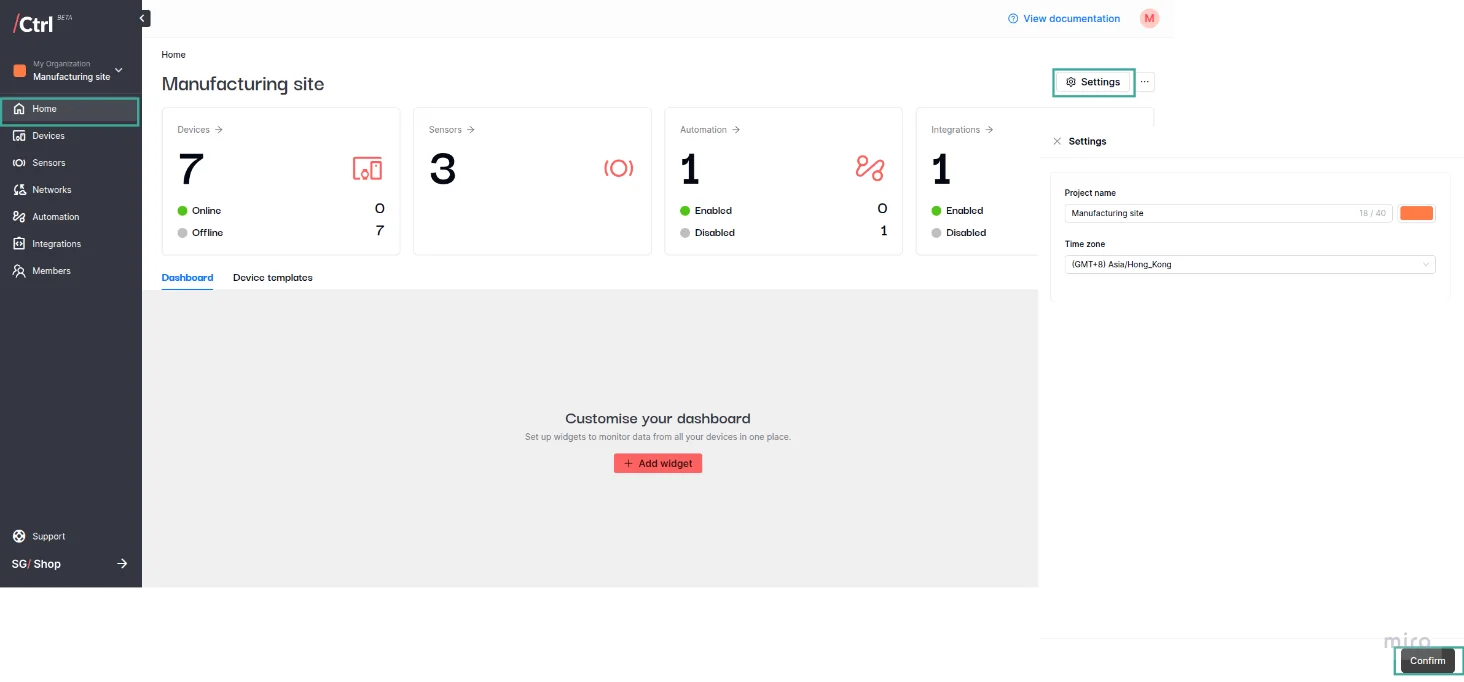
Update your project settings through the following steps:
On the target project, go to the Home tab.
Click the “Settings” button on the top right corner.
Make necessary changes.
Click “Confirm” to apply the changes.
Delete Project
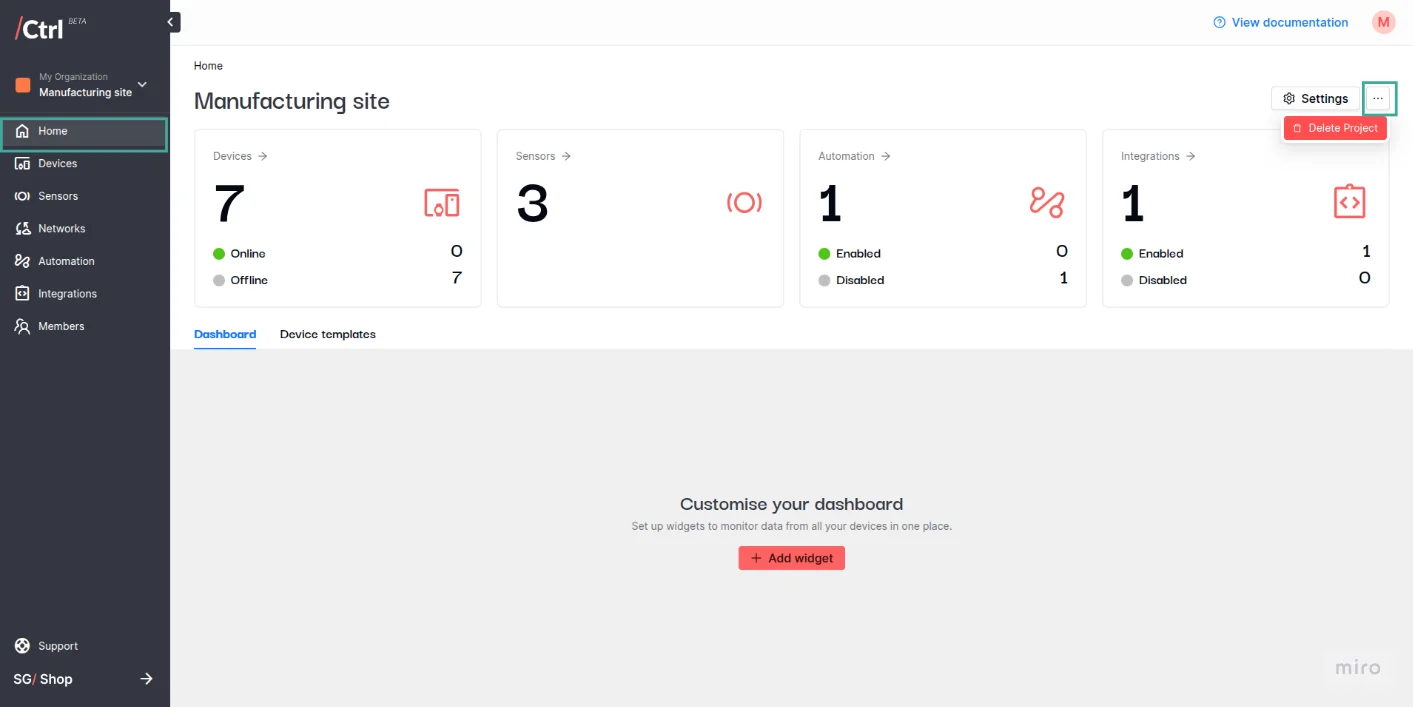
To delete a project, click on “…”, then “Delete project”. You’ll be asked to confirm this action by inputting your project name.
Upon project deletion, all related information will be deleted. This action cannot be undone.