
Managing Networks
For each project, you can save multiple LTE and Wi-Fi profiles for use across various devices through the Networks tab. This eliminates the need to repeatedly enter settings such as Wi-Fi passwords or LTE APNs during device provisioning.
Furthermore, you can implement these profiles remotely and manage your device’s network settings remotely through Ctrl.
For each project: manage your network profiles
For each device: manage your device network settings
Note
Network settings through Ctrl are only enabled for SG devices at the moment.
Manage Network Profiles
A network profile is a set of network configurations that can be implemented to multiple devices in the project.
Note
If your device is provisioned via ZTP, an LTE profile will be automatically added for you, with name “1NCE”.
Create new network profile
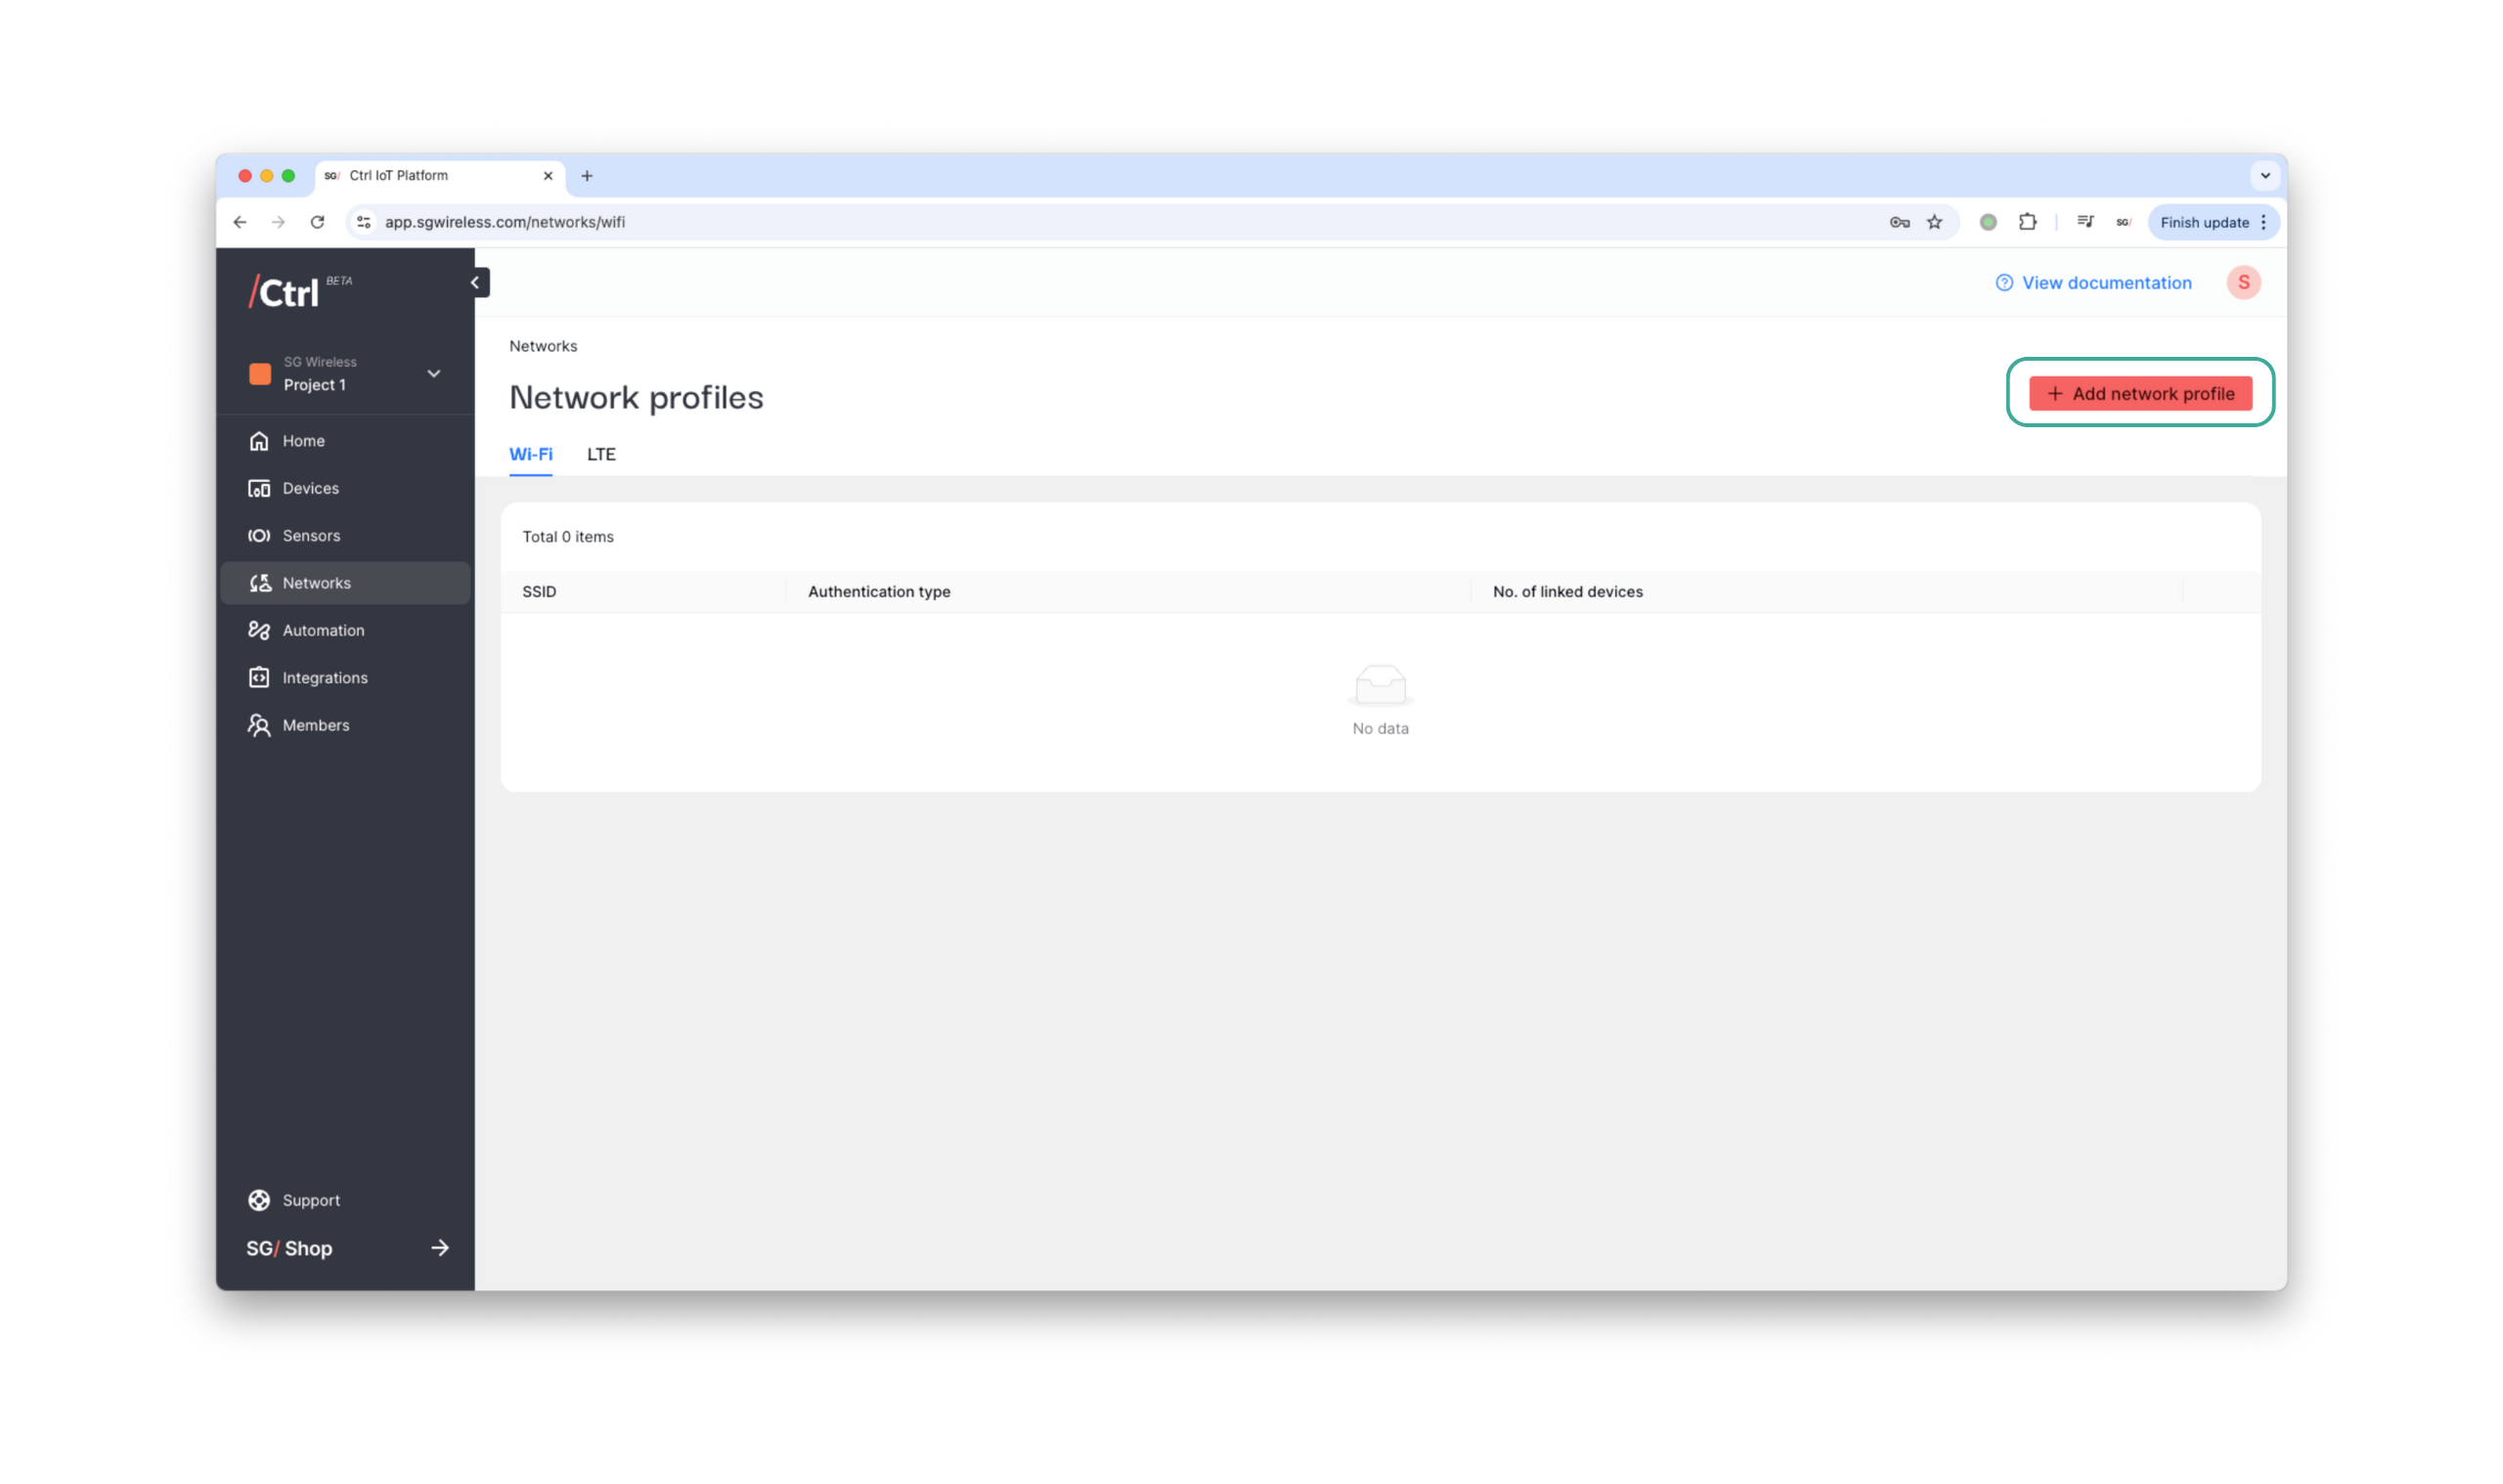
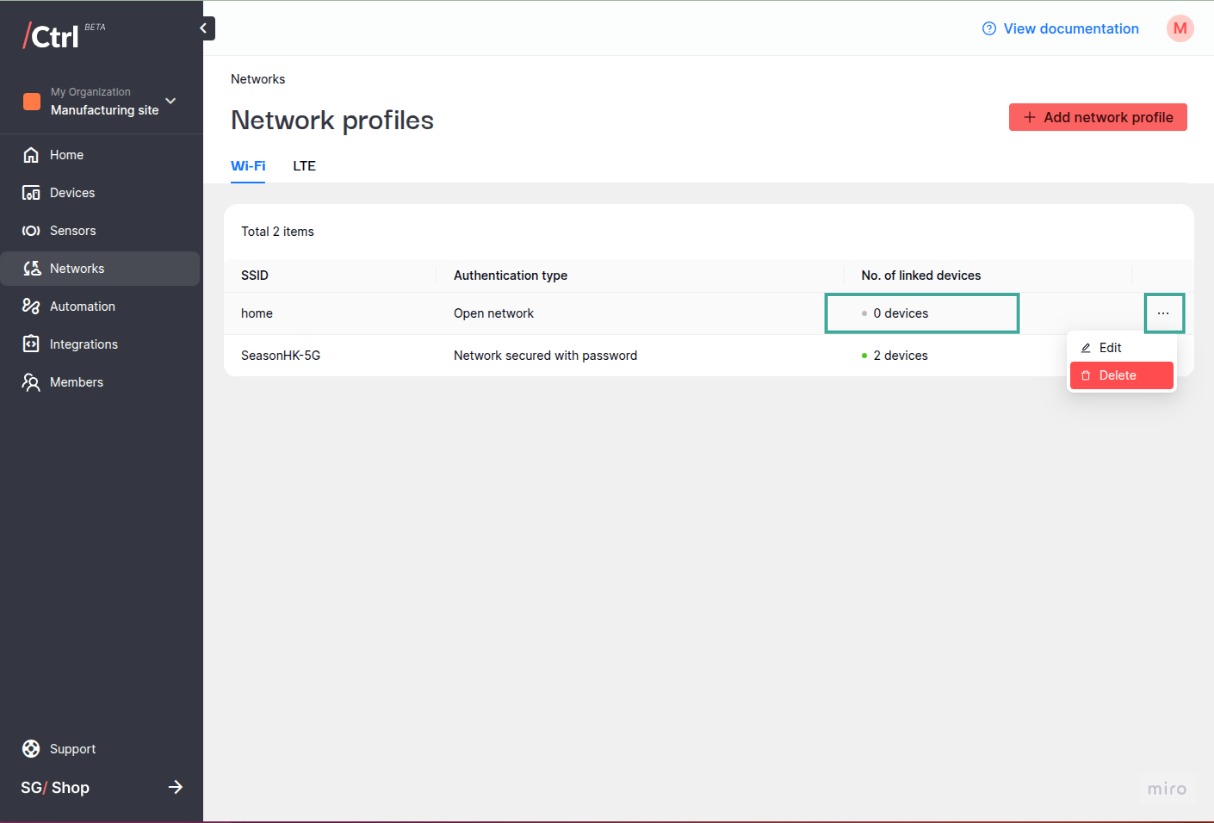
In the side menu, click “Networks”, then “Add network profile”.
Choose “Wi-Fi” or “LTE”, and enter the required network credentials.
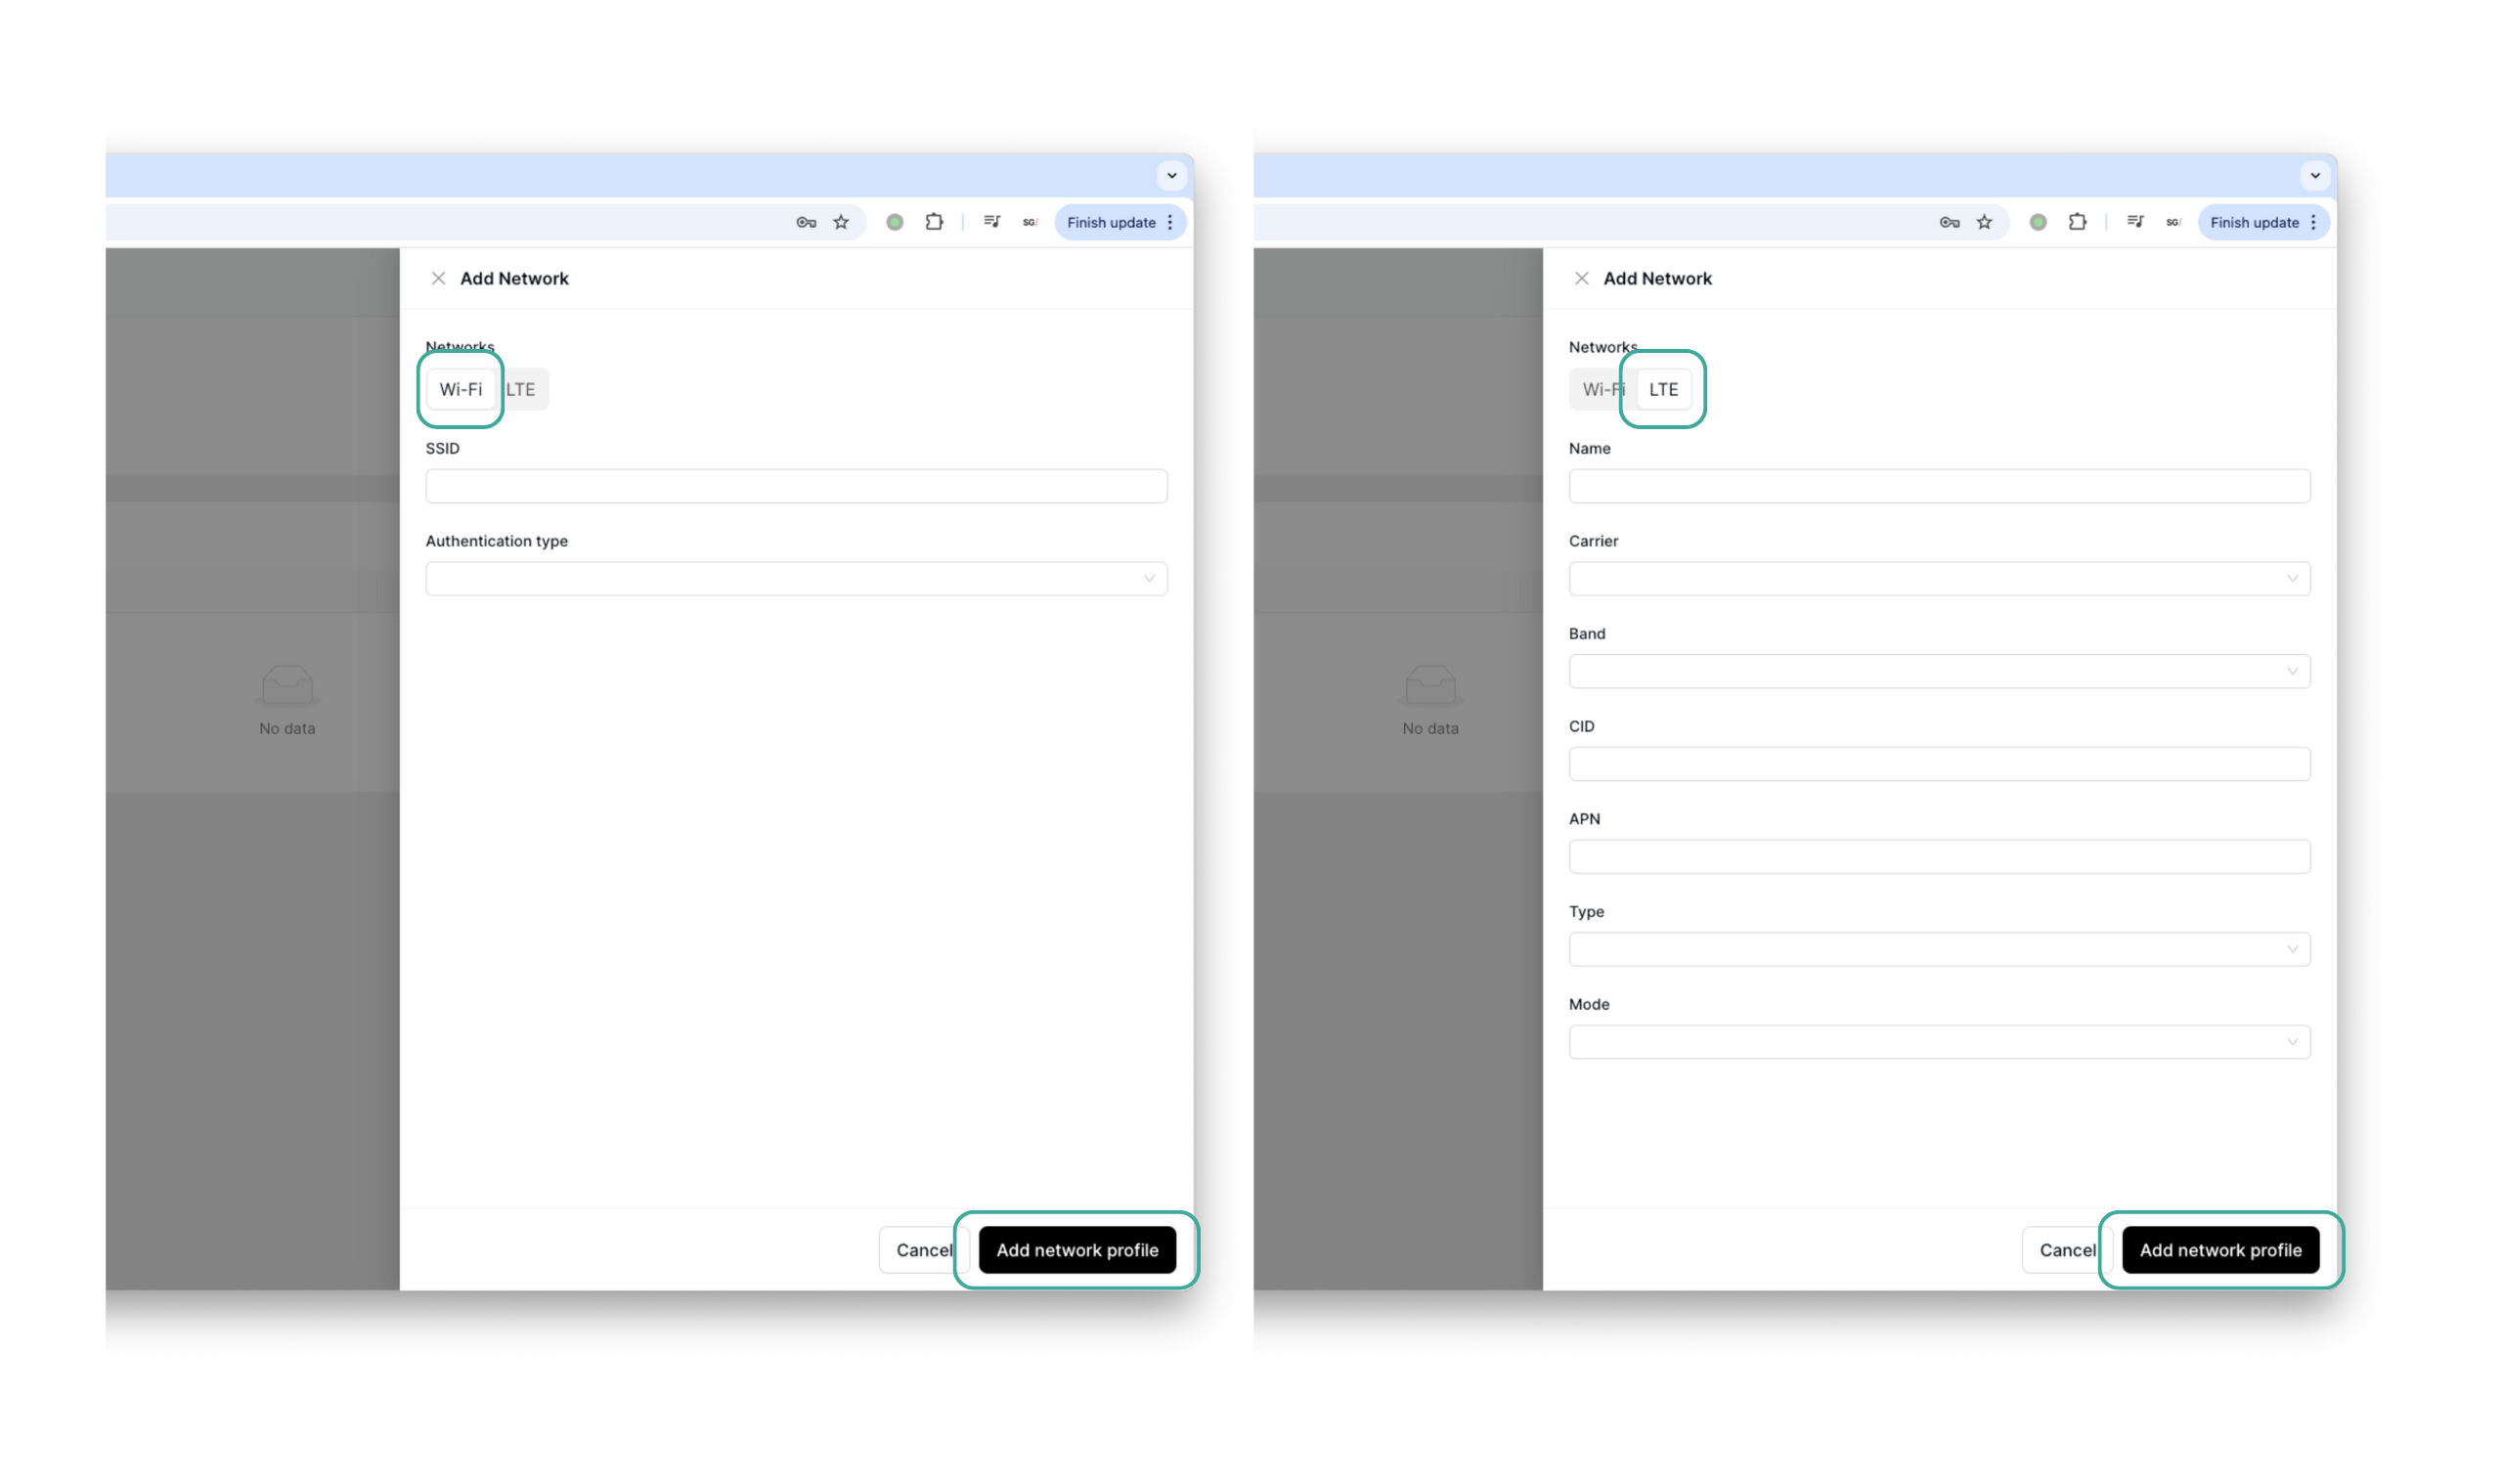
Click “Add network profile” once it’s done. Your new network profile will be available under the corresponding tab.
Edit network profile
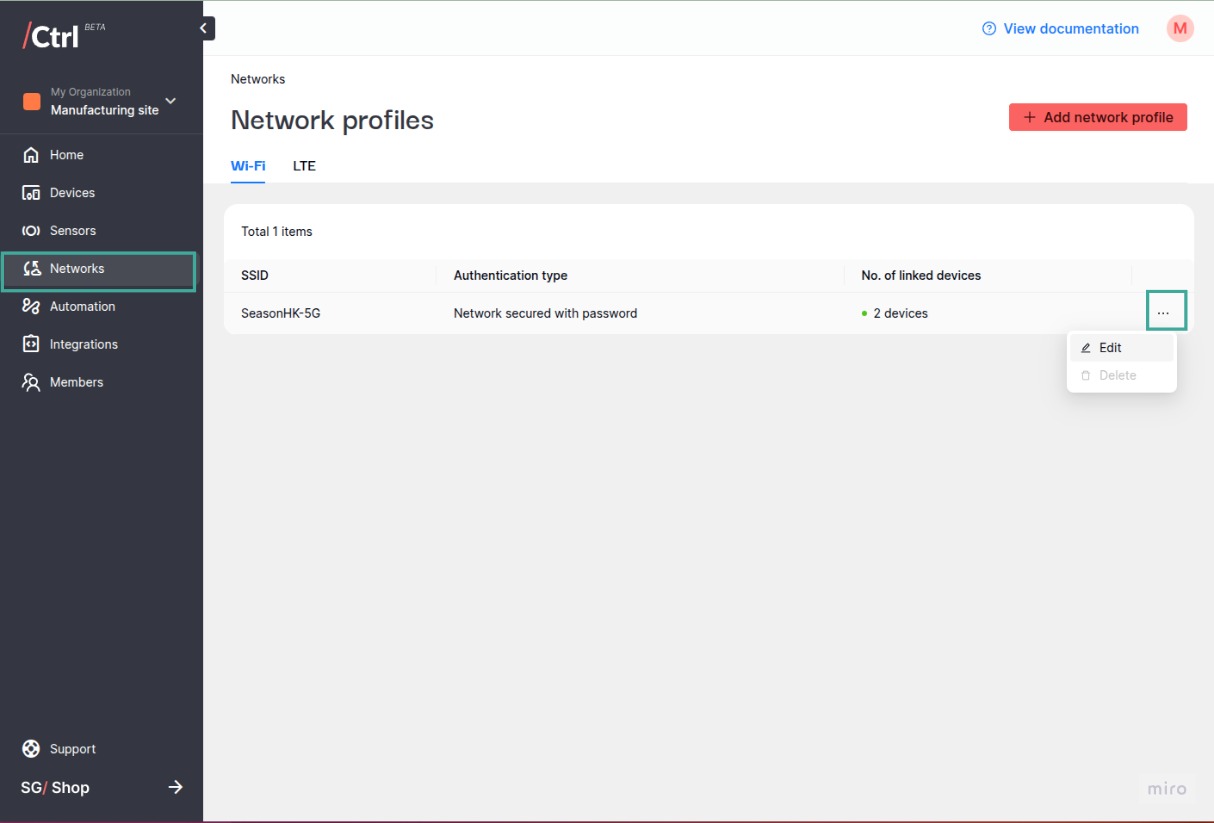
In the side menu, click “Networks”.
Click the “…” icon on the right-most column of the target network, then “Edit”.
Make changes to the network credentials as needed. Note that SSID is not editable for Wi-Fi profiles while name is not editable for LTE profiles.
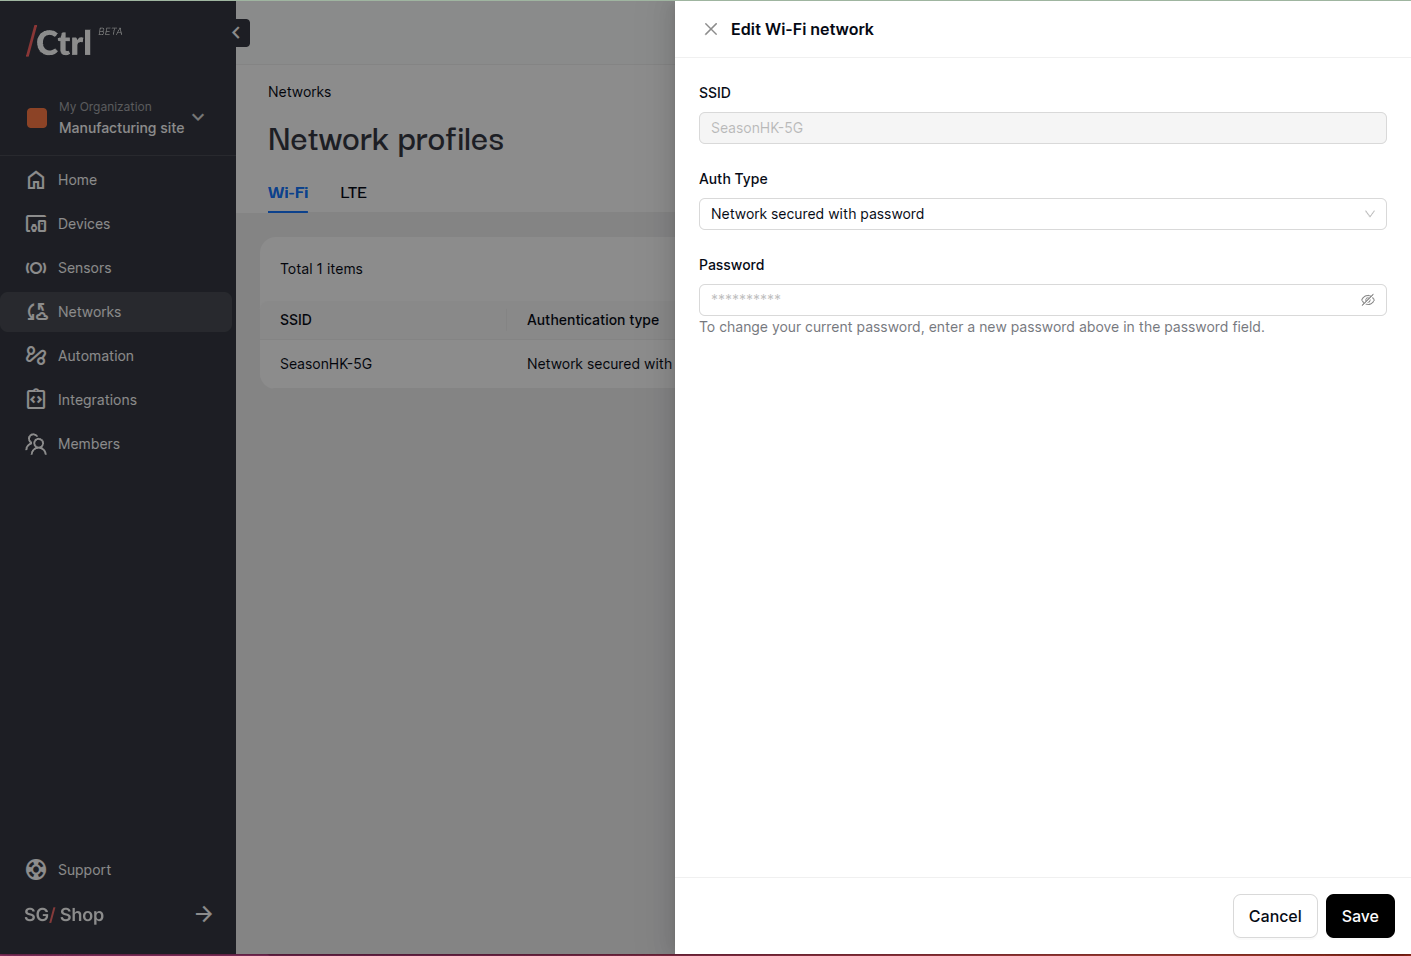
Click “Save” to apply changes.
Note
In order to implement the changes on your devices, you need to deploy the changes through each device’s network tab.
Delete network profile
A network can only be deleted if it is not being used by an existing device.
In the side menu, click “Networks”, then choose the target network.
Click the “…” icon on the right-most column of the target profile, then “Delete”.
Manage Device Network Settings
The F1 Starter Kit supports multiple network types that can be adjusted according to your need. You can enable or disable particular network types AND adjust the network type priority of your Starter Kit through Ctrl.
Accessing the device network settings
In the side menu, click “Devices”. Then, click on the target device.
Click on the device’s “Networks” tab.
Activate or deactivate a network
Click on the arrow icon on the target network.
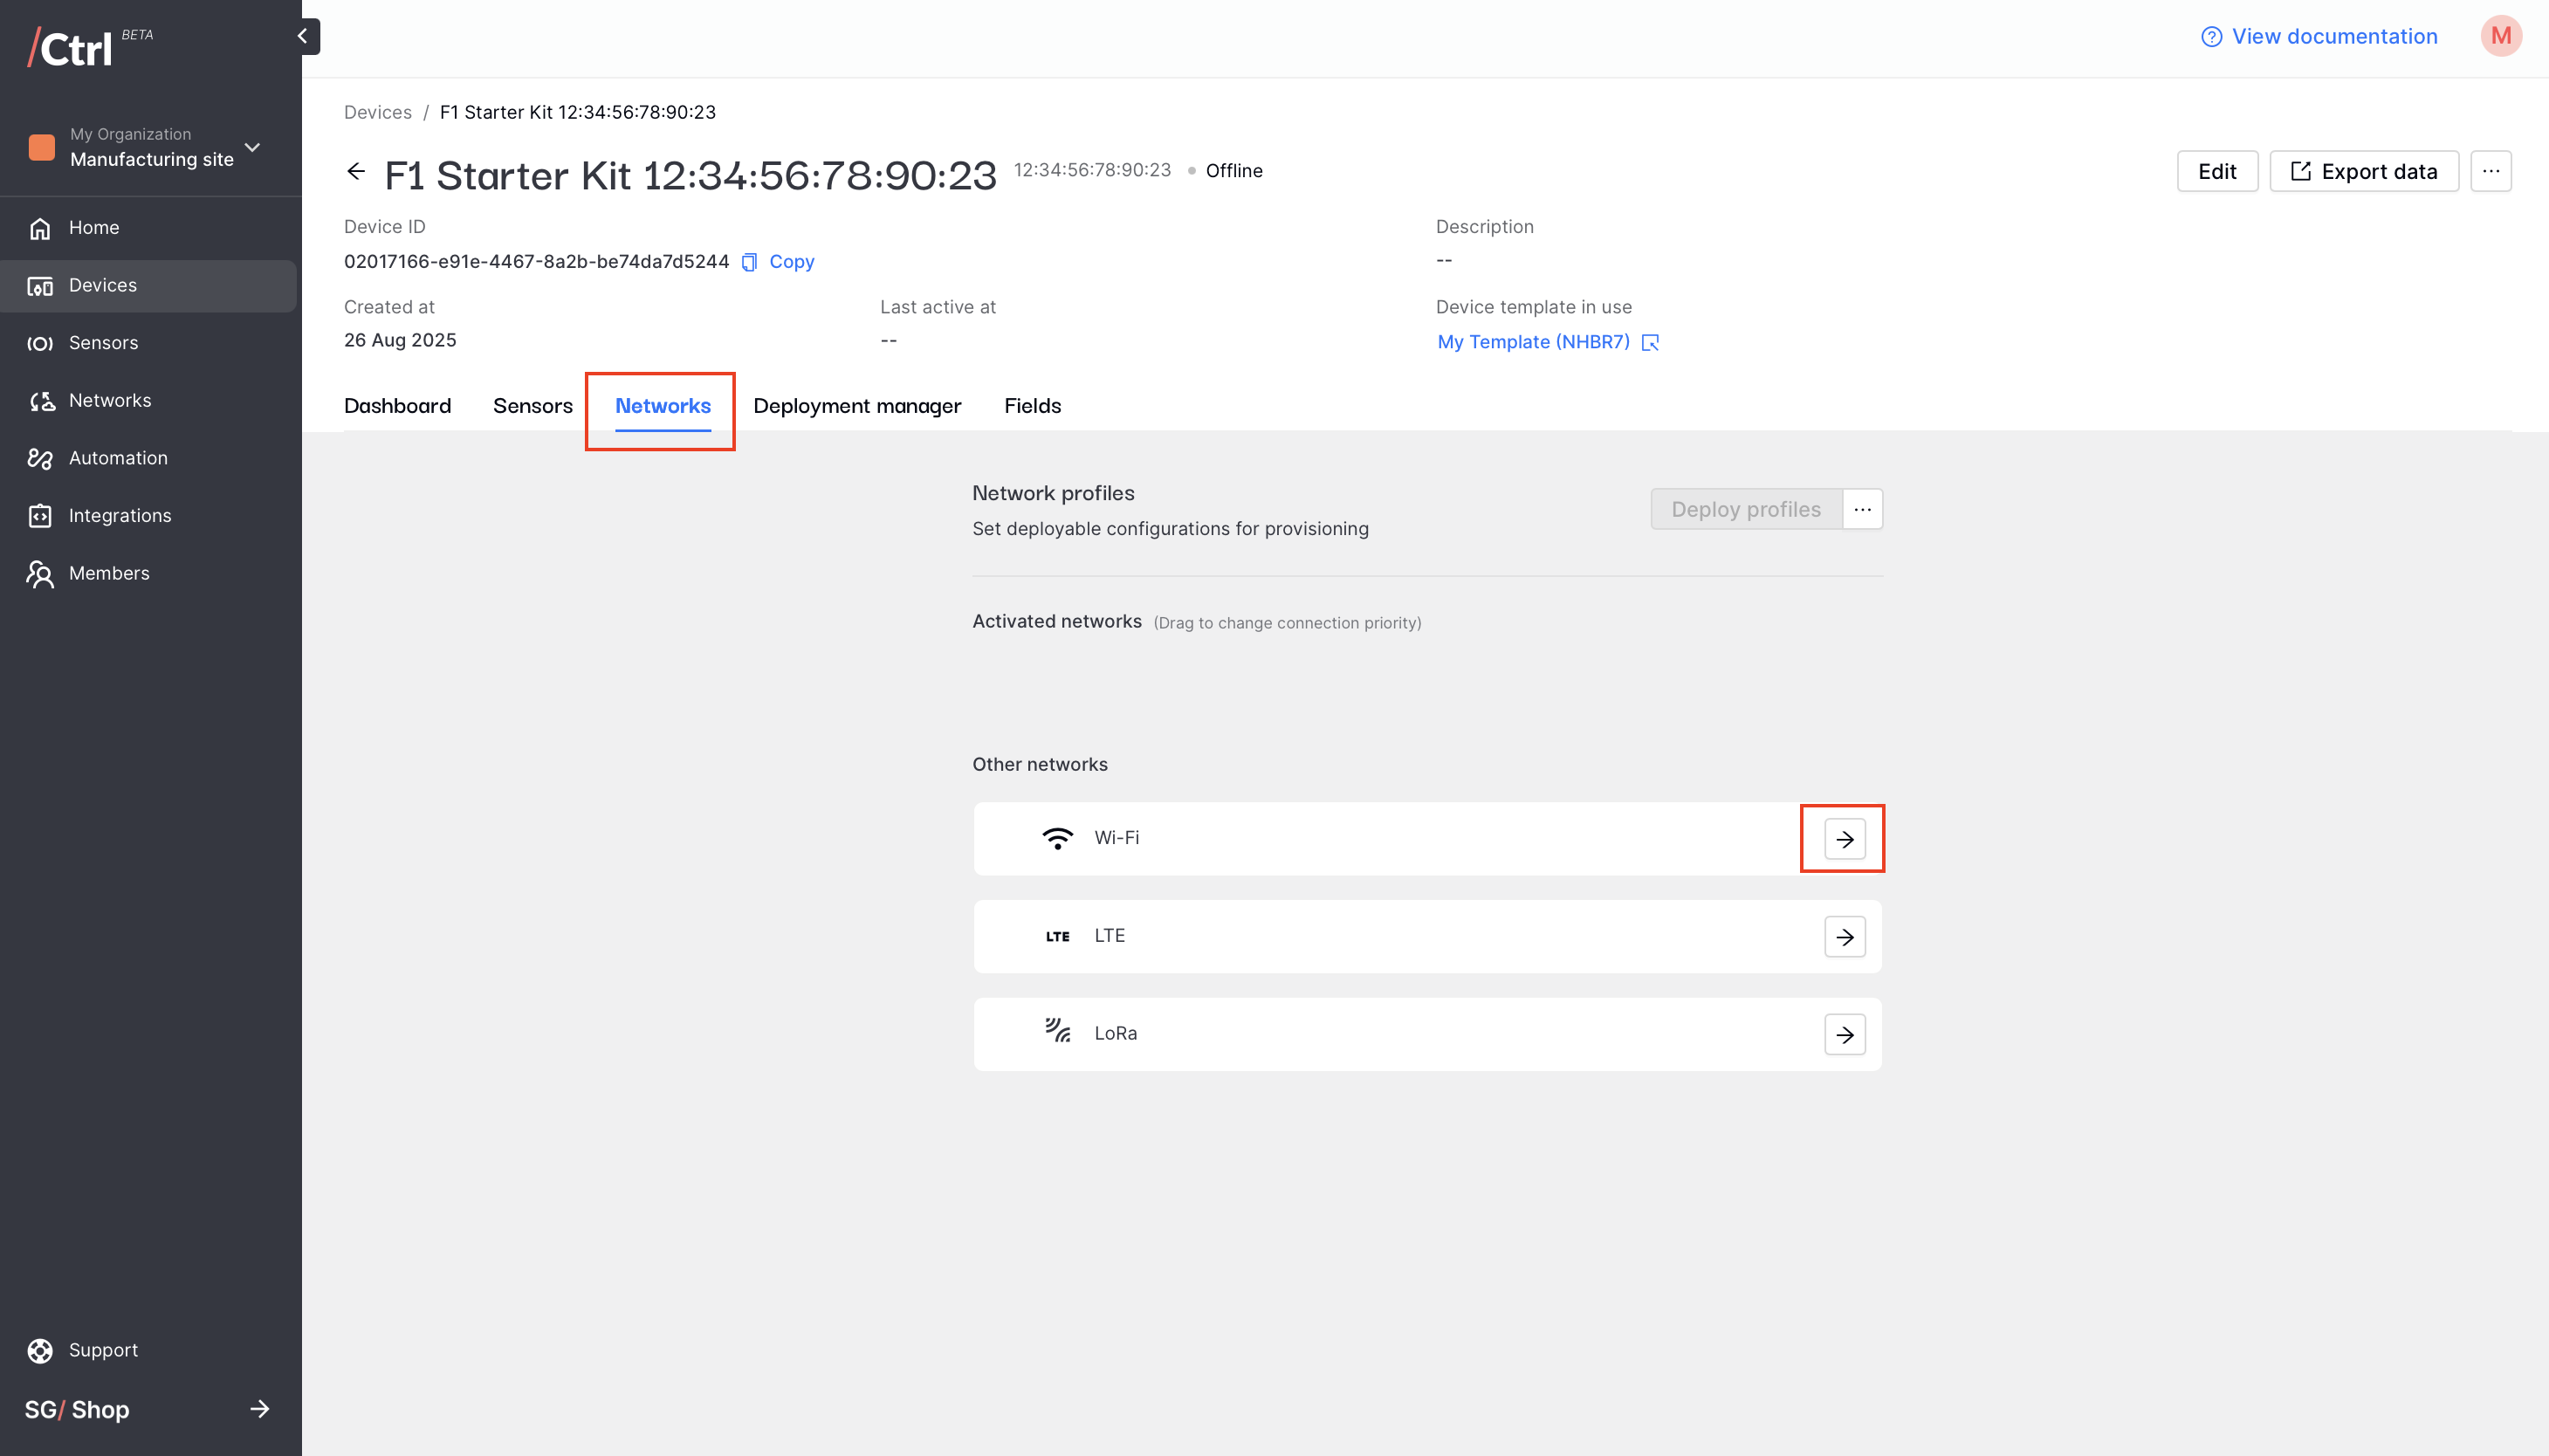
Press the toggle on the top right corner.
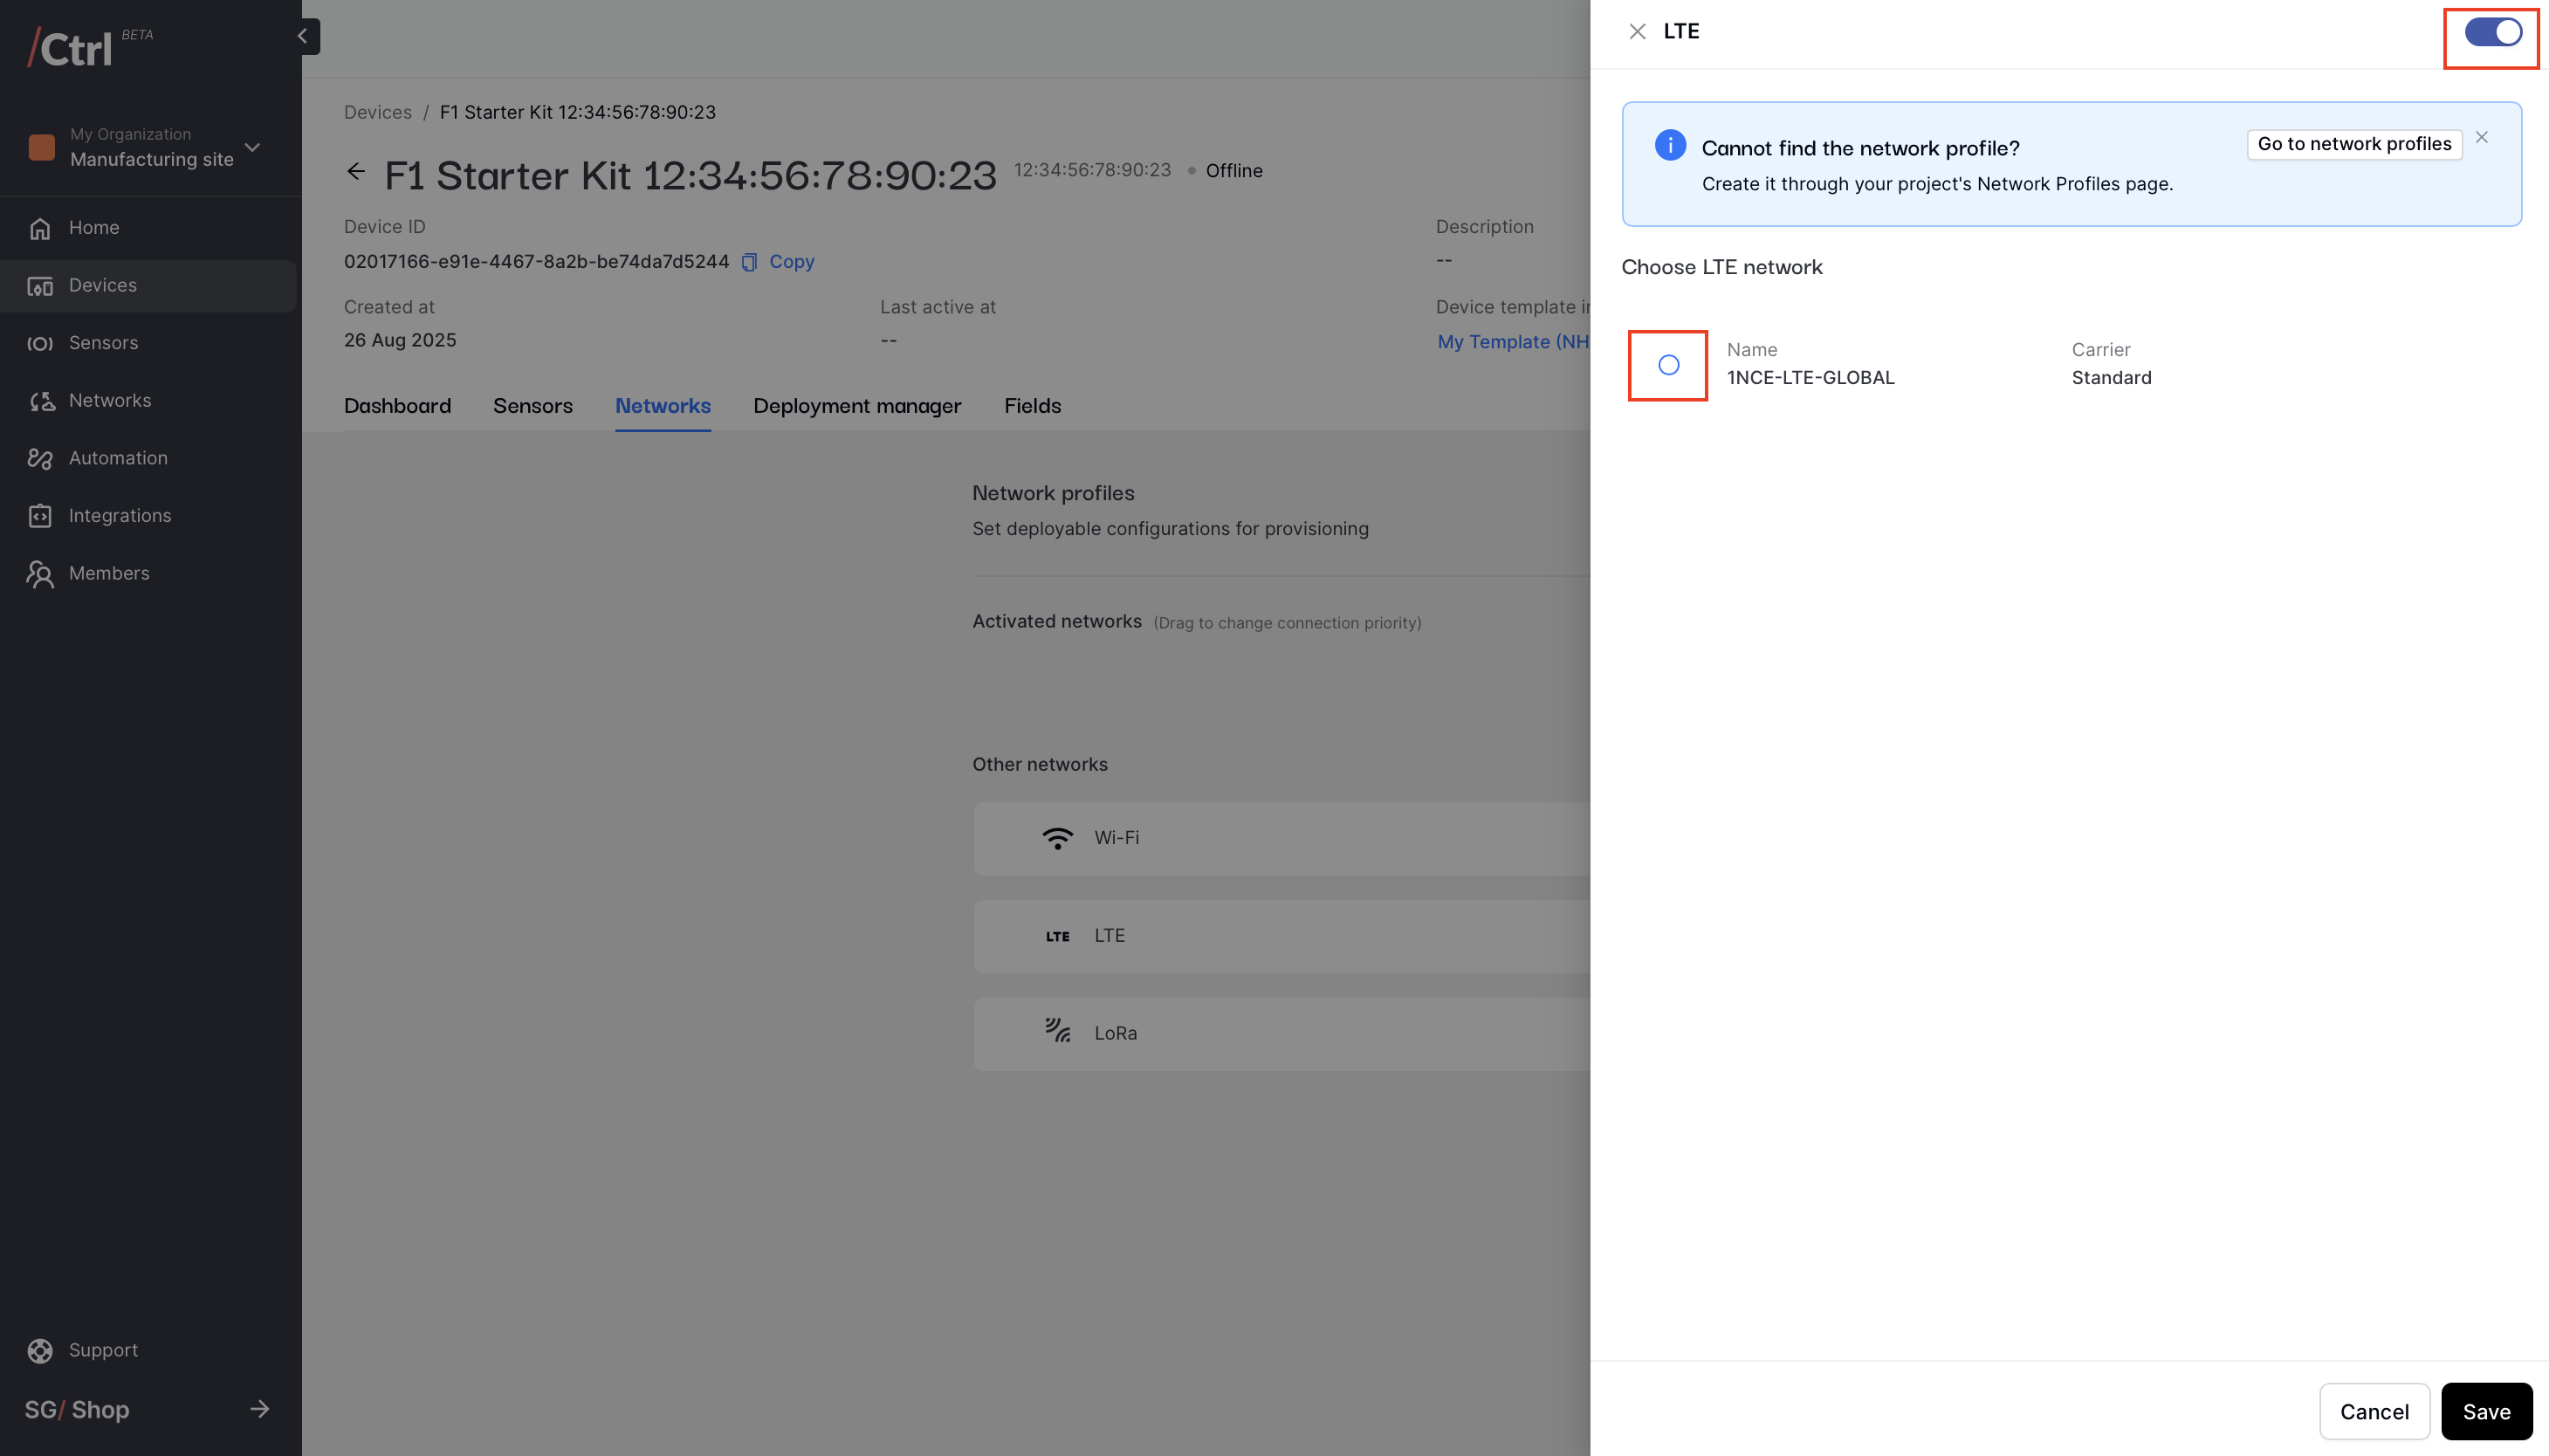
If you are activating the network, choose the preferred network profile before saving the update.
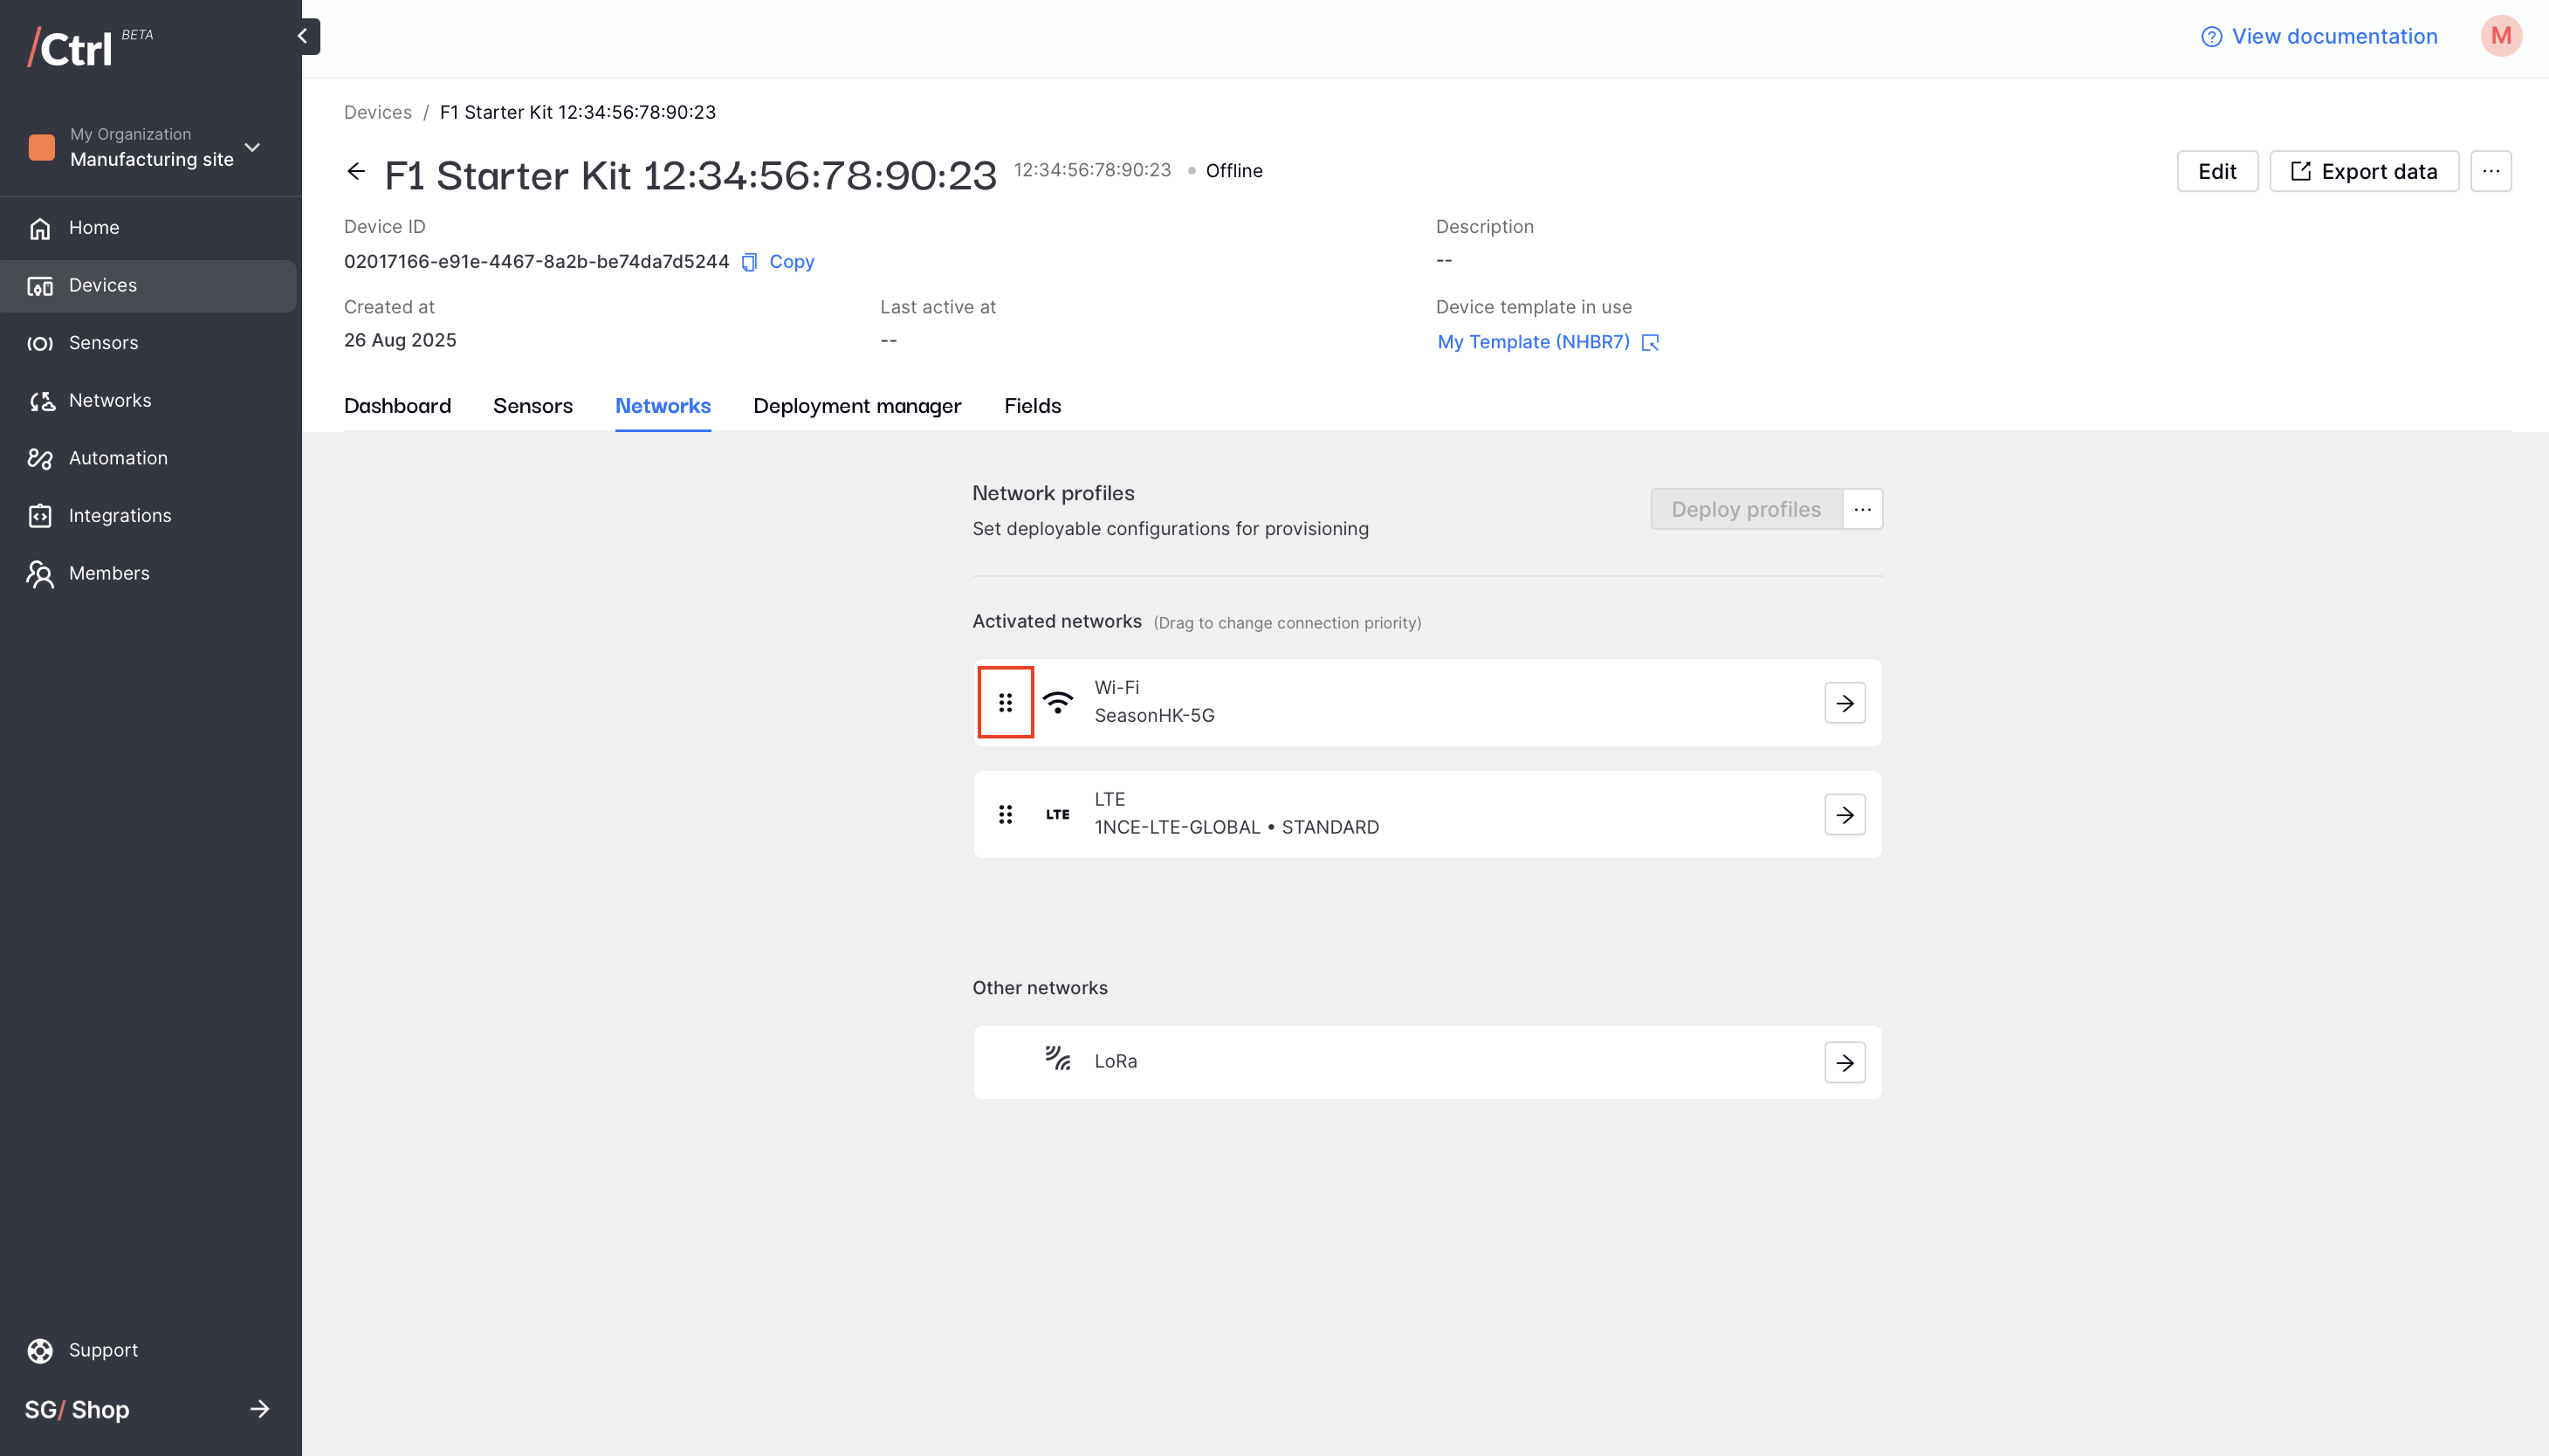
The activated networks are displayed under the “Activated networks” section, while the non-active networks are displayed under “Other networks” section.
Adjust the device network priority
In the list of activated networks, click and hold the three lines on the left of the target network, and drag it to its desired priority.
Note
This priority will only be used during the first-time connection. Automatic network switching is not supported after connection has been established.
Deploy the network setting
To implement the updated settings on your device, deploy it using one of the following approaches:
If your device is currently online: press the “Deploy profiles” button to deploy the update over the air.
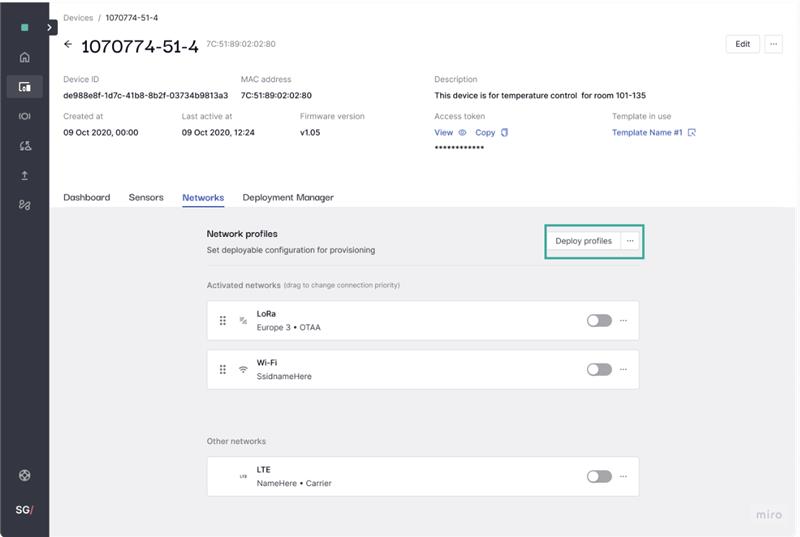
If your device is currently offline:
Generate an activation key by clicking the button under the “…” icon of the device’s network tab.
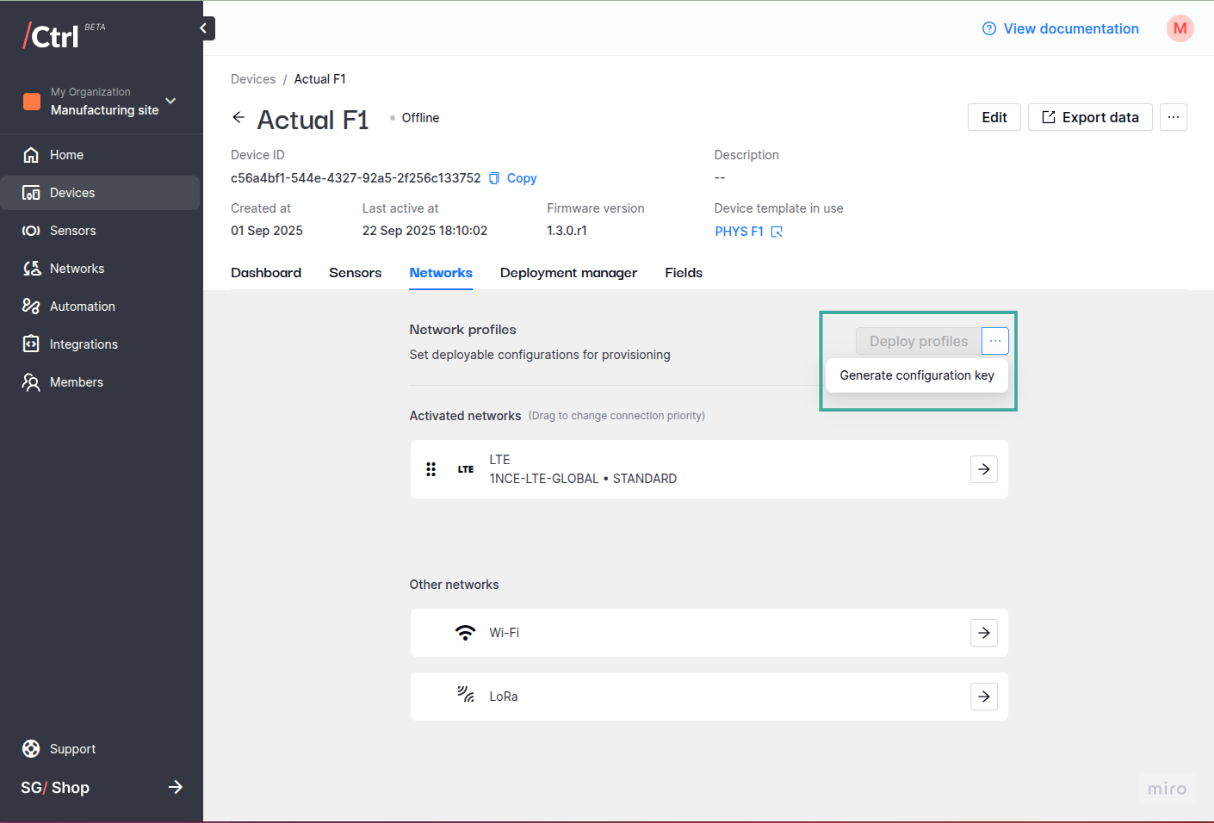
Copy the resulting activation code.